Vegan Caramel

Since discovering my dairy intolerance two years ago, I've been on the search to find dairy-free replacements for many of my former beloved butter and cream-filled desserts. Cakes and cookies were easy to convert, ice cream and confections were a bit more challenging, but I've managed to eat and eat while since. Though I found my intolerance curse in the beginning, I have made due with the cards I've been dealt.

The first major victory for dairy-free replacements was vegan whipped cream. It put up a brief fight, but relented when a can of coconut milk came to the rescue (as it so often does for dairy-free alternatives). Eager for a second victory to add to my list, I chose to tackle caramel next. Certainly, this could not be more difficult, I told myself, as I started working on my first batch. 

Oh, but it was. 

For the next month, each weekend I created a new batch and, shortly thereafter, tossed it directly into the trash. As it turns out, dairy-free milk alternatives do not hold up like heavy cream; the fat structure is too dissimilar. The coconut milk caramel, once cool, developed a look quite similar to bacon fat. The soy milk caramel was lumpy and dropped off the spoon like heavy rain drops. It seemed, for a short time, that my dreams of dairy-free caramel would have to be tossed in the trash as well.

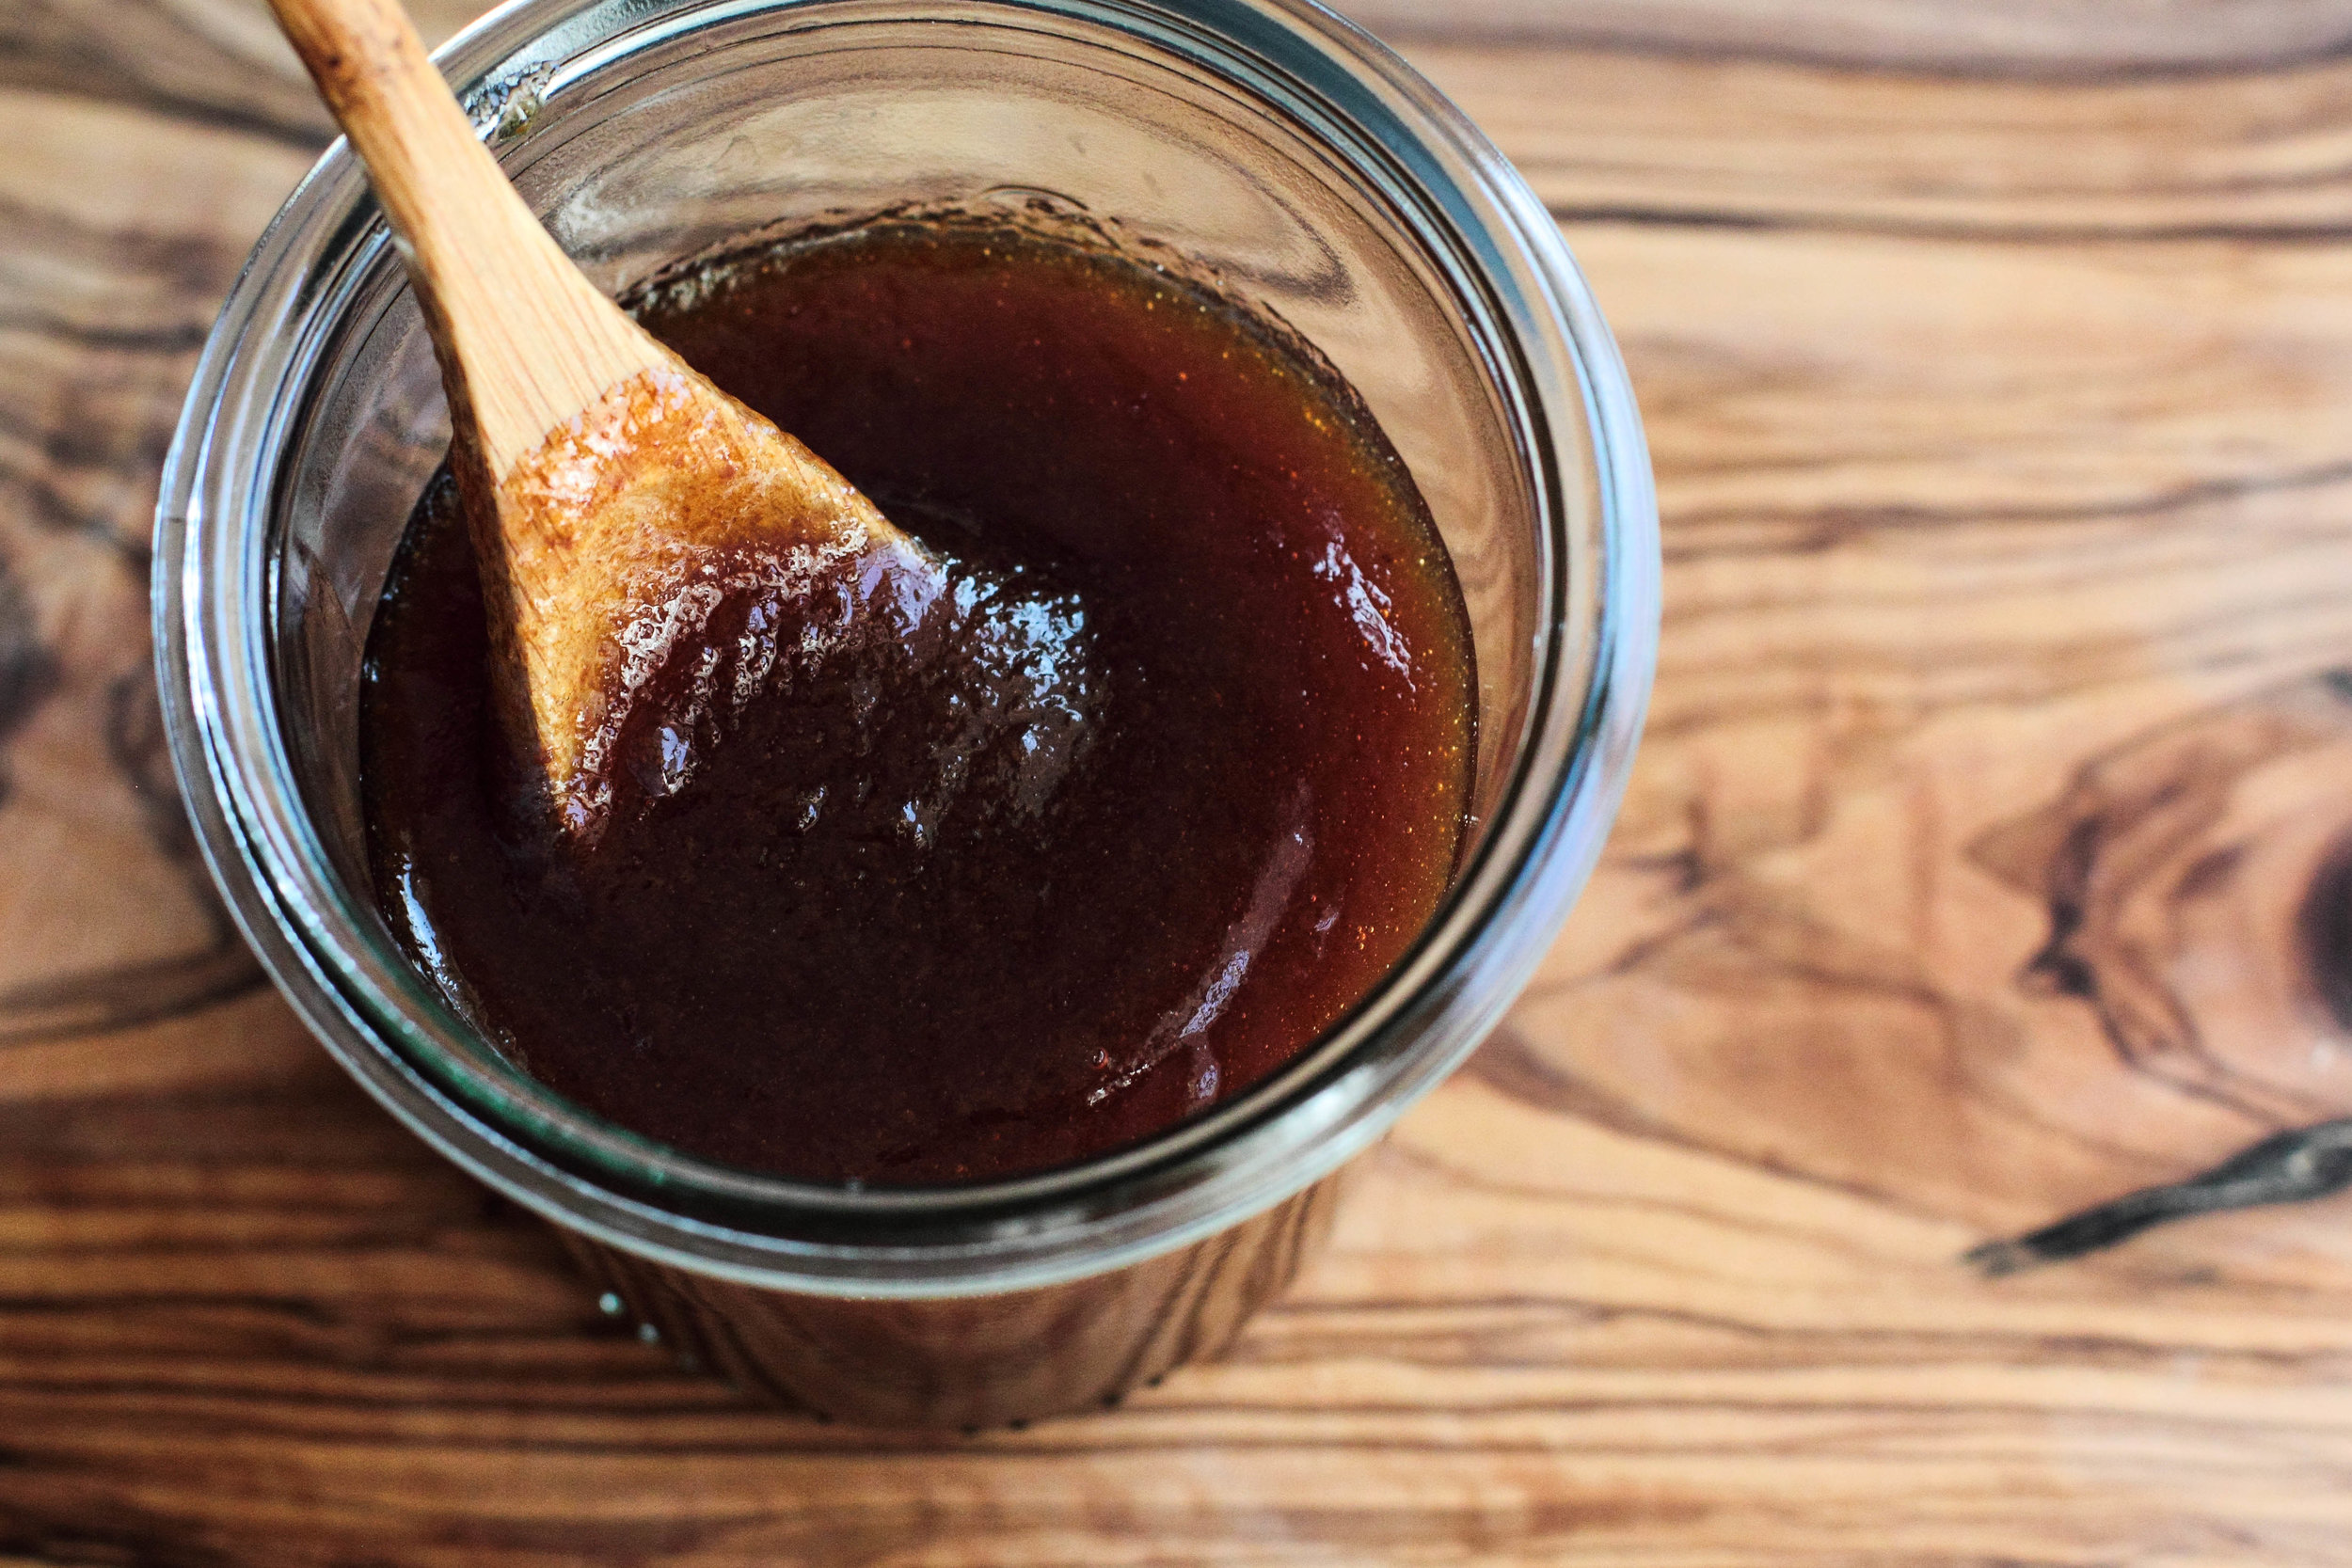
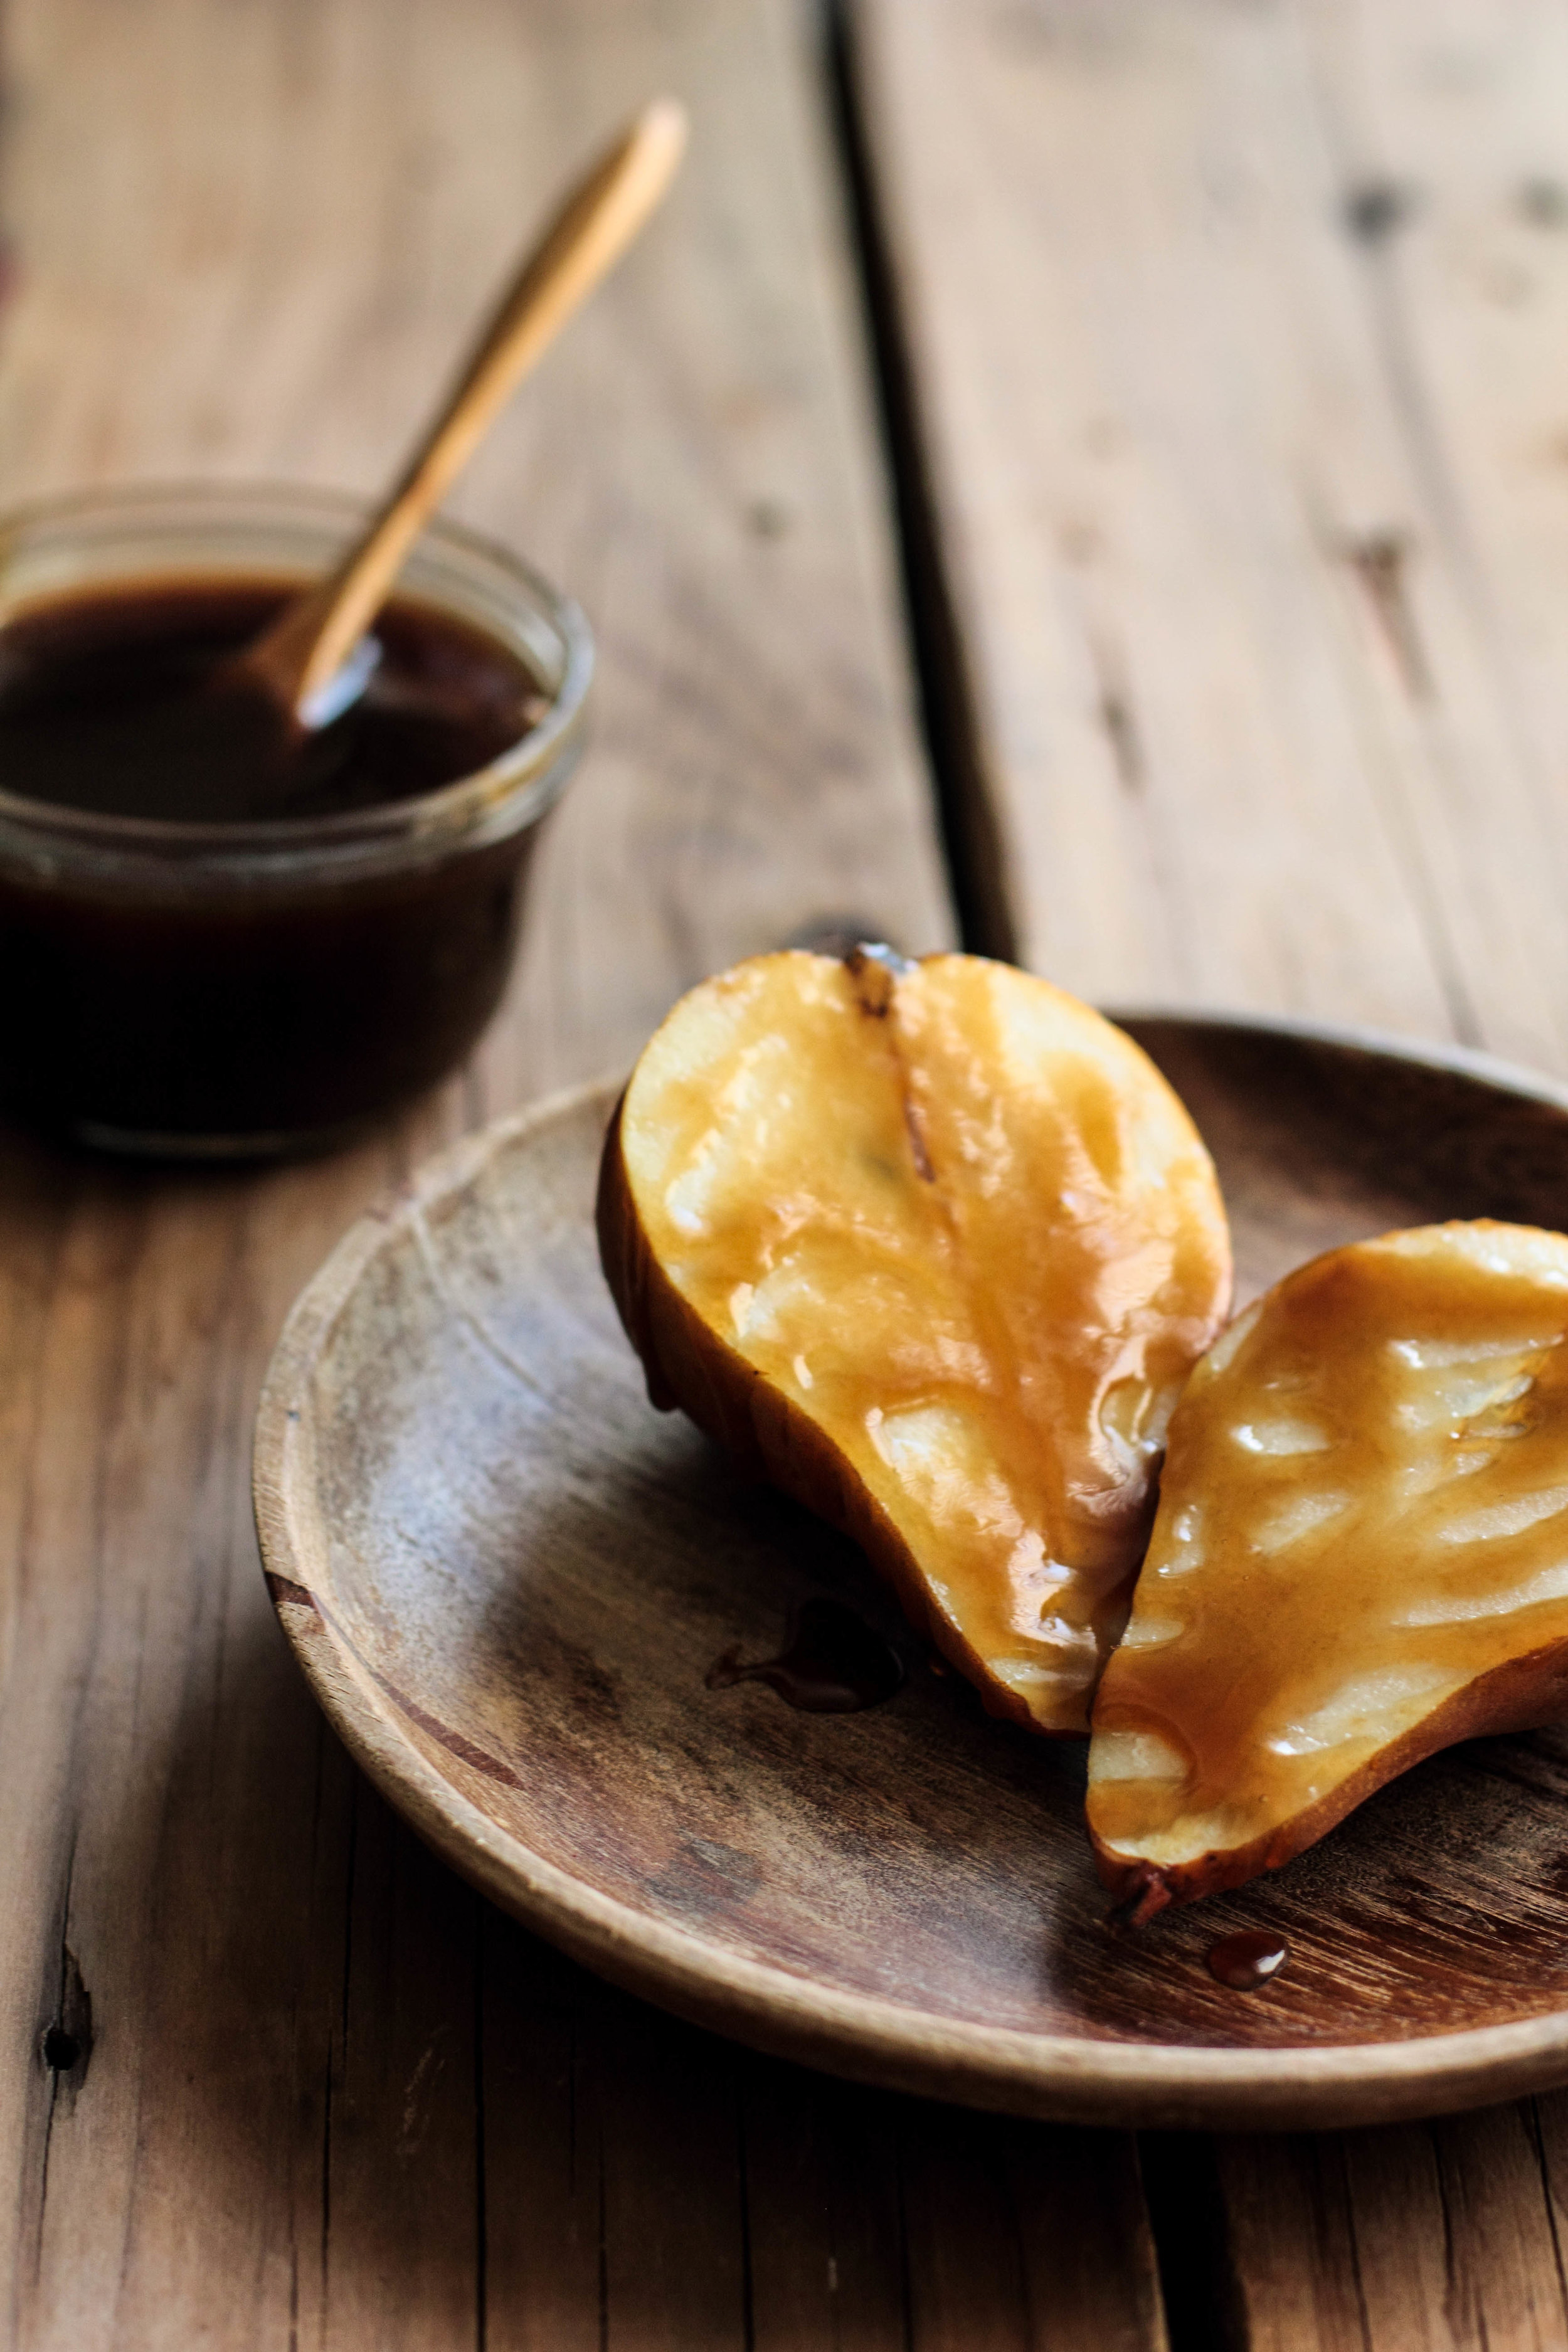
As I let the idea simmer in the back of my mind, it occurred to me that I might have to rethink the caramel in a more drastic sense. With a helpful bit of research, I went back to the ever faithful can of coconut milk. Instead of adding it to molten sugar, as I had done before, I simmered the milk down to a thick sauce with brown sugar to prevent the fat from separating. The brown sugar lends a caramelized flavor and the coconut milk provides the sticky, perfect-for-drizzling texture. I would suggest using light brown sugar instead of dark (or, ideally, a mixture of the two)the dark brown sugar (pictured) is on the edge of becoming too bitter for the final product.

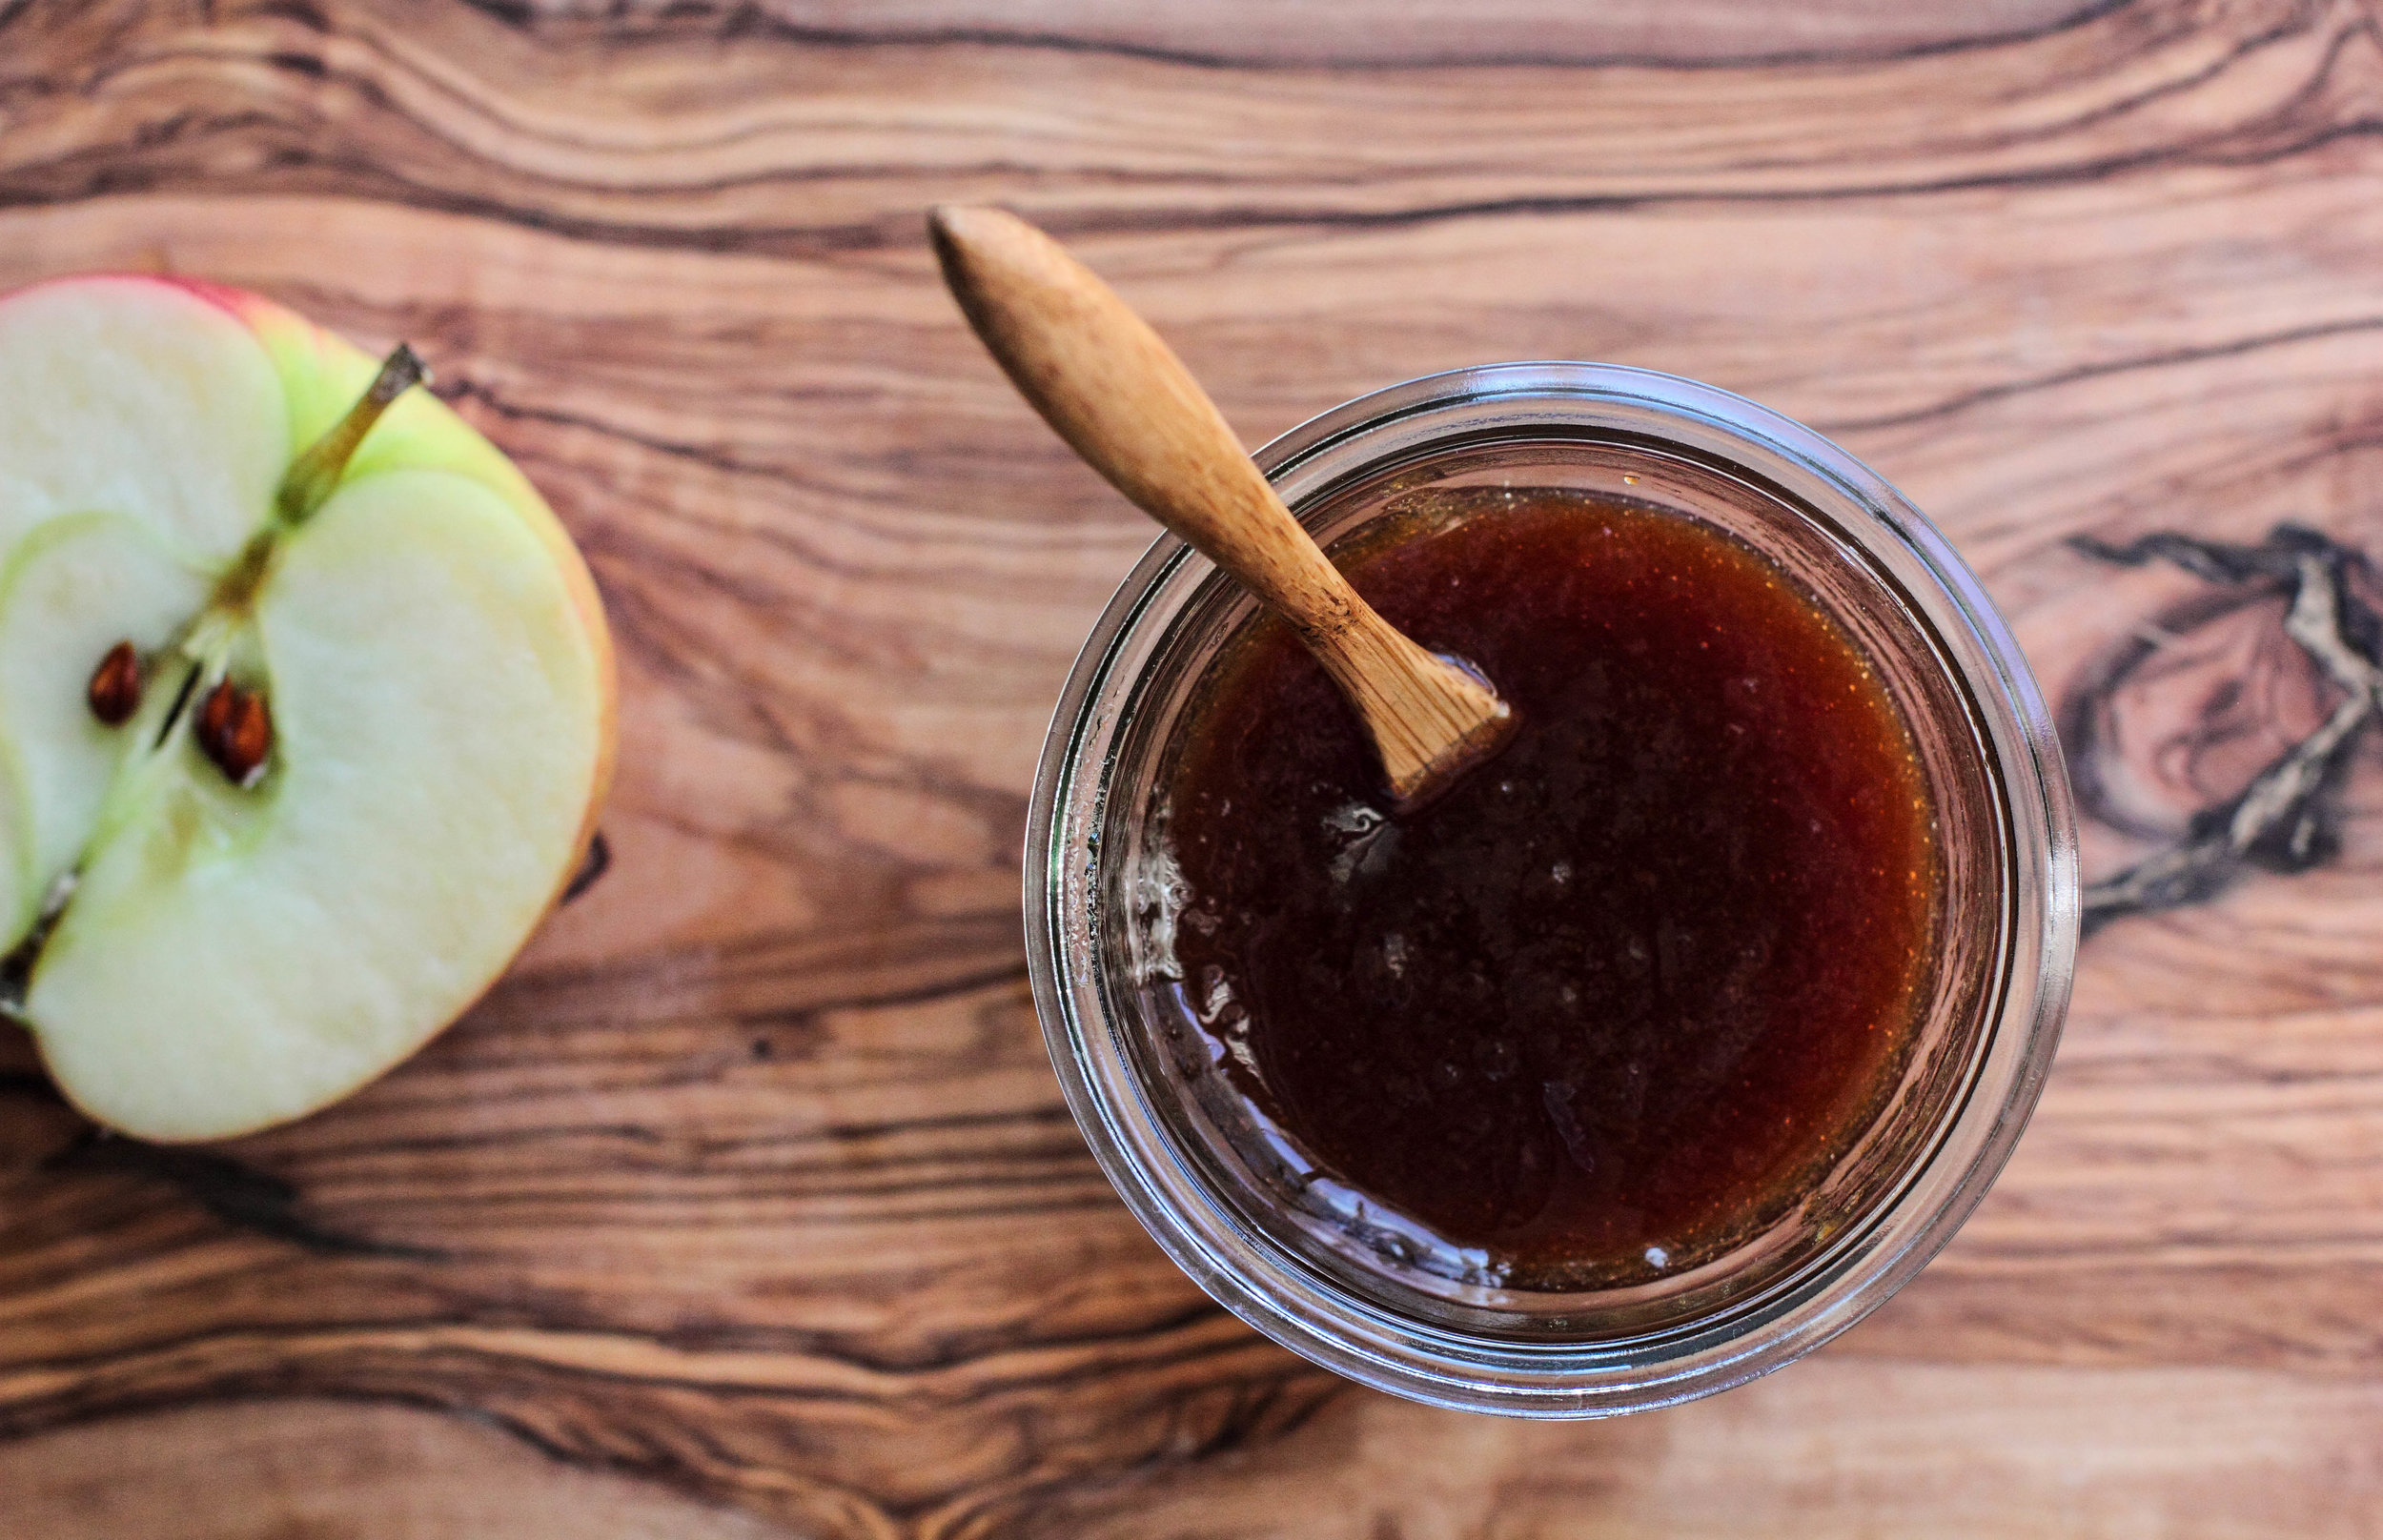
While the vegan caramel tastes like real caramel to my dairy-free palate, it was described to me by dairy-lovers as "coconut butterscotch." Drizzled over ripe pears or apple slices, I doubt many would notice or care about the differences.  

Vegan caramel is created from a mixture of coconut milk and brown sugar simmered down until it forms a thick syrup. It may be a different take on caramel but, for those with food restrictions, it is a dream. The caramel pairs well with fresh fruit and can (and should) be drizzled over pastries and bowls of ice cream. For a smooth final product, I recommend running it through a fine mesh strainer. 

For those of you who love the classics, this basic caramel recipe may be more your style.

One Year Ago: Classic Apple Pie
Two Years Ago: Whole Wheat Chocolate Chip Scones, Brown Butter Pear Muffins, Pumpkin Espresso Bread, and Triple Coconut Cookies
Three Years Ago: 3 Milk Coconut Cake, Blackberry Lemonade, Garden Tomato & Basil Tart, and Peaches & Cream
Four Years Ago: Butternut Squash Custard, Pumpkin Bread Pudding & Caramel Rum Raisin Sauce, and Banana Nut Bread

Vegan Caramel

Yields about 1 cup

14 ounces (397 grams) full fat coconut milk
3/4 cup (150 grams) light brown sugar, packed (or a mixture of half light brown/half dark brown sugar)
1 teaspoon vanilla extract

In a large saucepan, whisk together the coconut milk and brown sugar. Bring to a boil over medium high heat, reduce temperature, and simmer for 25 to 35 minutes, or until it thickens into a syrup. It can be simmered longer for a thicker sauce. Remove from heat and stir in the vanilla extract.

For a smooth sauce,  run the caramel through a fine mesh strainer.

Pumpkin Molasses Bread

With the sun setting earlier each evening and the daylight hours dwindling, I have unconsciously begun nestling in for the cold months to come. The freezer is well stocked. The sweaters have made their way to the center of the closet, pushing aside the t-shirts and summer dresses. Once I could see my breath outdoors, I made a large pot of vegetable soup to keep warm. It now feels like a cliche to say Winter is Coming, but I can see it in those around me, as we try to get in the last few weeks of autumn before winter's sleep.

It is the ebb and flow of life in the Midwest.

Autumn has the best flavorscinnamon, nutmeg, maple, molassesand I will argue it fervidly with anyone who objects. To me, it doesn't truly feel like the season until I open a can of pumpkin. Mixed with sweet, rich molasses, the pumpkin finds a home. I like to add a little cinnamon brown sugar topping to my pumpkin loaves to add a sweet, extra crunch. It is something my grandmother has done with her own breads, and I choose to follow her path. The bread is dense and moist, hearty and made for snacking.

I ate the slices plain, and I drizzled the slices with caramel; both ways are fabulous. As an unexpected recommendation, this pumpkin bread goes beautifully with a can of cola. The flavors and sweetness mingle in an unforeseen, but truly noteworthy manner. 

Pumpkin Molasses Bread is a spiced quick bread that encompasses the flavors of autumn. The bread is easy to throw together, but becomes difficult to wait for once it starts to fill the house with the scents of cinnamon and molasses. The bread is filling, which makes one slice a good choice for a morning snack (or breakfast).

One Year Ago: Apple Cinnamon Pancakes
Two Years Ago: Caramelized Leek, Basil, & Black Pepper Biscuits, Zucchini Chocolate Chip Muffins, Cinnamon Roll Cookies, and Bourbon Peach & Thyme Jam
Three Years Ago: Chocolate Beet Cake, Sweet & Spicy Peanut Chili Chicken Wings, Zucchini Bread, and Lemon Blueberry Scones
Four Years Ago: Fleur de Sel Chocolate Figs, Mixed Berry Crumble, and Chocolate Avocado Cupcakes with Avocado Buttercream

Pumpkin Molasses Bread

Yields 9 x 5-inch loaf

Pumpkin Molasses Bread 
1/2 cup (100 grams) brown sugar, packed 
 15 ounces (425 grams) canned pumpkin puree 
1/2 cup (120 ml)  molasses
1/4 cup (59 ml) vegetable oil  
3 large eggs 
1 teaspoon vanilla extract 
1 1/2 cups (188 grams) all-purpose flour 
1 1/2 teaspoons baking soda 
1 1/2 teaspoons ground cinnamon 
1/2 teaspoon ground nutmeg 
1/2 teaspoon ground cloves 
1/2 teaspoon salt

Preheat oven to 350 degrees F (180 degrees C). Grease a 9 x 5-inch loaf pan.

In a large mixing bowl, whisk together the brown sugar, pumpkin, molasses, vegetable oil, eggs, and vanilla extract. Fold in the flour, baking soda, spices, and salt. Spread batter evenly into prepared pan.

Brown Sugar Cinnamon Topping 
3 tablespoons brown sugar, packed 
1/2 teaspoon ground cinnamon

In a small bowl, whisk together the brown sugar and cinnamon. Sprinkle evenly over the pumpkin batter.

Bake for 50-60 minutes, or until a toothpick inserted into the center comes out clean. Allow to cool before cutting and serving.

Boiled Cider

The leaves crunching beneath my shoes are shades of orange, yellow, and red. The temperature outside is steadily dropping. A bright pumpkin is sitting outside my window, waiting to be carved. It is beginning to feel like autumn should. 

At the start of a season full of cinnamon and nutmeg, I needed a new staple to liven up my baking repertoire. Since I adore apples (I eat one every day with lunch),  it felt natural to play around with the ingredient a bit further. I first heard of boiled cider last spring, when it was used to add an extra touch to an apple pie. Since then, I have been hooked on the idea, anxiously awaiting fall to try it out in my baking. Boiled cider is just as it soundspure apple cider that has been boiled down into a rich, thick syrup.

Boiled Cider has an seemingly endless possibility of uses, which is why am I so excited to have it on hand this fall. The syrup can be added to apple dishes to brighten and intensify the apple flavor, including applesauce, apple pie, apple crisp, or apple tarts. Boiled Cider can also be heated and drizzled over pancakes, as an alternative to maple syrup. For savory dishes, a spoonful or two can be used to season pork roasts or enhance meat sauces. The list goes on. 

Boiled Cider has a single ingredient, which makes it virtually impossible to mess up. I would suggest springing for a jug of pure apple cider found in the refrigerated section of the grocery store. It will boil down into a richer, more flavorful syrup than a juice that has been pasteurized. I did not specify a specific amount of juice in the recipe because it is not necessary. You can boil as much or as little cider as you please. Just keep an eye on the pot and, whenever you need another lungful of the delicious scent, give it a little stir. 

Boiled Cider is a versatile ingredient and autumn kitchen staple. A spoonful can be added to sweet and savory dishes to lend a bold, welcoming apple flavor. As a bonus, while the cider boils down, it makes the whole house fragrant with the scents of the season.

One Year Ago: Cinnamon Raisin Swirl Bread
Two Years Ago: Rum Raisin Oatmeal Cookies, Cucumber Zucchini Cream Cheese Slices, Banana Rum Bread, and Vanilla Bean Cardamom Peach Pie
Three Years Ago: Grilled Apricots with Honey Greek Yogurt, Malted Chocolate Cupcakes with Toasted Marshmallow Filling, Coconut Pancakes, and Rocky Road Cookies
Four Years Ago: Whole Wheat Banana Pancakes, Cinnamon Chocolate Chip Banana Bread, and Maple Roasted Bananas with Cinnamon Whipped Cream

Boiled Cider

Pure apple cider (no sugar added)

In a large pot, pour in the apple cider. Take a wooden chopstick or skewer, place it into the liquid, and mark the height of the apple juice onto the wood. Remove the chopstick and mark the wood into thirds. This will help you keep track of the progress of the cider.

Bring the apple juice to a boil, lower the heat, and simmer until it is 1/3 of the original volume. Stir and check frequently with the chopstick to judge how far the juice volume has decreased. Depending on the amount of cider, it can take anywhere from 30 minutes to a few hours to boil down into a thick syrup. 

If fresh apple cider was used, run the syrup through a fine mesh strainer to remove any solids. Store in an airtight container in the refrigerator.