Rosemary Soda Bread

IMG_0725-2.jpg

Winter, usually brusque and bitter, has taken on a milder disposition this year. Instead of windblown piles of snow so high the windows are partially covered, the snow is an afterthought. An inch of powder blows around by day and settles by night, simply to keep up appearances. Yet, the cold weather traditions of the Upper Midwest hold strong. We bundle up in layers, donning our hats and scarves early in the season (though we become looser on the dress code once we are adapted to the below freezing temperatures). We complain endlessly about the weather to one another, bonding over our shared displeasure with wind and iced car windows.

And, of course, there's the soup.

Sundays are for rich, hearty soups. When the weekend comes to a close, I try to make a large pot to last a few meals. My mother did this while I was growing up, and I am certain her mother did it for her as well. Soup is a comfort food, a way to squeeze in extra vegetables and keep our bodies warm.

Lately, I have been experimenting with making my own bone broth and creating twists on old favorites. Zuppa Toscana has been a well seasoned request, year after year. I throw in carrots, celery and extra handfuls of kale, and take out the cream. The flavor remains, but it becomes an arguably healthier dish. Tonight will be vegetable barley, with hamburger and leftover bacon just to throw the name in contention.

As experience has revealed, fresh bread tops the list as the perfect side to soup. This quick bread recipe takes as long to bake as the soup takes to stew, making them an inseparable duo. 

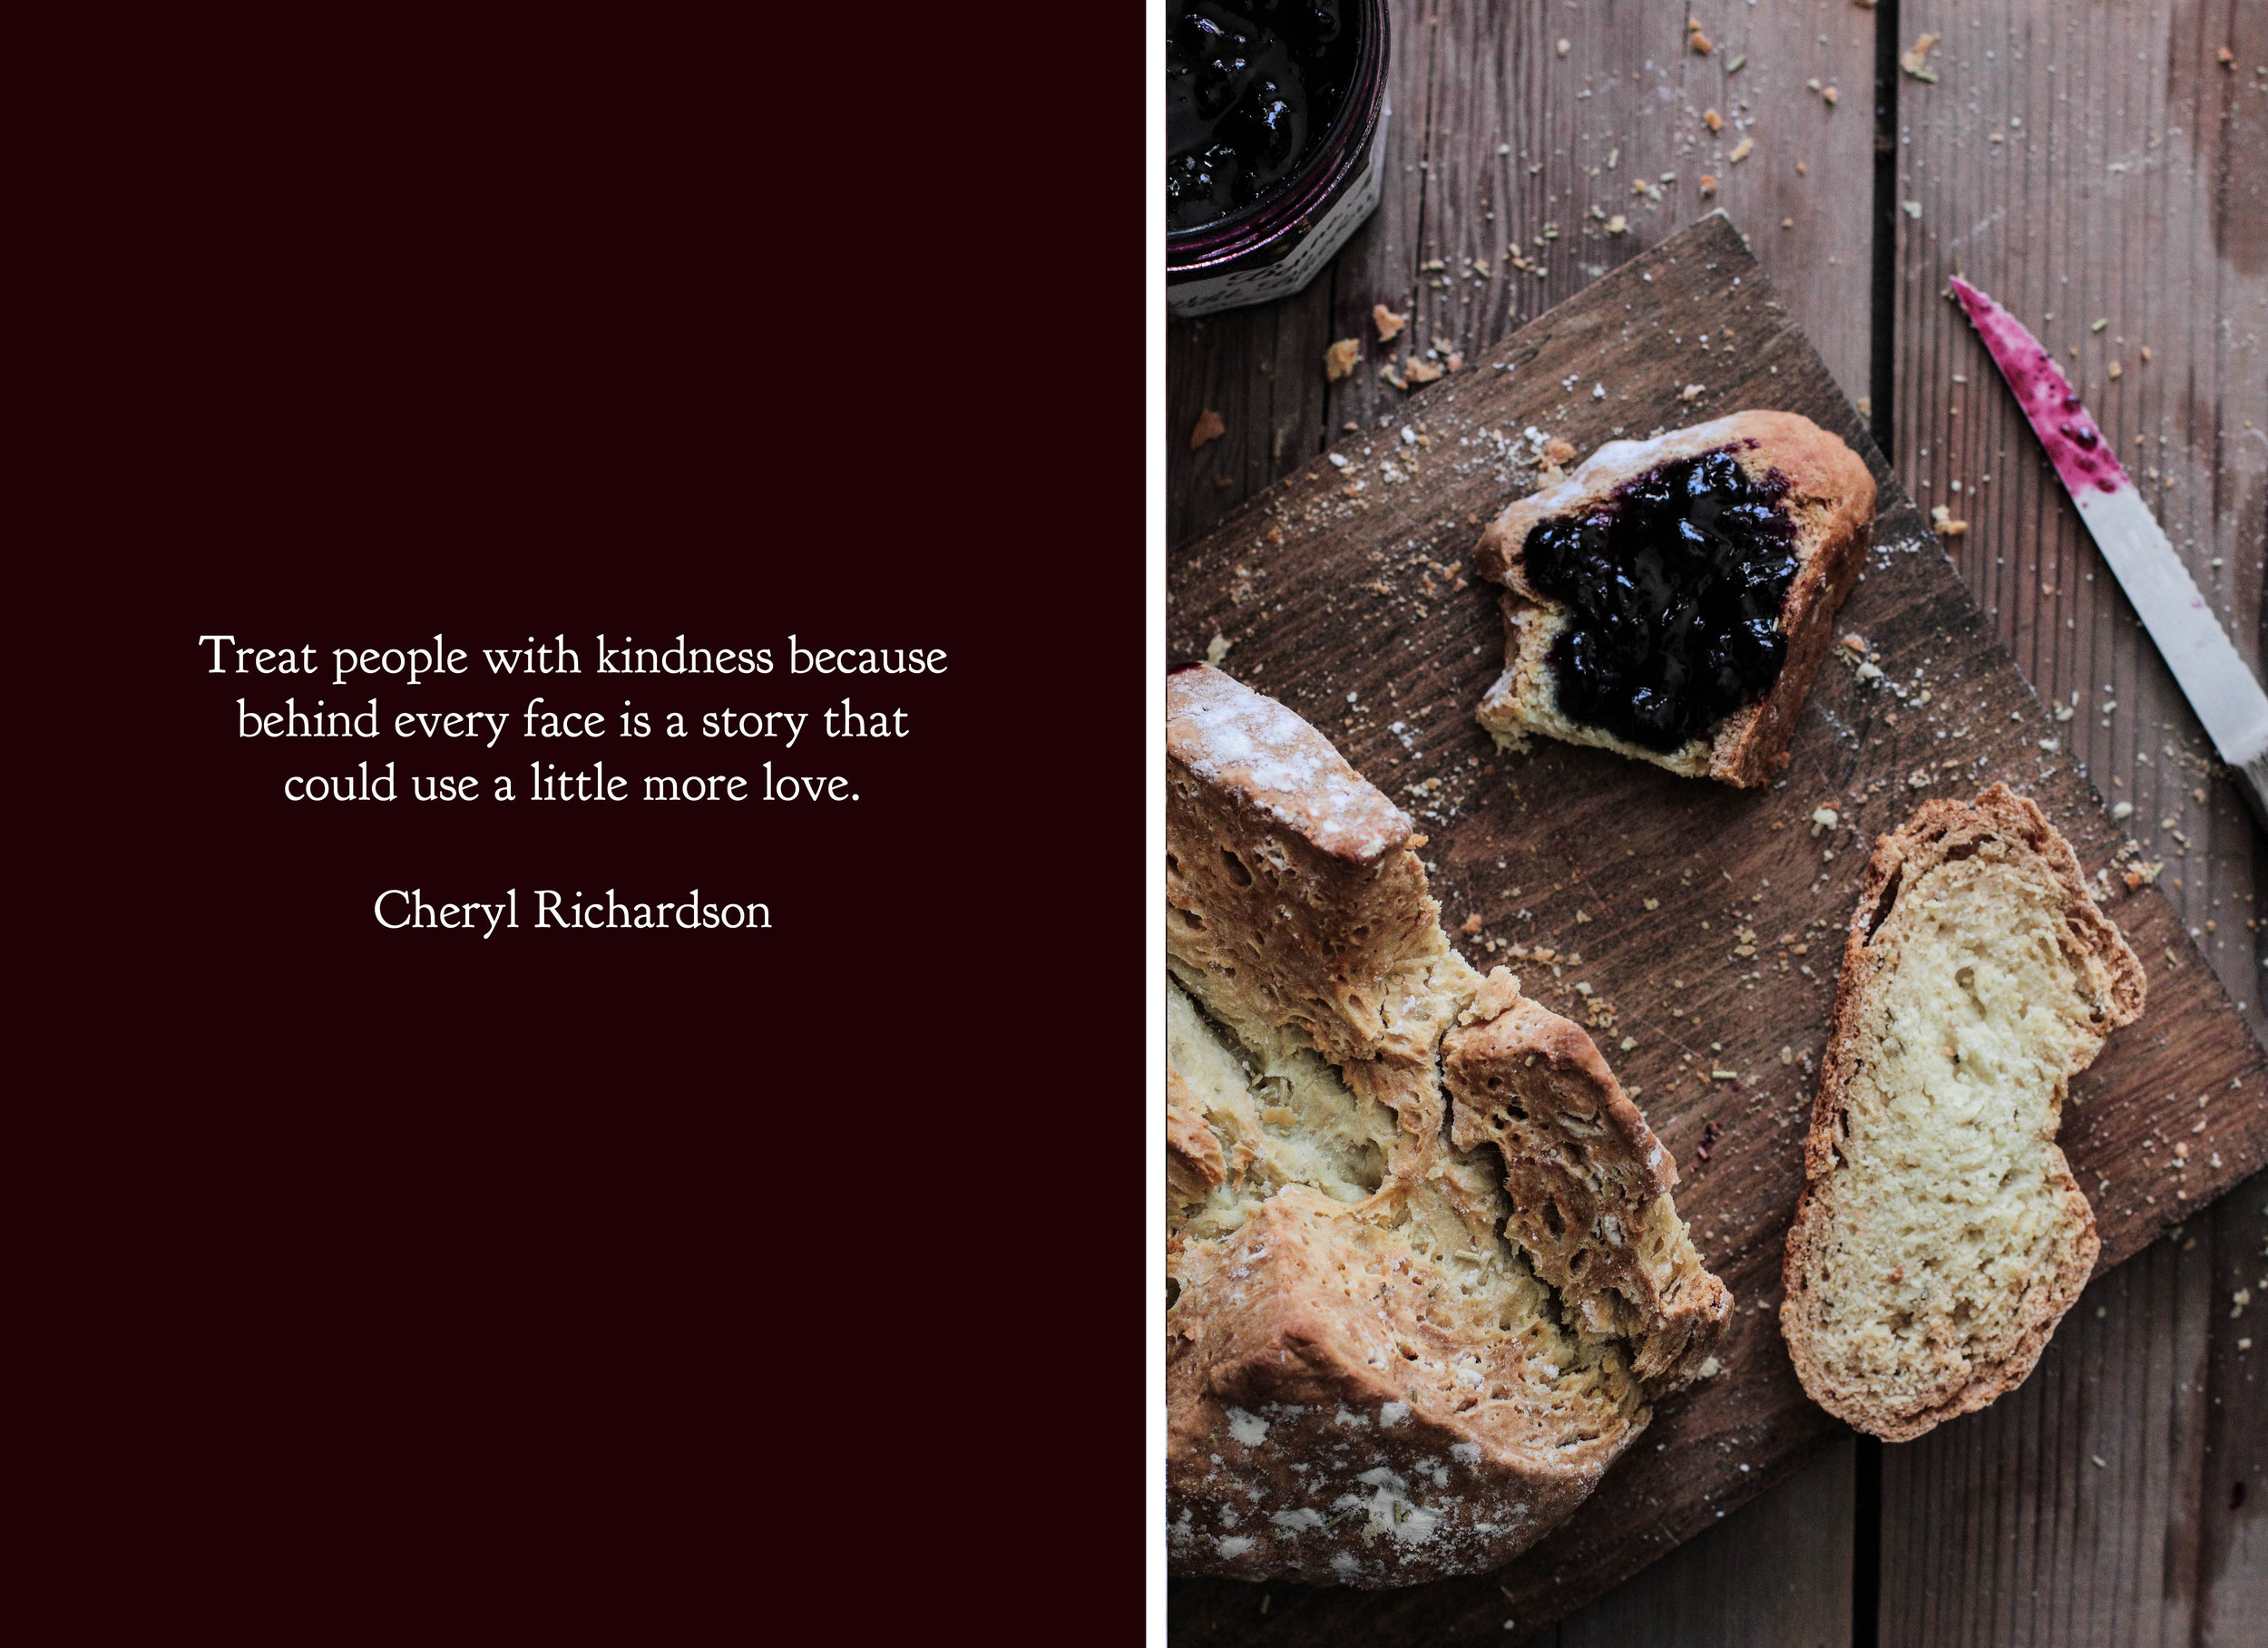
Rosemary Soda Bread is a quick bread that can go from an idea to a loaf in an hour. The bread is on the denser side, risen through baking soda alone, but the quality reminds me of a good biscuit. Seasoned with dried rosemary, the bread takes on a subtle flavor, but still pairs well with flavors both sweet and savory. While this bread works well to soak up hearty soups and gravies, I also find it at home with a spread of dark berry preserves.

One Year Ago:  Chocolate Almond Biscotti and Grapefruit Rum Cocktails
Two Years Ago:Toasted Almond Cookies with Fig Filling, Coconut Raisin Granola, and Hot Cocoa Popsicles
Three Years Ago:Beer Bread, Baked Corn Tortilla Chips, Roasted Pepper Feta Scones, and Flourless Chocolate Rum Cake
Four Years Ago:Vanilla Rum Soaked French Toast, Cocoa Almond Meringues, Banana Bread Oatmeal 

Rosemary Soda Bread

Yields 1 loaf

3 1/2 cups (440 grams) bread or all-purpose flour
1 teaspoon baking soda
1 teaspoon dried rosemary
1 teaspoon salt
1/4 cup (57 grams) butter, melted
1/2 cup (115 grams) sour cream
1 cup (237 ml) milk

Preheat oven to 400 degrees F (205 degree C). 

In a large mixing bowl, whisk together the flour, baking soda, rosemary, and salt. Add in melted butter, sour cream, and milk, stirring with a spatula to bring dough together. 

Turn out on a lightly floured surface and knead dough until it forms a ball. Place onto baking sheet and flatten the top. Using a sharp knife, cut a 1/4-inch deep cross into the top of the loaf. Dust lightly with flour and dried rosemary. Bake for 45-55 minutes, or until lightly browned.

Serve with a spread of butter and jam (I used wild blueberry preserves from Bonne Maman), or use it to soak up a hearty broth.

Chocolate Raspberry Tarts

Ms. Rosenau, you look exhausted, observed one of my students. And I felt it, too. My shoulders were tense, my brain was in overdrive, and the last night of good sleep was a far away memory. As with most things, there is only so much energy to be spent before nature intervenes. I spent most of the last week ill on the couch, with a box of tissues and a blanket, working my way through the Netflix queue.

Sometimes life likes to give reminders of lessons I should have learned long ago. Slow down, friends, slow down.

These Chocolate Raspberry Tarts have been in the back of my mind for months. I ordered a new set of tart pans back in July, which were backordered until October. I finally gave them a try last weekend. Luckily, this seems just the season for these tarts, with Valentine's Day coming up quickly. 

Chocolate and raspberries is a vibrant combination, both in sight and taste. The sweetness of the chocolate balances the tart berries and comes together in a rich bite. Share these with someone you love, whether it be a significant other, good friend, or yourself.

Chocolate Raspberry Tarts are dark and intense, with a pop of fresh berries to lighten the mood. The dough is made from a chocolate pastry crust, easy to roll out and manage while forming the base. The filling is a chocolate raspberry truffle filling, made with the juice of raspberries and high-quality chocolate bar. The tarts keep for a few days (add fresh raspberries before serving), but I imagine they would disappear before then.

One Year Ago:  Honey Oat Bread and Banana Cacao Nib Buckwheat Muffins
Two Years Ago: Bruleed Grapefruit, Bacon & Chive Beer Bread, and Pomegranate White Wine Panna Cotta
Three Years Ago: Cheddar Dill Biscuits, Campfire S'mores Brownies, and BBQ Bacon Wrapped Water Chestnuts
Four Years Ago:Zuppa Toscana, Quick Chocolate Cake, and Chocolate Frosted Yellow Cake

Chocolate Raspberry Tarts

Yields 6 small tarts

Chocolate Tart Dough
8 tablespoons (113 grams) butter, cubed
3/4 cup (95 grams) powdered sugar
1 large egg
1 teaspoon vanilla extract
1/2 teaspoon salt
1 2/3 cups (205 grams) all-purpose flour
1/3 cup (30 grams) cocoa powder

In a food processor, place the butter and powdered sugar. Process until smooth. Add the egg, vanilla, and salt and continue processing until uniform, scraping down the sides as needed. Add the flour and cocoa powder, processing until the dough comes together and begins to gather in the bowl. A stand mixer can also be used if a food processor is unavailable.

Remove dough and shape into a cylinder. Wrap in plastic wrap and refrigerate for a minimum of 30 minutes.

Preheat oven to 400 degrees F (205 degrees C). 

Unwrap dough and slice cylinder into 6 even pieces. On a lightly floured surface, roll out each slice into a circle 2-inches larger than the tart pan. Gently place dough into pan, pressing it along the edges. If necessary, additional dough can be used to cover up cracks or tears. Using a rolling pin, roll it along the top of the pan to cut off excess dough. Use fingers to form a clean edge. Puncture a couple dozen holes into the bottom of the tart using a fork; this will prevent the dough from rising.

Bake for 15-20 minutes, or until they are dry in appearance and touch. Cool to room temperature.

Chocolate Raspberry Filling
2 1/2 cups (250 grams) fresh or frozen raspberries
3 tablespoons granulated sugar
6 ounces (170 grams) semi-sweet chocolate, finely chopped (use a higher quality for best flavor)
Fresh raspberries, for garnish

In a large saucepan, place the raspberries and granulated sugar. Bring to a boil over medium high heat, reduce to low, and simmer to release juices. Using a spoon, press down on the berries to break them up and release additional juices. 

Place berries in a fine mesh strainer over a medium mixing bowl filled with finely chopped chocolate. Drain out all juices, pressing on the berries to release juices further. Discard solids. Stir the chocolate and raspberry juice mixture. If the berry juice was not warm enough to melt the chocolate until smooth, place in the microwave in 10 second increments, stirring well between each heating, until smooth.

Spoon chocolate filling into cooled tart shells and refrigerate until set. Top with fresh raspberries before serving.  

Pear Vanilla Sorbet

Whenever I travel, the small moments stay with me longer than the big ones. The feeling of standing at the center of an ancient world in Delphi, Greece. The beauty of the fogs rolling in over the lush English countryside in springtime. A nectarine in southern France that tasted so divine that time stopped moving, just for a breath. It is the unexpected experiences that bury themselves in my memory, to be remembered and re-lived often.

I may not be able to tell you all of the landmarks I have seen or the museums I have visited, but I can tell you how it feels to sit on the steps of a church in Rome at night, the piazza lit with yellow lamps, and listen to a man softly strum a guitar. In the end, that may be more important after all.

On my recent trip to Paris and southern France, I fell in love with pear sorbet at Soleileïs, a quaint ice cream shop in Arles. The sorbet was the literal essence of pears; the texture, the delicate sweetness, and the soft flavor were all represented. From that moment on, whenever I found another ice cream cone on my travels—which was often—pear sorbet was tucked in the bottom of the cone so I could savor it in the last few bites.

While pear sorbet is somewhat of a staple in France (and perhaps most of Europe?), the United States is barren to such pleasures. Since I adore it so, I set out to create my own version of that first cone.

Not to be confused with pear ice cream (where pear is blended in more or less equal parts with cream), this sorbet stays pure to its namesake. Pears are peeled, cored, and cooked down with vanilla bean, forming the base of the dessert. There is little added sweetener in this sorbet, relying on the natural sugars of the pear to bring out the sweetness. The pear flavor reminds me of a good vanilla ice cream: satisfying spoonful after spoonful, but never overpowering. 

Make a batch to share and create your own new, small moments to remember.

Pears are cooked down with vanilla bean, lemon juice, and sugar before they are blended into a thick puree. Use a high setting to keep the sorbet silky smooth. The final sorbet will retain the flavor, sweetness, and texture of a good pear. I find that a cone full of sorbet can be used as a wonderful palate cleanser after meals, since it feels light and bright on the tongue.

One Year Ago:  Pear Chocolate Scones
Two Years Ago: Chocolate Chunk Ginger Cookies and Vanilla Bean Marshmallows
Three Years Ago: How to Freeze Cookies Dough, Soft & Chewy Chocolate Chip Cookies, and Dark Chocolate Oatmeal
Four Years Ago: Minnesota Wild Rice Soup, Cherry Chocolate Chunk Oatmeal Cookies, and Cranberry White Wine Spritzer

Pear Vanilla Sorbet

Yields about 1 quart

6 bosc (or bartlett) pears, peeled, cored, and diced into 1-inch pieces
1/2 cup (100 grams) granulated sugar
1/2 cup (120 ml) water
2 teaspoons fresh lemon juice
1 vanilla bean, cut lengthwise with seeds removed
1 tablespoon agave nectar (or honey)

In a large saucepan, place prepared pears, sugar, water, lemon juice, vanilla bean seeds, and vanilla bean pod. Bring to a boil over medium high heat, reduce heat, and simmer until the pears are soft, about 10 minutes. Remove vanilla bean pods. Stir in agave nectar. Cool until warm to the touch (it is dangerous to blend hot liquids because they expand drastically).

Transfer pears and juices to a blender or food processor, and process until smooth. Place in the refrigerator and chill 3-4 hours, or until cold.

Freeze mixture in ice cream maker, following the manufacturer's instructions. Transfer sorbet to an airtight container and freeze for 2-3 hours before serving. The sorbet will keep well for 2 weeks in the freezer.