Strawberry Rhubarb Pie

Summer is moving quickly. It feels like only a moment has passed since school ended and summer vacation began. I've been working on a project of sorts, which has made free time feel scarce. While I'm going to keep it under wraps a little while longer, I'm excited to share the details with you soon!

In the quiet, everyday moments, I remember to enjoy these summer days. I savor time on the deck watching the vegetable and herb garden grow (perhaps too much , as they have quickly escaped the confines of their planters). I remind myself to turn off the background noise in my life (television and cell phone) to bring my thoughts back down to earth.

And, of course, I bake.

strawberryrhubarbpie1.jpg

I made this pie a couple of weeks ago, and am finally getting a chance to share it with you. With strawberries and rhubarb in full season, and a holiday around the corner, the timing still feels right. This pie takes full advantage of late spring and early summer's offerings.

I prefer a pie with a bit more bite, so the recipe below results in a pie with a tarter flavor. However, if your tooth is a bit sweeter, add another 1/4 cup of sugar to bring the sweetness to your liking. With a scoop of vanilla ice cream on top, this pie will be sure to please.

IMG_9696-2.jpg

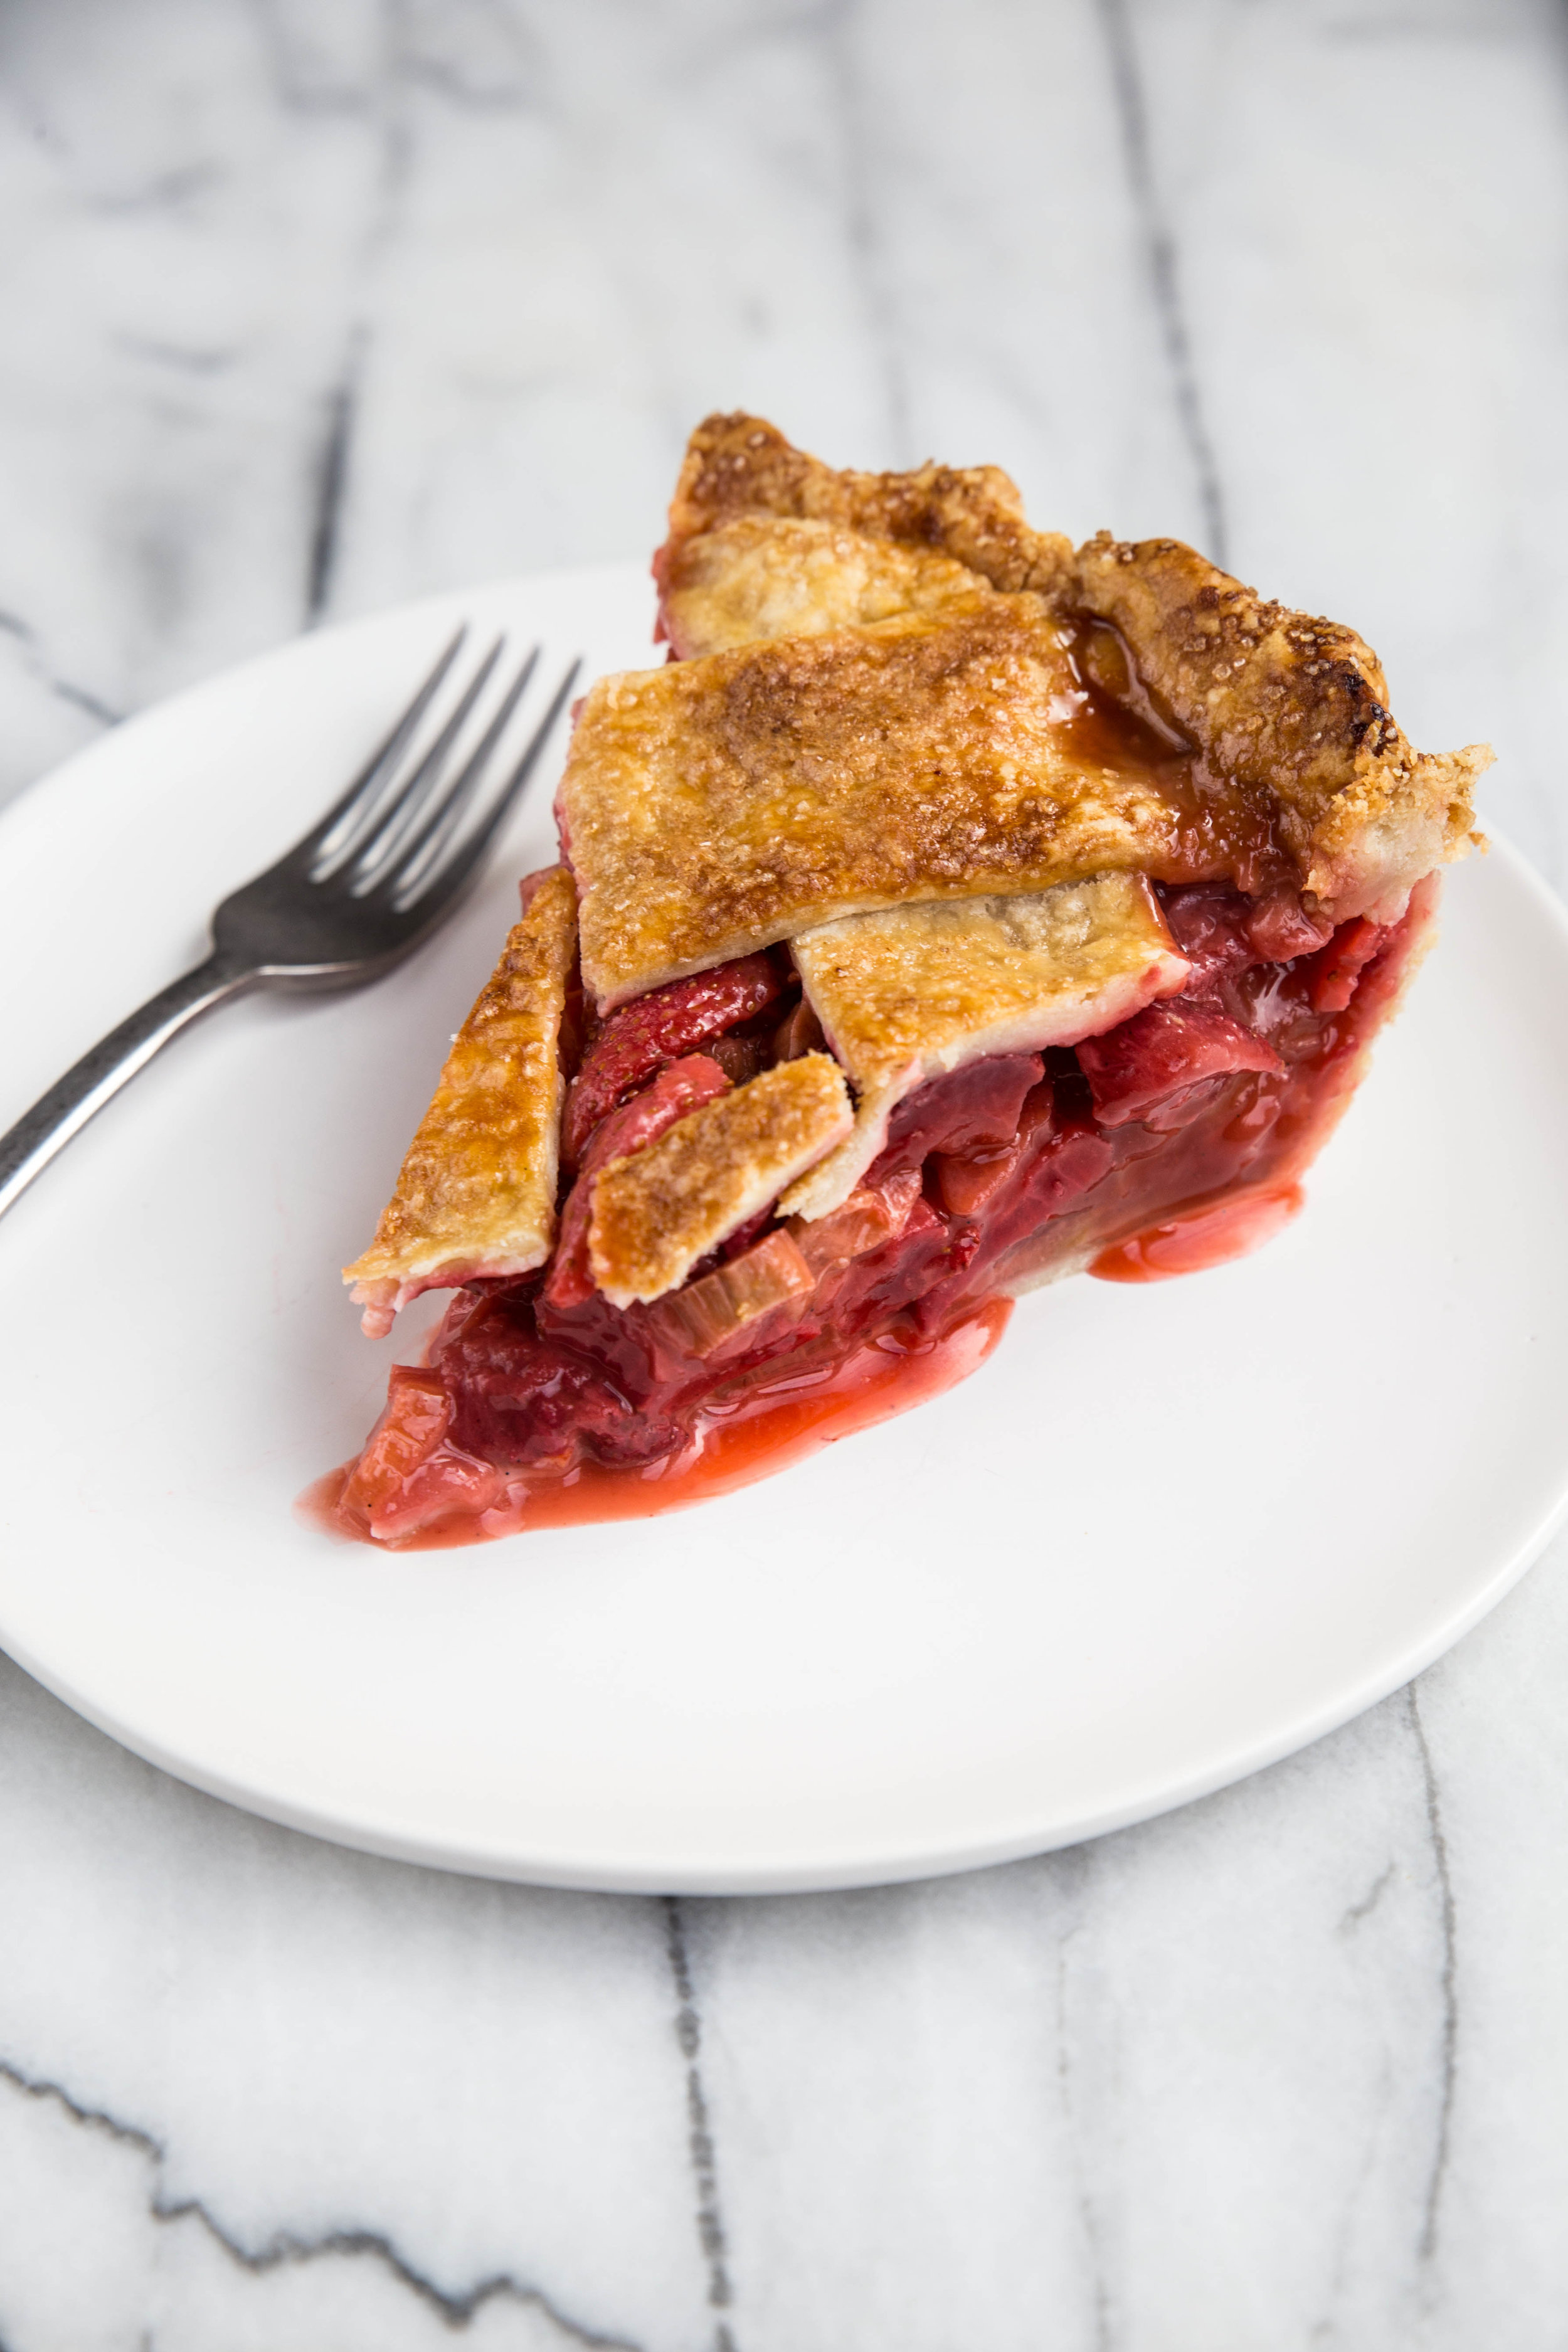
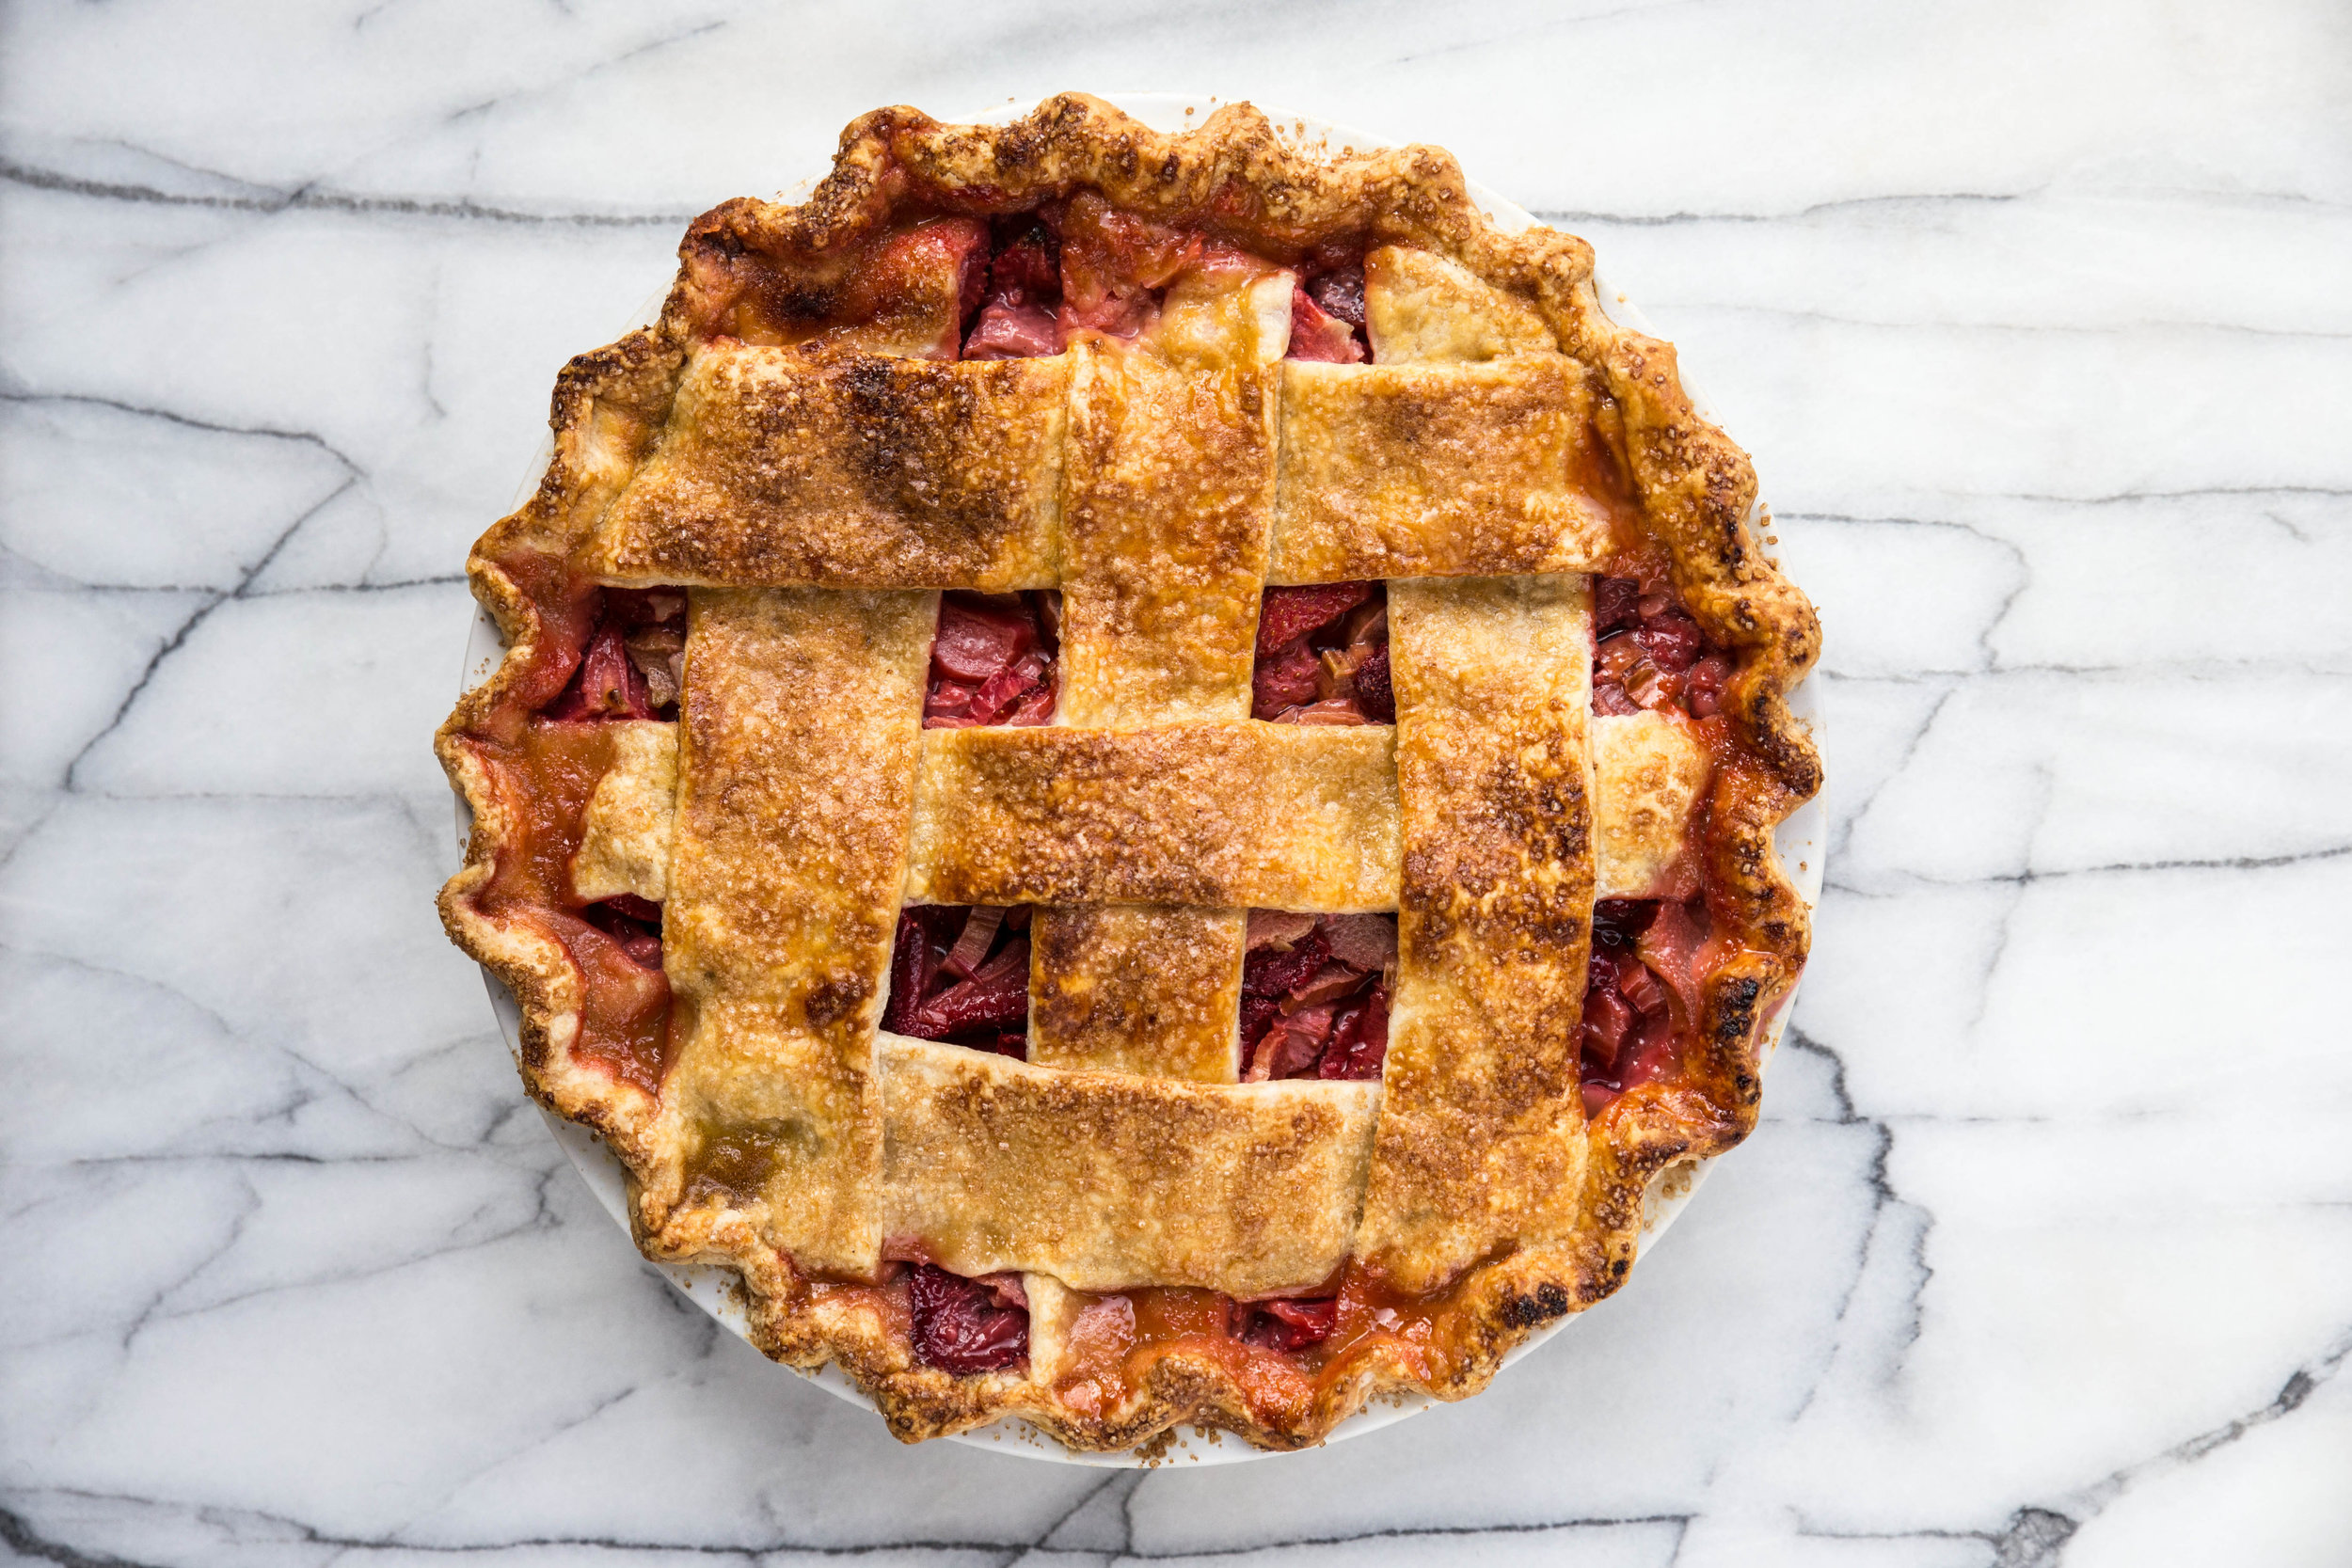
This Strawberry Rhubarb Pie celebrates the seasonal produce of June. Two pints of strawberries and a handful of rhubarb stalks come together in this brightly flavored pastry. With cornstarch to thicken, the pie and its juices set up nicely. Serve with a large spoonful of whipped cream or scoop of ice cream to share.

One Year Ago: Chocolate Peanut Butter Pie
Two Years Ago: Dulce de Leche Cake
Three Years Ago: Strawberry Layer Cake & Blueberry Oat Crumble Muffins
Four Years Ago: Mango MargaritaChocolate Cacao Nib Banana Bread, & Chocolate Espresso Custard
Five Years Ago: Vanilla Chia Pudding, Rhubarb Vanilla Pound Cake, Boozy Margarita Lime Cake, & Double Chocolate Muffins
Six Years Ago: Toffee Chocolate Chip Cookies, Coconut Nutmeg Pudding, Lavender Lemonade, & Vegan Chocolate Cupcakes
Seven Years Ago: Whole Wheat Chocolate Chip Cookies, Garlic Parmesan Pull-Apart Bread, & Chocolate Almond Oat Bars
Eight Years Ago: Chocolate Coconut Granola, Bittersweet Chocolate Sherbet, & Tapioca Pudding

Strawberry Rhubarb Pie

Yields one 9-inch pie

1 double crust pie dough recipe
2 pints (24 ounces or 680 grams) strawberries, hulled and sliced
10 ounces (280 grams) fresh rhubarb, sliced into 1/4 inch pieces
1/2 cup (100 grams) granulated sugar
1/4 cup (50 grams) brown sugar, packed
1 teaspoon vanilla extract
4 tablespoons cornstarch
Egg wash (1 large egg + 1 tablespoon water, whisked), for brushing
Raw or demerara sugar, for sprinkling

Preheat oven to 425 degrees F (220 degrees C).

In a large mixing bowl, gently stir together the sliced strawberries, rhubarb, sugars, vanilla, and cornstarch until evenly coated. Set aside.

Form the pie dough into a disk and divide it into a 60/40 ratio (if using a store-bought crust, do not worry about this step). On a lightly floured surface, roll out the larger section of dough into a 14-inch round circle. Carefully transfer it to a 9-inch pie pan and trim the excess pie dough to create a 1-inch overhang. Fill the pie crust with the strawberry-rhubarb mixture.

On a lightly floured surface, roll out the smaller section of pie dough. Using a pizza cutter and a ruler, cut out wide strips of dough. Layer the strips over the top of the pie in a decorative fashion and trim so they are even with the edge of the pie pan. Using your fingers, pinch the bottom and top layers together in a pattern of your choice.

Using a pastry brush, brush the top of the pie crust with egg wash and sprinkle raw sugar over the pie. Bake the pie for 15 minutes at 425 degrees F (220 degrees C). Then, lower the oven temperature to 375 degrees F (190 degrees C). If necessary, cover the edges of the pie crust with aluminum foil to prevent further browning. Bake an additional 50-65 minutes, or until the lattice and crust are evenly browned. 

For perfect slices, cool for at least 3-5 hours (or overnight). Serve with whipped cream or ice cream, if desired.

Cold Brew with Vanilla Almond Milk Creamer

 
This post is sponsored through a partnership with The J.M. Smucker Company © 2017. DD IP Holder LLC. All thoughts and opinions are my own.

This post is sponsored through a partnership with The J.M. Smucker Company © 2017. DD IP Holder LLC. All thoughts and opinions are my own.


With warmer days approaching (and the end of the school year), my mind drifts towards the slower days of summer.  I've stuffed the sweaters into the back of the closet, bringing the t-shirts front and center.

A defining line between the cold and warm months, however, is my switch from hot coffee to cold brew. 

As a teacher, I drink my fair share of coffee. My favorite moments to enjoy a cup is relaxing after a long day at work, with my feet up on the couch, or on a slow-moving weekend morning.

Lately, I've been drinking Dunkin' Donuts Cold Brew. It's easy to prepare and has a smooth finish, with no acidity or bitter taste.

On Sunday nights, I prep the cold brew by placing two coffee pouches into a two-quart pitcher with four cups of water and leave it to steep in the refrigerator overnight. The next morning, I remove the pouches, add a few cups of water to dilute it to my taste, and it is ready to enjoy. Best of all, the pitcher lasts the rest of the week so the work is complete in two simple steps.

One of my favorite cold brew tricks is to freeze some of the cold brew into ice cubes after it has finished brewing. Then, when it's time to enjoy the coffee, I add a few cold brew cubes. The drink stays cold longer, and the coffee cubes prevent the drink from becoming watered down as the ice melts. 

IMG_9975-2.jpg
coldbrewcreamer1.jpg

I prefer my cold brew with creamer to add a hint of flavor and sweetness. After finding disappointment with dairy-free brands, I set out to create my own. As I often do for a dairy-free alternative, I reached for the can of full-fat coconut milk. While homemade coconut milk creamer works well in hot beverages, the fat separates to the top when it hits a cold beverage, rendering it undrinkable.

Almonds, however, do the job and do it well.

This homemade almond milk creamer holds together well in a cold drink and lends itself to customization. To give the creamer its creaminess, I follow a similar approach as I do with my recipe for homemade almond milk. The difference is that I add less water when blending so the almond milk is concentrated. 

IMG_0135-2.jpg

With pure vanilla extract for flavor and maple syrup to sweeten to taste, this homemade almond milk creamer is complete. I adore this creamer because it mimics the coffee house experience with simple, wholesome ingredients.

The coffee creamer may appear to separate if it is left to rest, but a quick swirl of the glass will bring it back to a uniform appearance. Use as much or as little as you like in your next glass of cold brew.


This cold brew with homemade vanilla almond milk creamer works as a great afternoon pick-me-up. Brewed with Dunkin' Donuts Cold Brew Coffee Packs, the coffee has a smooth, rich finish. I prefer to enjoy it with homemade creamer flavored with vanilla and sweetened with maple syrup, but you can customize the drink to your taste. Enjoy!

One Year Ago: Strawberry Scones
Two Years Ago: Chocolate Hazelnut Rolls
Three Years Ago: Blueberry Oat Bars (GF)  & Peanut Butter Chocolate Chunk Cookies (GF)
Four Years Ago: Chocolate Blackberry Cupcakes
Five Years Ago:  Sunflower Seed Bread, Blackberry Fool, Lime Curd Tart, & Honey Chocolate Chunk Cookies
Six Years Ago: Tiramisu Cake, Peanut Butter Cornmeal Cookies, Honey Wheat Cake, & Chocolate Almond Ice Cream
Seven Years Ago:  Chocolate-Filled Buns, Malted Chocolate Chip Cookies, & Parmesan Poppy Seed Crackers

Cold Brew with Vanilla Almond Milk Creamer

Yields 6 servings

1 pouch Dunkin’ Donuts Cold Brew Coffee Packs
1 cup (120 grams) raw almonds
3 1/2 cups (830 mL) filtered water, divided
3-5 tablespoons maple syrup, to taste
2 teaspoons pure vanilla extract

The cold brew and almond milk creamer need to be started the evening before serving.

To prepare the cold brew coffee, follow the directions according to the package.

To prepare the almond milk creamer, place almonds in a container and cover with 2 cups filtered water. Seal container and allow to soak overnight, for at least 8 hours or up to 2 days.

Strain almonds and rinse with fresh water. (The almonds release phytic acid while soaking, which prevents the body from absorbing nutrients; rinsing the almonds removes this acid.) Place almonds and 1 1/2 cups filtered water in a blender. Blend on high for 2-3 minutes. Using a nut bag, layered cheesecloth, or fine mesh strainer, strain the almond milk to remove the pulp. If using the fine mesh strainer, run the milk through several times to eliminate pulp. The leftover pulp can be used in smoothies, muffins, or bread, or it can be dehydrated and used in the same manner as almond flour. Add maple syrup and vanilla extract to the almond milk.

Keep the almond milk creamer refrigerated. It should stay fresh for 5 to 7 days. The creamer may undergo separation in the refrigerator. Give the creamer a good shake and it will come back together quickly.

To prepare the cold brew coffee drink, place prepared cold brew in a glass with ice and add almond milk creamer to taste. For best results, freeze some of the cold brew into ice cubes in advance. This method keeps the cold brew chilled and prevents it from getting watered down as the ice melts.


©The J.M. Smucker Company © 2017. DD IP Holder LLC

Coconut Cake

IMG_9586-2.jpg

So this is thirty. Another year around the sun, another number added to my age.

When I was younger, my 30th birthday appeared so far away. The only experience with 30th birthdays I had to rely on was a Friends episode—"The One Where They All Turn Thirty." As the show flashbacked with vingettes of everyone's milestone birthday, I falsely assumed that as I aged I would have as many regrets and crying episodes as the characters.

But, at thirty years old today, I feel right. I feel none of the anxiety and distress as I did on my 25th birthday when I despaired that my childhood was over. There have been no tears, crises, or wishful holds onto my youth. Instead, I feel at peace with myself.

I'm finally at a place in my life where everything is coming together.

coconutcake1.jpg
IMG_9594-2.jpg

It was a big year for me. After an exhausting home search, I moved into my dream house last June with Chris, my boyfriend of eight years. Almost a year later, we've added our own personality to the space (though there are still many projects left to go). Even though I resisted it for many years, it feels good to put down roots.

I'm wrapping up my third year at my current high school as a science teacher. Although the change to pursue teaching instead of baking was an unexpected turn in my life, these students have created a place in my heart. I cannot imagine I will ever tire of watching them learn and grow as young adults during the time we have together.

And, because I don't have enough on my plate, I also thought it was a good idea to take 18 graduate credits this spring on top of working a full-time job and blogging. News flash: It was a terrible idea, but I survived. Who enjoys free time anyway? Not me, apparently.

IMG_9598-2.jpg

This past year I also fell back in love with baking. I've had mixed feelings about baking and blogging the last few years, finding the responsibility exciting one day and like a chore the next. After realizing that I was holding myself to impractical standards (that were not right for me anyway), I loosened the expectations I had for myself.

In this reinstated freedom, I rekindled a new love for a longtime hobby. 

The idea for this coconut cake has been in my head for years. I held myself back, though, waiting until I felt an occasion was "special" enough to turn it from dream into reality. Eventually I realized that this line of thinking was ridiculous—why was I stopping myself from enjoying a cake infused with one of my favorite flavors?

This coconut cake features coconut in every component. The cake is made with coconut oil, coconut milk, and coconut extract for an added touch. Covered in coconut whipped cream and sprinkled with toasted coconut, the cake is truly a coconut lover's dream. I enjoy the cake with an extra dollop of whipped cream and a handful of berries on top every slice. I recommend you do the same.

Cheers to another year, my friends. May we enjoy growing older as much as we enjoy eating cake!

IMG_9633-2.jpg

This Coconut Cake starts with a coconut infused batter. The cake itself falls on the denser side of the spectrum, but stays fresh and moist. Topped with coconut whipped cream and toasted coconut flakes, the cake is ready to be served. Enjoy with an extra dollop of whipped cream and a handful of fresh berries.

One Year Ago: Rhubarb Almond Cake
Two Years Ago: Chocolate Banana Baked French Toast
Three Years Ago: Perfect Pie Crust (Tutorial) & Berry Balsamic Pie
Four Years Ago: Roasted Strawberry Red Wine Popsicles & Berry Topped Angel Food Cake
Five Years Ago: Strawberry Charlotte, Fresh Strawberry Cake, Whole Wheat WafflesChocolate Hazelnut Banana Bread, & White Chocolate Espresso Cake
Six Years Ago: Rhubarb Ginger Muffins, Coconut Waffles, Multigrain Bread, & Vanilla Cupcakes
Seven Years Ago: Pina Colada Cupcakes, Strawberry Rhubarb Lemonade, & Roasted Cherry Brownies

Coconut Cake

Yields 12-16 servings

1 1/2 cups (300 grams) granulated sugar
3/4 cup (180 mL) coconut oil
4 large eggs, divided
2 teaspoons vanilla extract
1 teaspoon coconut extract
1 teaspoon salt
2 teaspoons baking powder
2 1/2 cups (300 grams) all-purpose flour
1/2 cup (125 mL) canned coconut milk
1/2 cup + 2 tablespoons (150 mL) milk
Coconut Whipped Cream, for topping
1 cup (60 grams) toasted coconut flakes, for topping

Preheat oven to 350 degrees F (180 degrees C). Heavily grease and flour a 10-cup tube or bundt pan. Set aside.

In a large mixing bowl, whisk together the granulated sugar, coconut oil, 4 egg yolks, vanilla extract, coconut extract, salt, and baking powder until uniform. Alternate adding the flour, coconut milk, and milk, stirring after each addition until the batter is smooth and uniform in appearance. 

In a separate mixing bowl, beat the 4 remaining egg whites until stiff peaks form. Gently fold the egg whites into the cake batter just until uniform.

Pour batter into the prepared baking pan and bake for 45-55 minutes, or until a toothpick inserted into the center comes out clean. Allow cake to cool in pan for 15 minutes before unmolding and cooling completely.

Immediately before serving, top the cake with a layer of coconut whipped cream and toasted coconut flakes. Serve with an additional side of whipped cream and berries.

Refrigerate leftovers. Allow the cake to come to room temperature before serving for best texture.