Swedish Tea Ring

Starting the morning with sweet rolls warm from the oven makes the holiday season feel more special. Whether on Christmas morning, after the stockings have been opened, or to recover from a late evening on New Year's Eve, the smell of yeast creates sweet memories. In years past, I have made chocolate hazelnut rollsalmond cardamom rolls, and cinnamon sugar swirl bread. This year I have been testing out the Swedish Tea Ring, a sweet bread similar to a cinnamon roll, but in a shape that is better suited for sharing.

In partnership with King Arthur Flour, each month I want to challenge you with a new recipe, filled with step-by-step explanations and techniques, to help you grow and develop as a baker. This month we're tackling sweet yeasted dough. Just as coffee cakes are meant to be served alongside a cup of coffee, the Swedish Tea Ring is meant to be served with a mug of hot tea. Swedish Tea Rings come in a variety of forms, some with fresh fruit and some with dried fruit, but the most common ingredient is finely chopped nuts. 

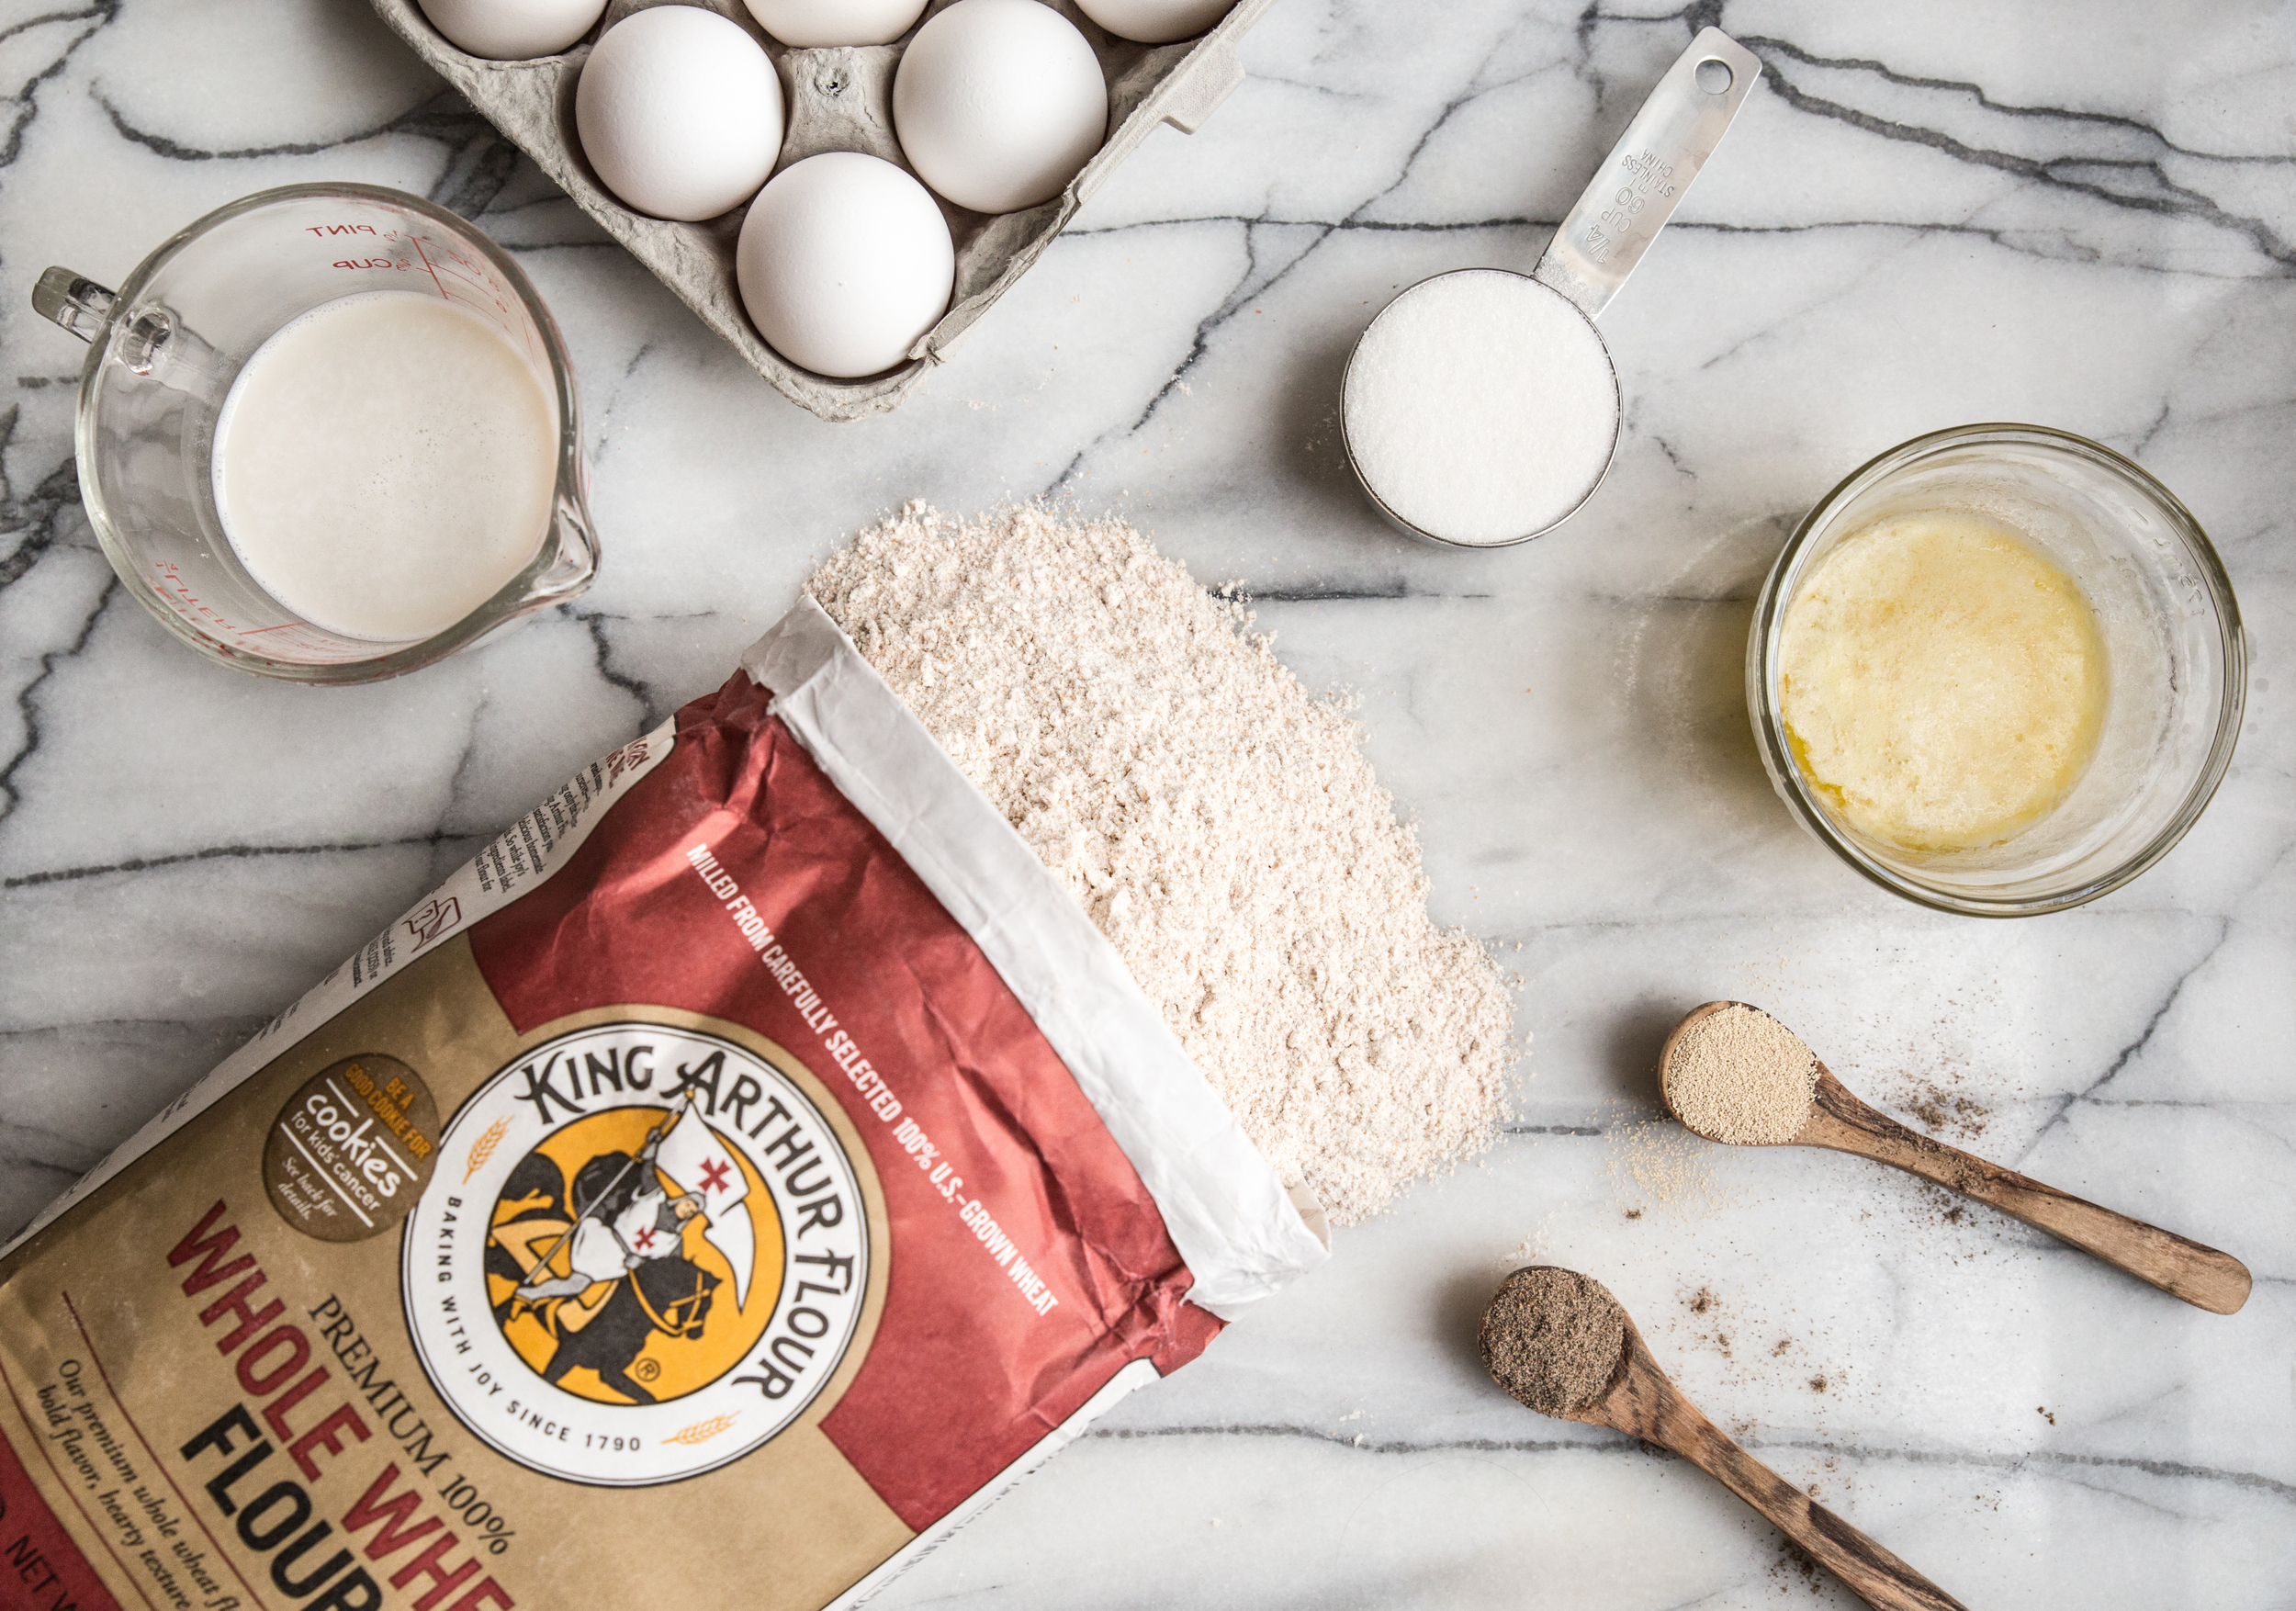
This dough combines a mixture of whole wheat and all-purpose flour. Whole wheat flour is a healthier alternative to white flour and has a nutty undertone, which complements the almonds in the recipe. Sweet dough has higher levels of fat, sugar, and egg than traditional dough, which keeps the bread soft and tender after baking. This recipe uses milk and butter to retain moisture in the final product. The dough is also spiced with ground cardamom to give it additional warmth in flavor.

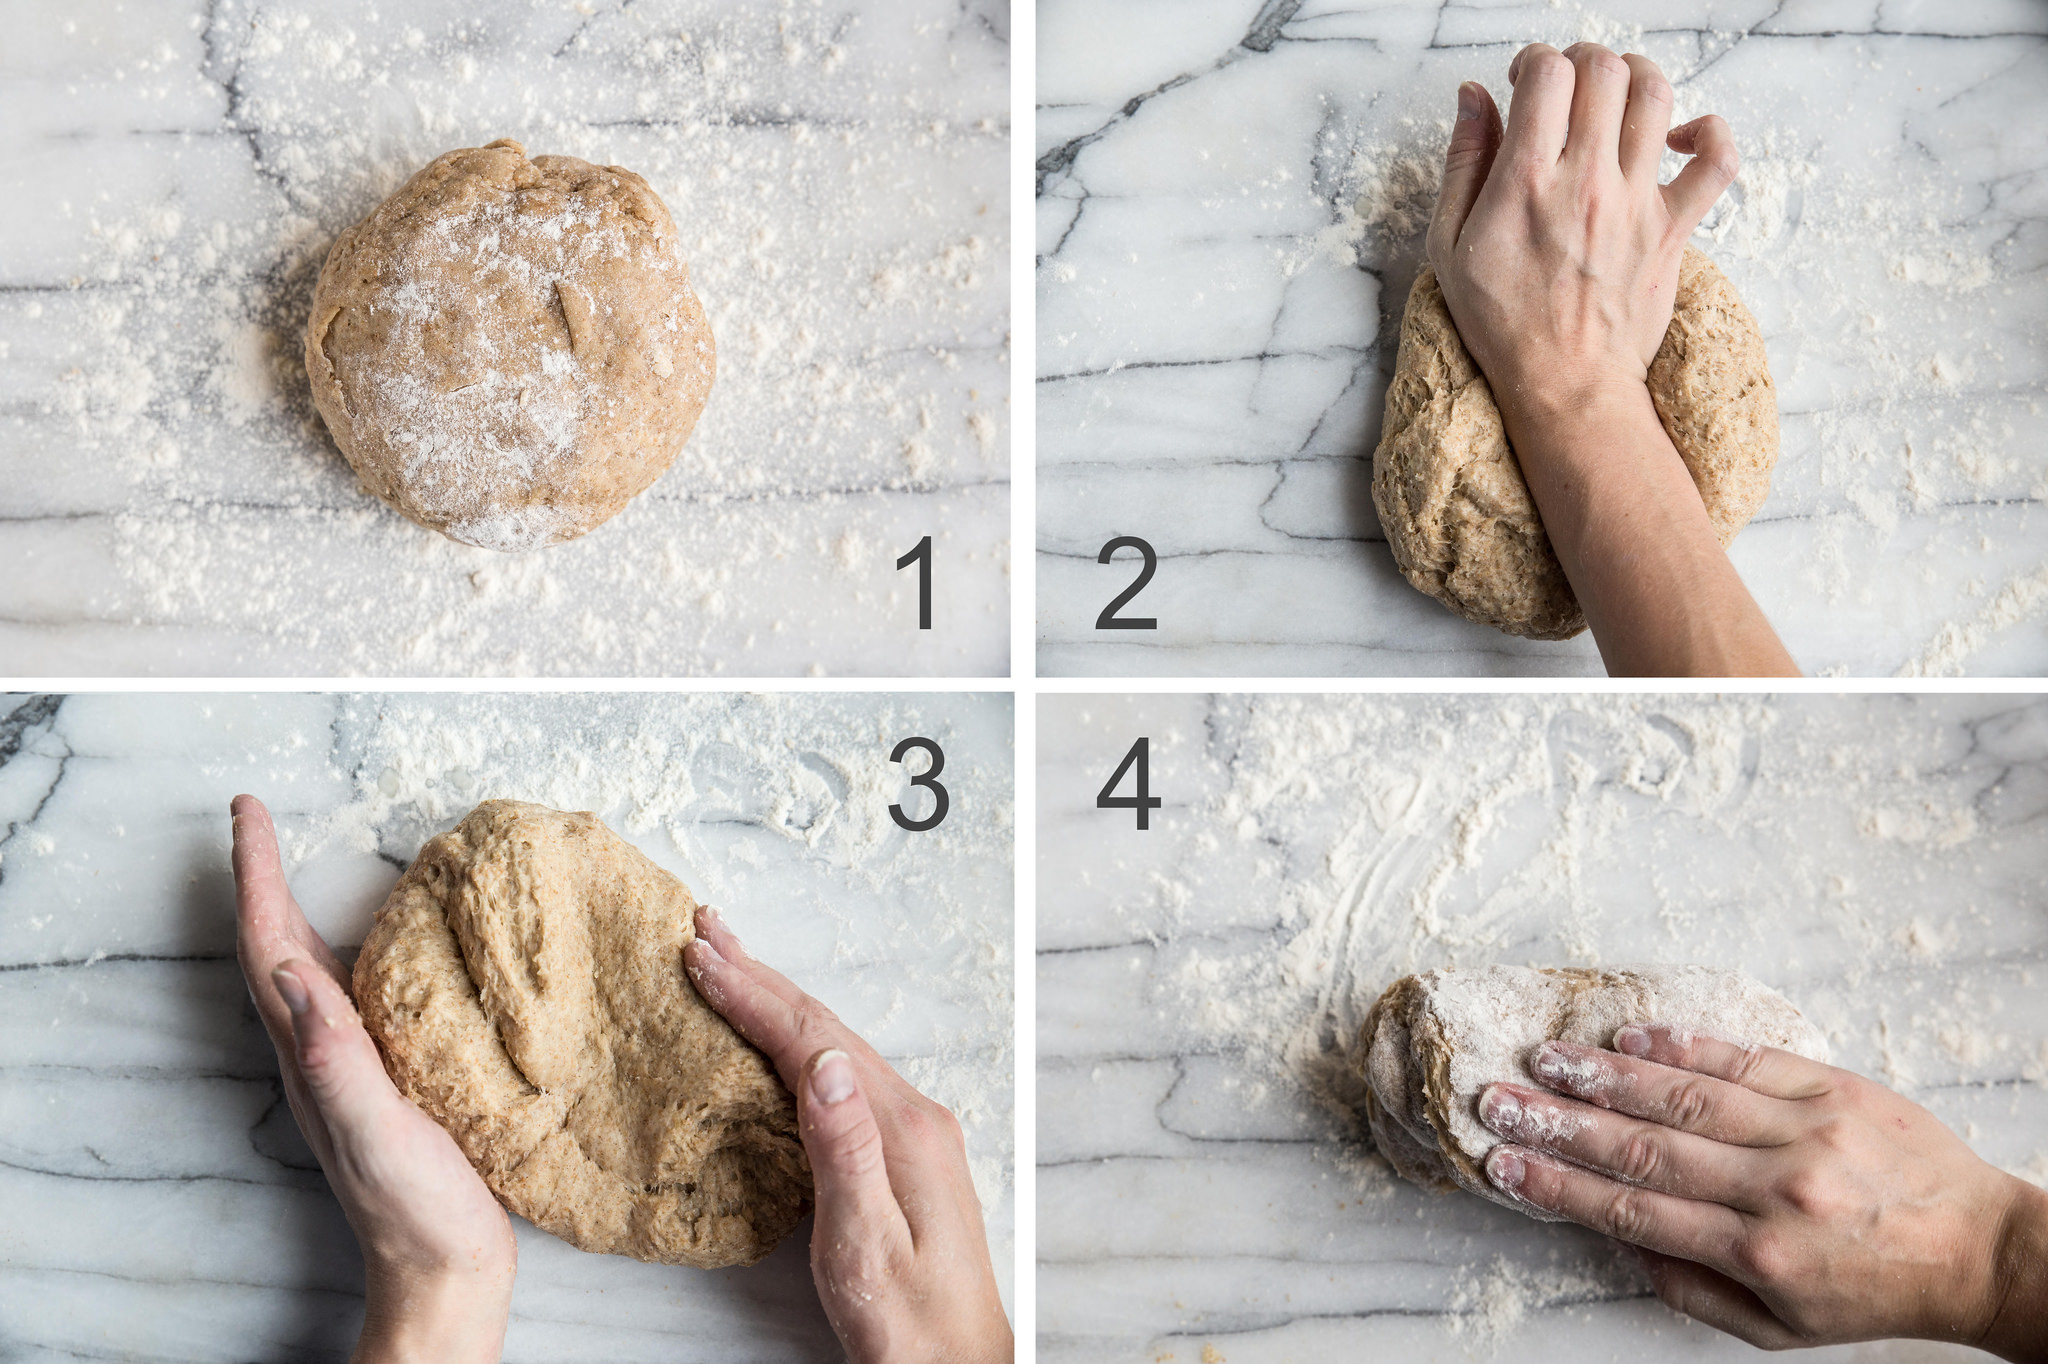
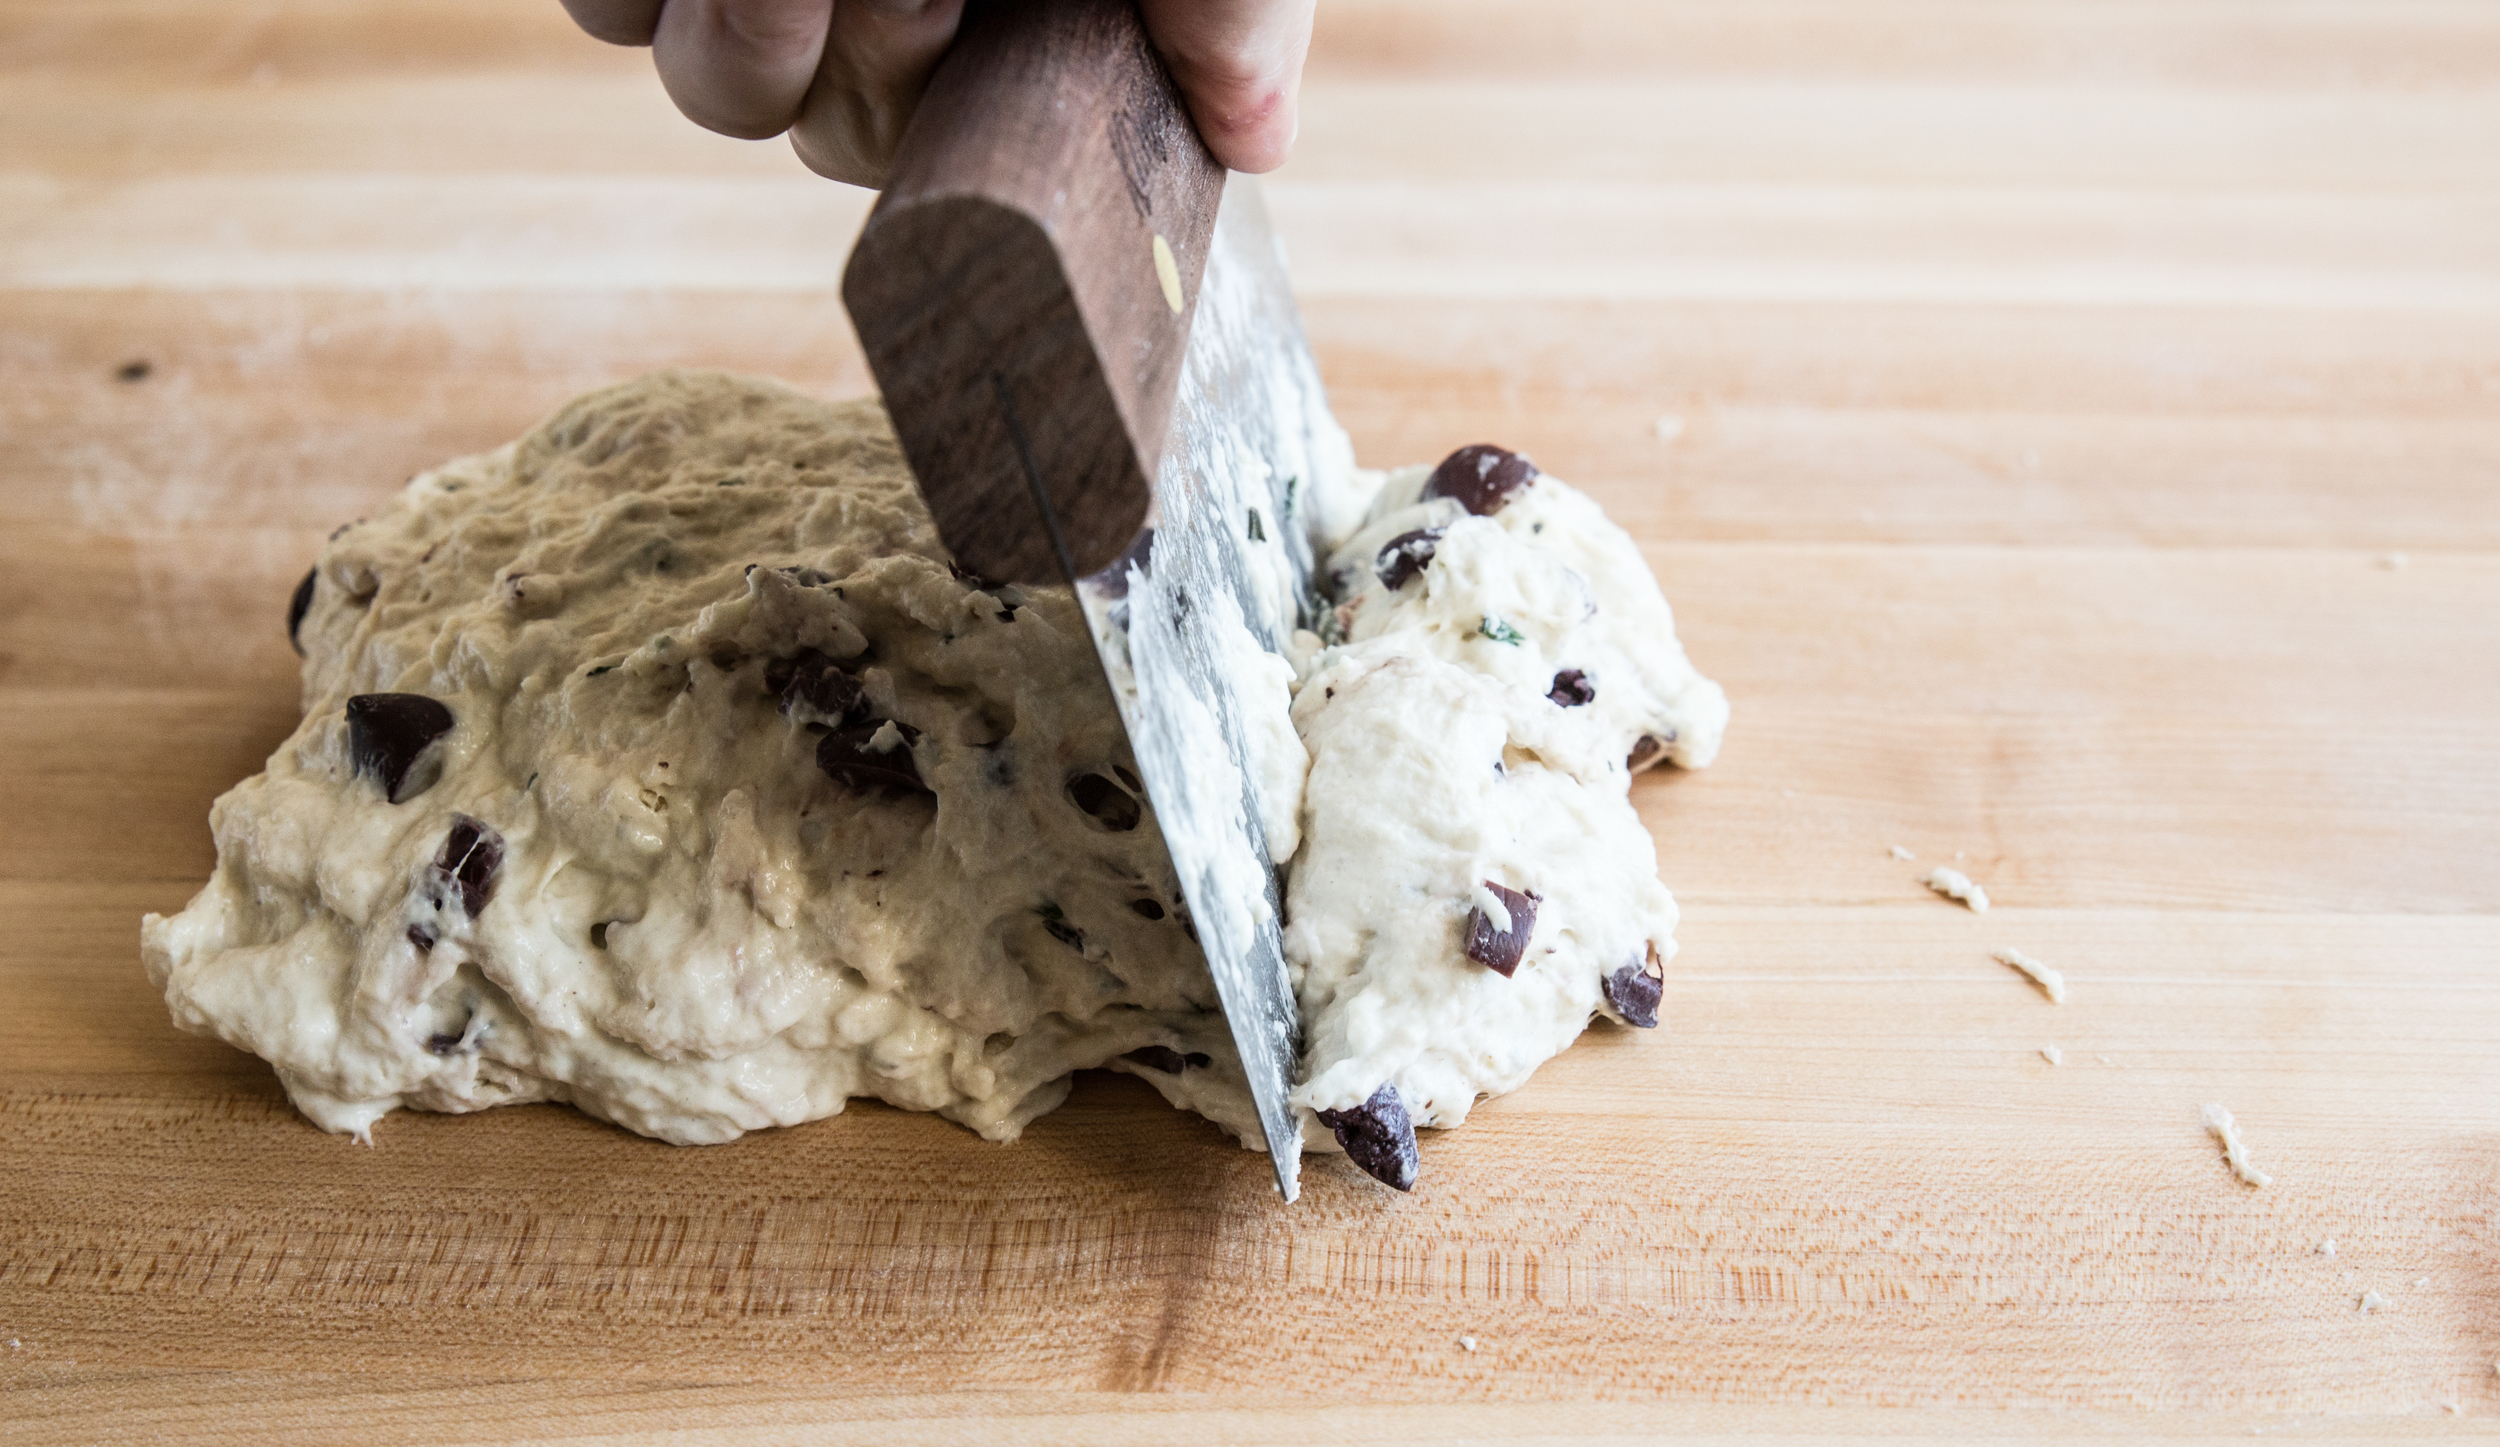
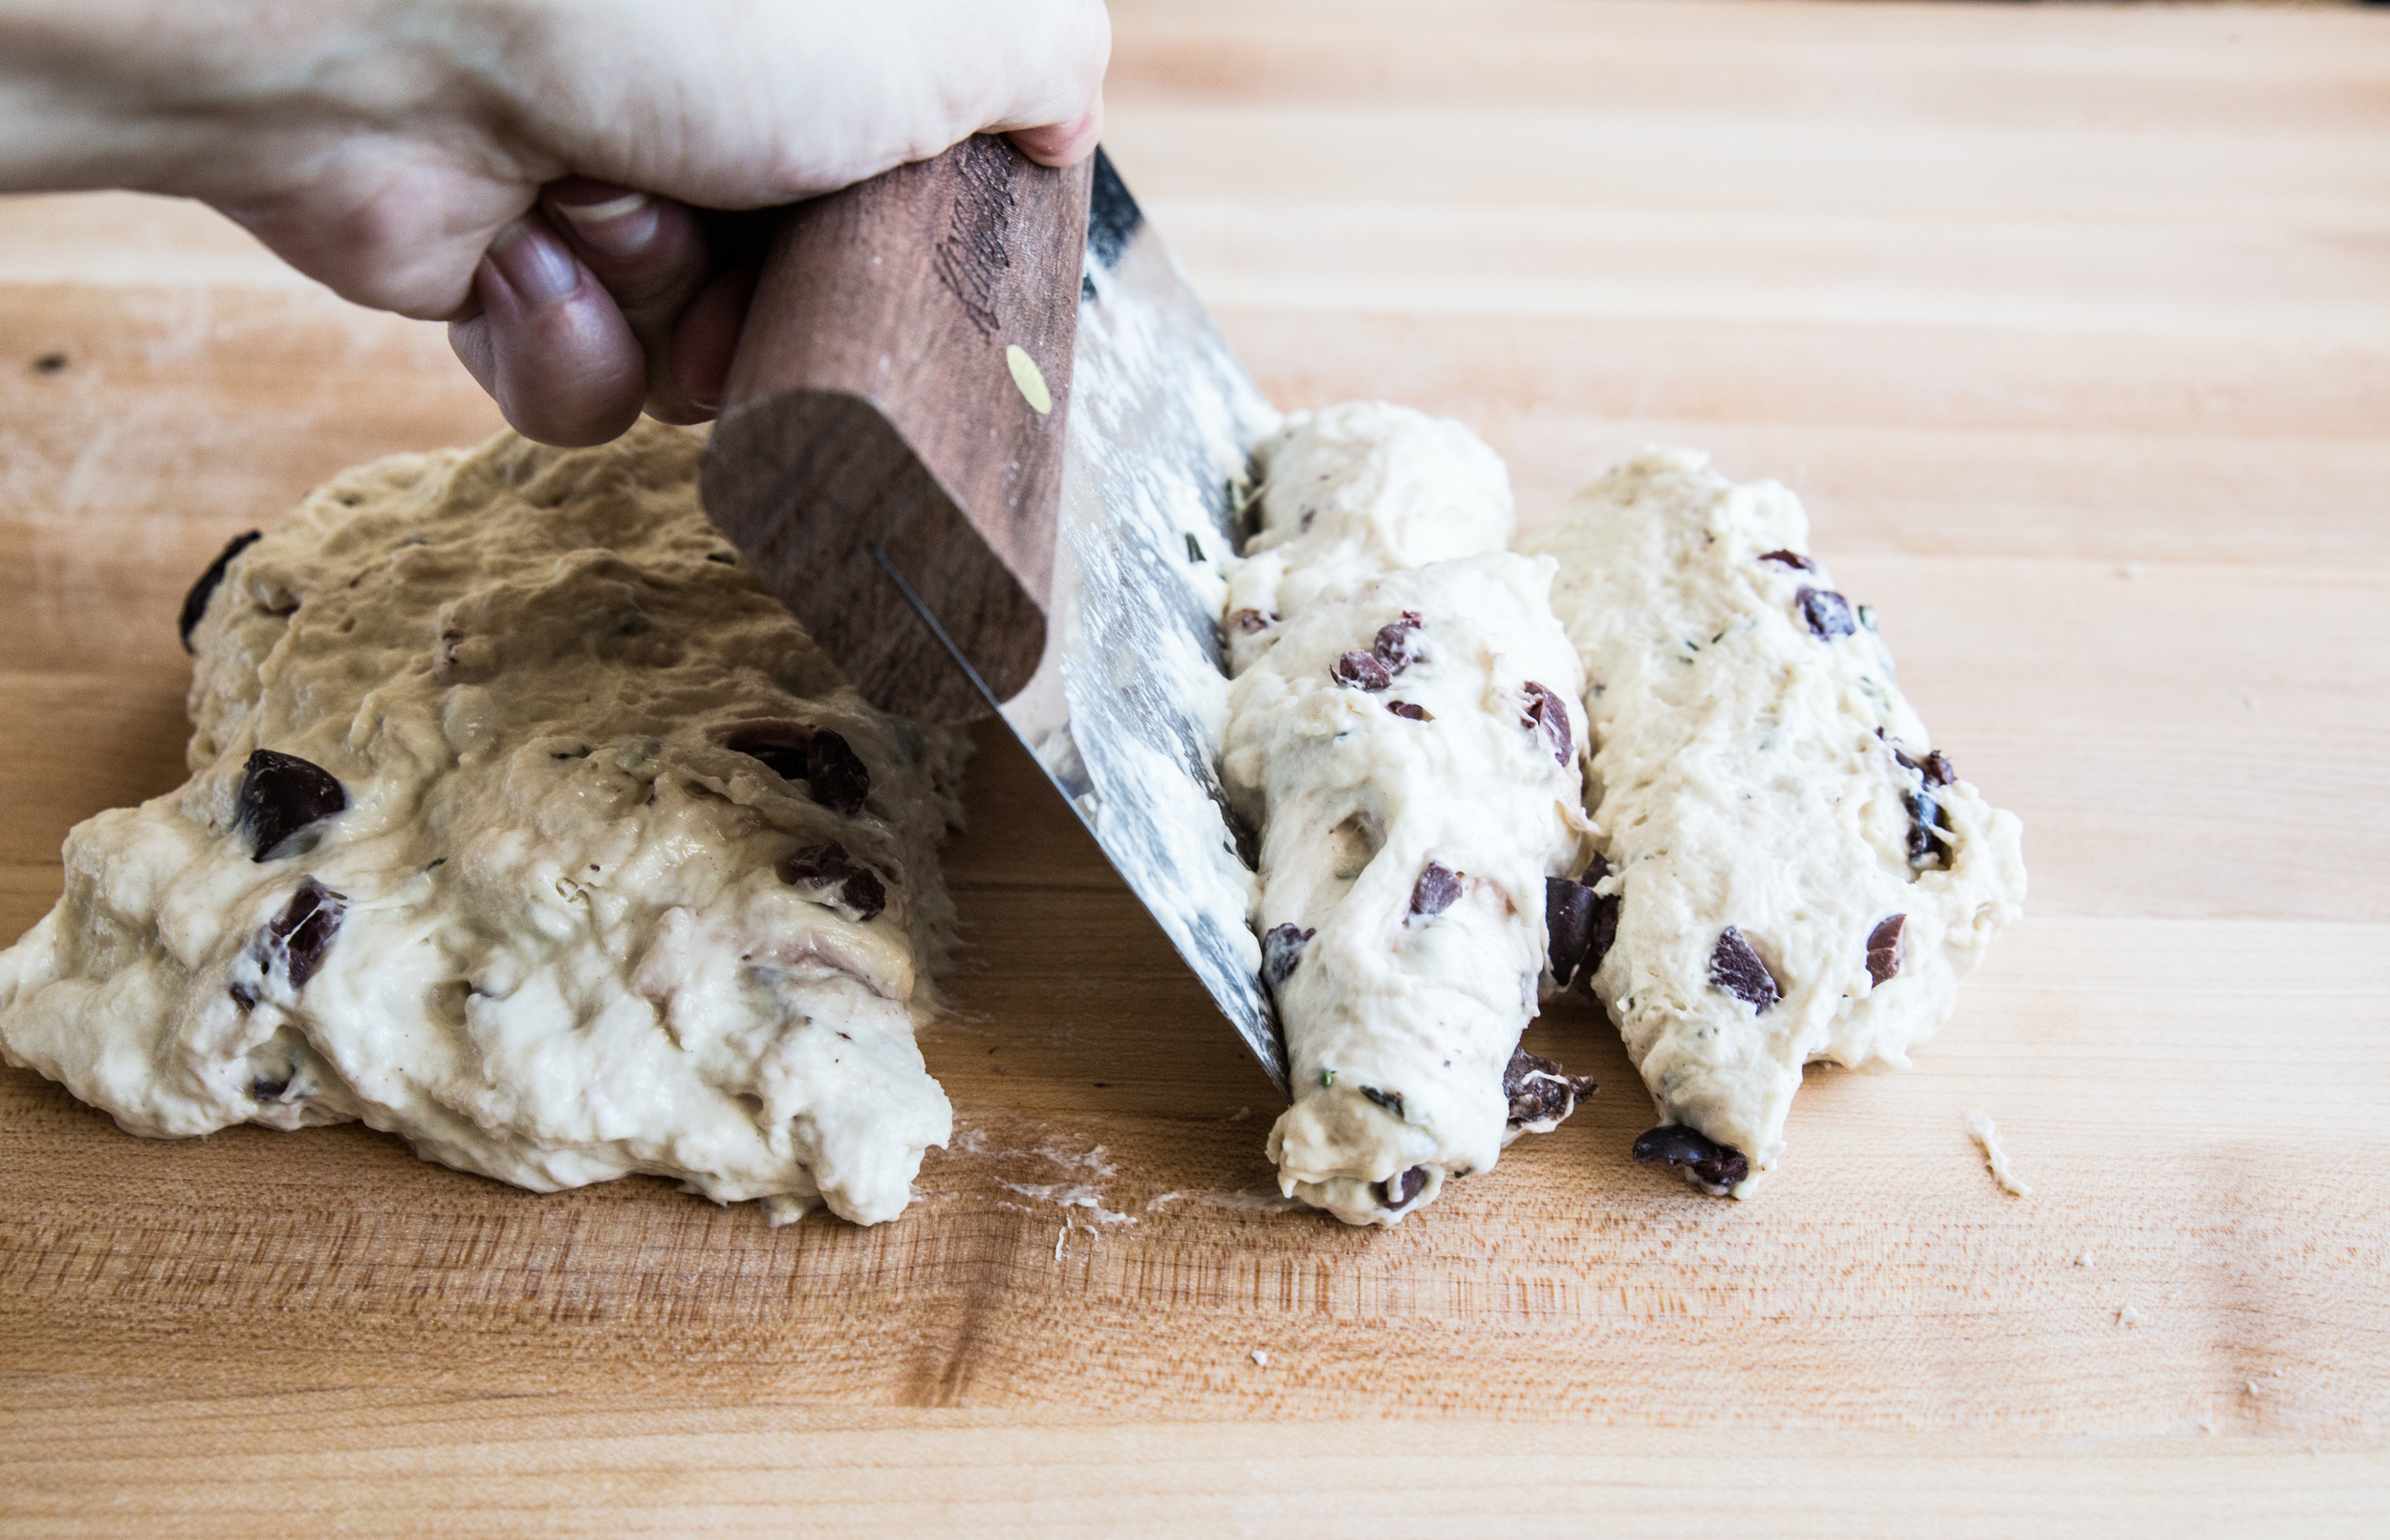
After the dough is mixed together, it must be kneaded to develop gluten before rising. (1) To begin kneading, bring the dough into a ball shape on a lightly floured surface. (2) Using the heel of your hand, push the dough downwards at an angle to stretch it away from you. (3) Rotate the dough 90 degrees. (4) Fold it in half and repeat, beginning with step 2. As the dough is kneaded, you will be able to feel the dough firm up as the gluten forms. As the texture of the dough changes, the dough will also require less flour and may be easier to knead on a flour-less surface. If too much flour is incorporated into the dough, it will become stiff and difficult to work with; take care not to sprinkle too much flour on the surface. 

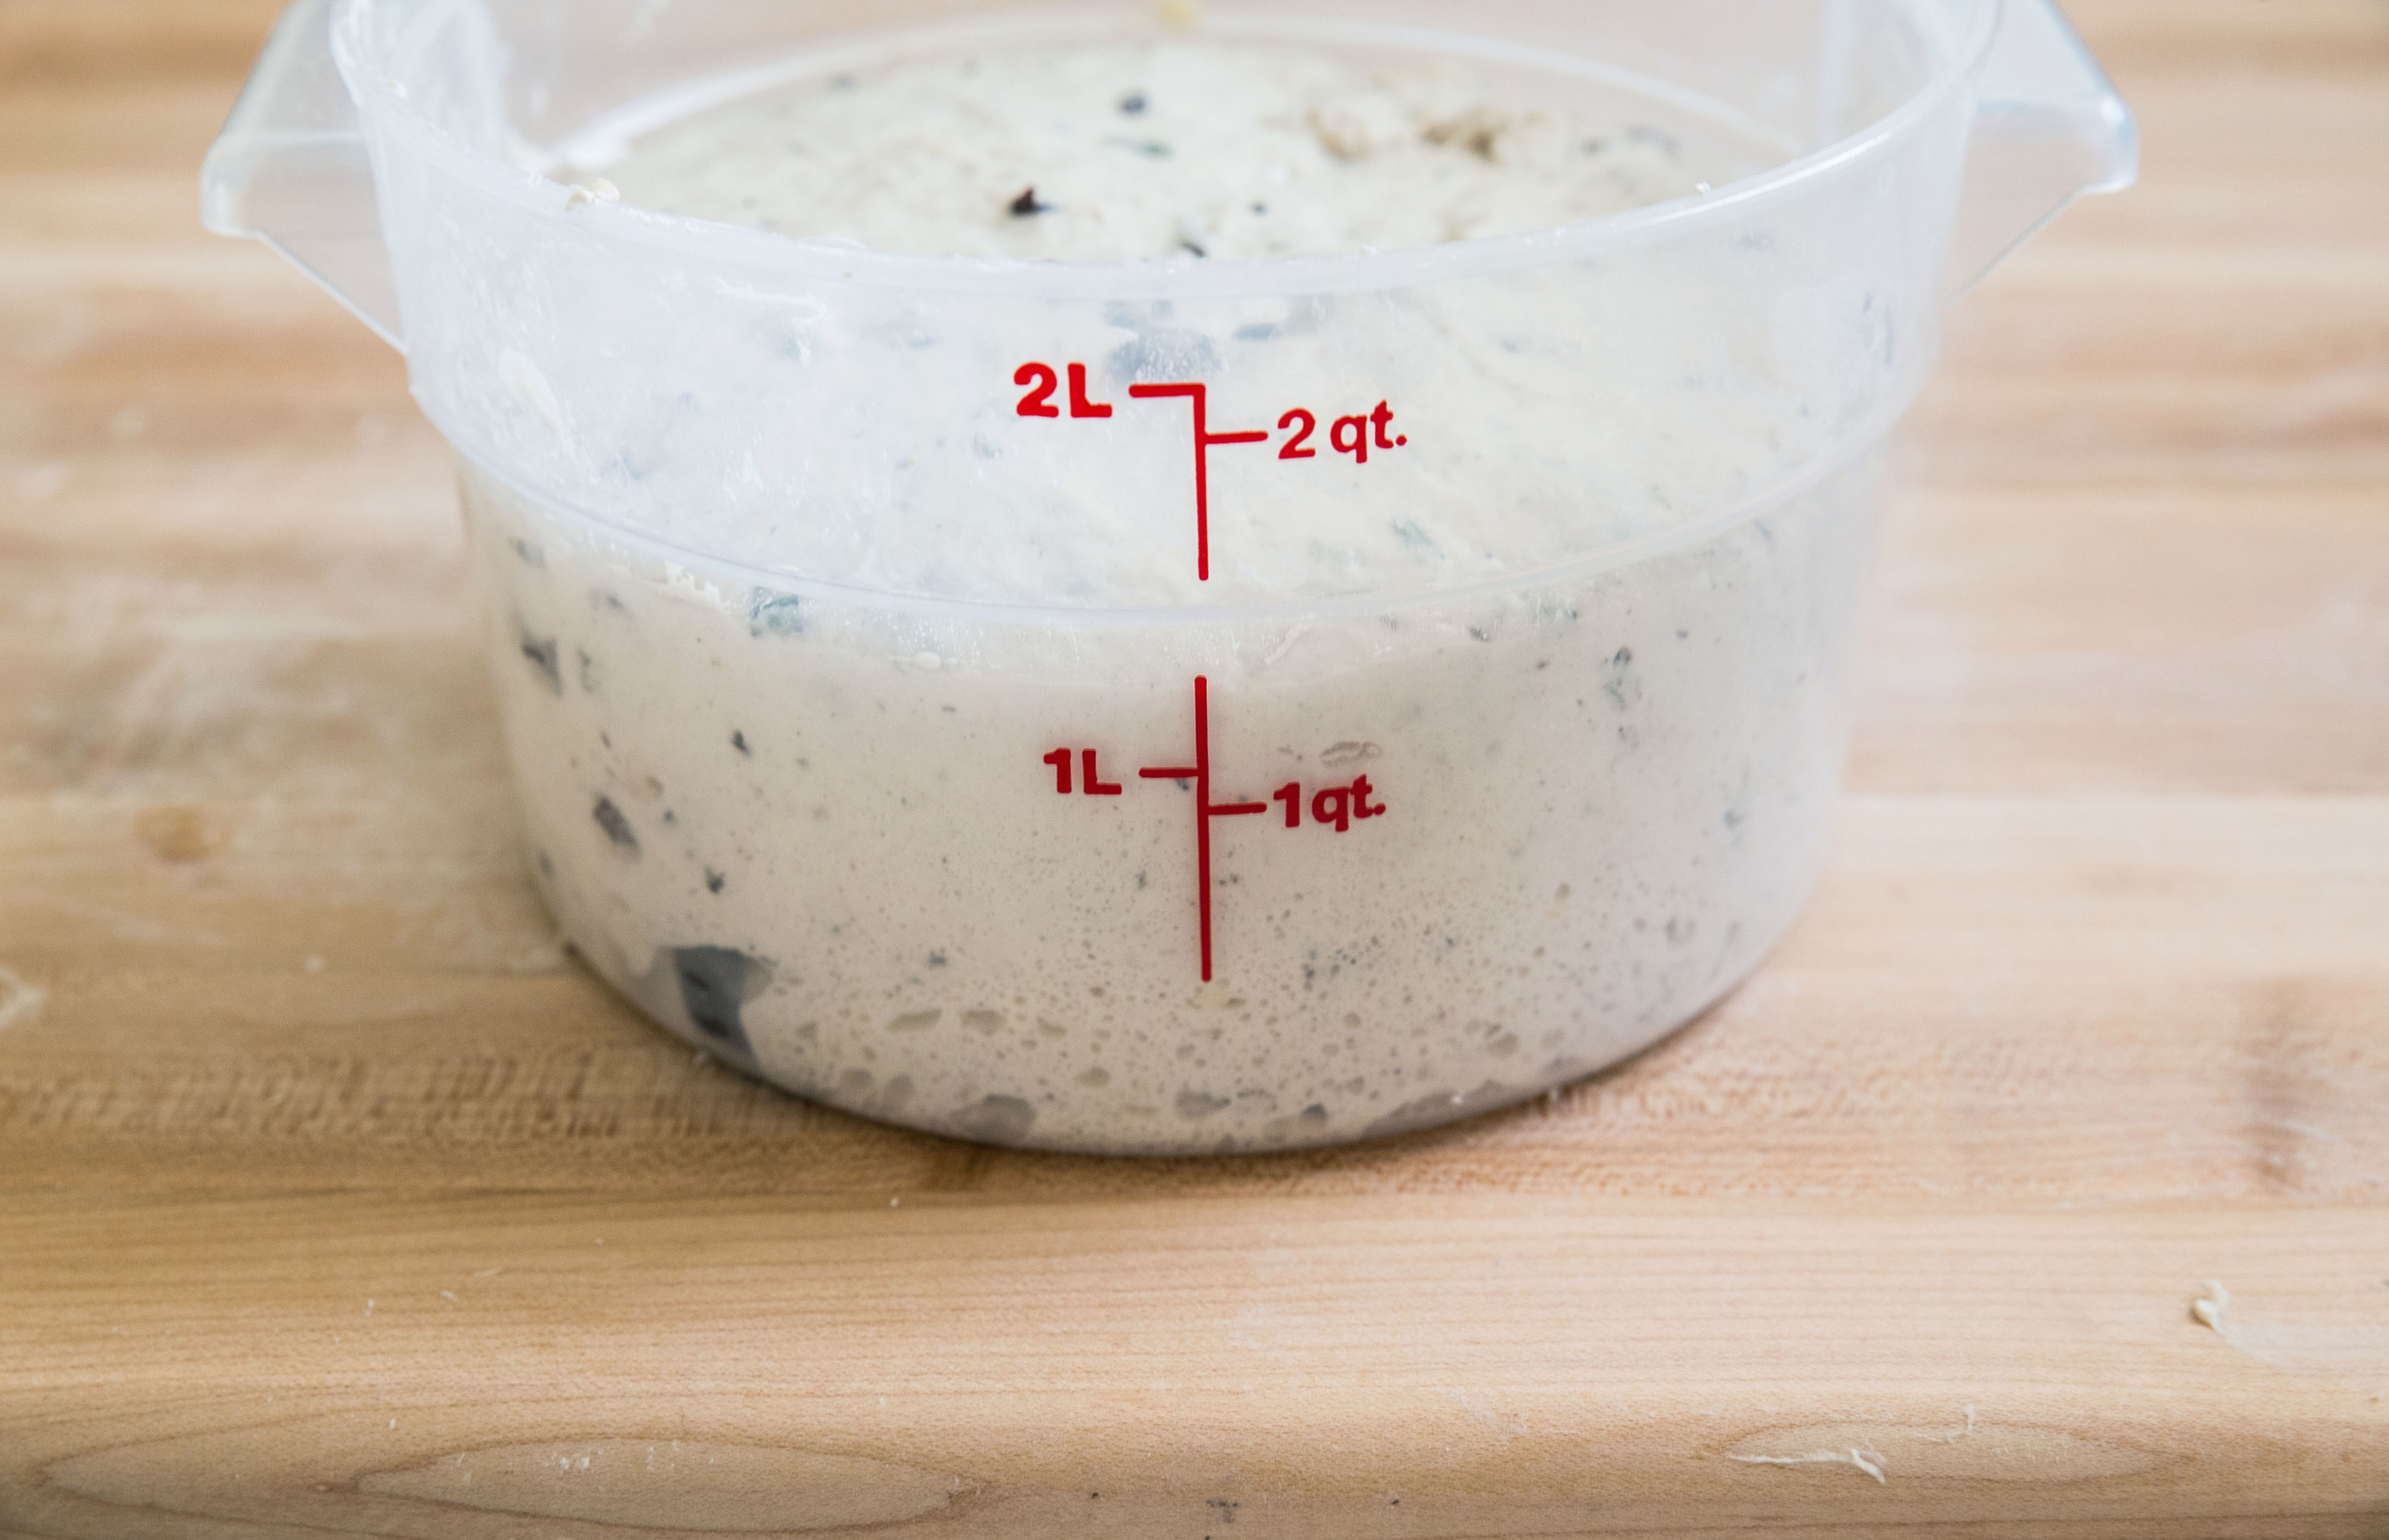
After 7-10 minutes of kneading by hand, the dough will begin to feel elastic and spring back under your touch. I prefer to knead by hand to feel the texture of the dough change (and for the personal relaxation that comes from repetitive motion), but directions for kneading by machine are included in the recipe below. Place in a bowl, cover, and allow to rise for 1-2 hours.

The filling contains a mixture of butter, cinnamon, and demerara sugar. Demerara sugar is a partially unrefined, raw sugar. It has larger crystals than brown sugar, but a similar caramel and molasses flavor profile. If you do not have demerara sugar on hand, brown sugar can be used as an alternative. 

After the dough has risen, roll it out into a 12 x 18-inch rectangle. Take care not to use too much flour on your work surface or the dough will be more difficult to roll out. It is best if it lightly sticks to the surface because the dough will better hold its shape. Evenly coat the dough with the brown sugar mixture and sprinkle on a layer of finely chopped almonds. In the photograph below, the almonds are uneven in sizetry to avoid this. The filling retains a better texture when the nuts are chopped small and evenly sized.

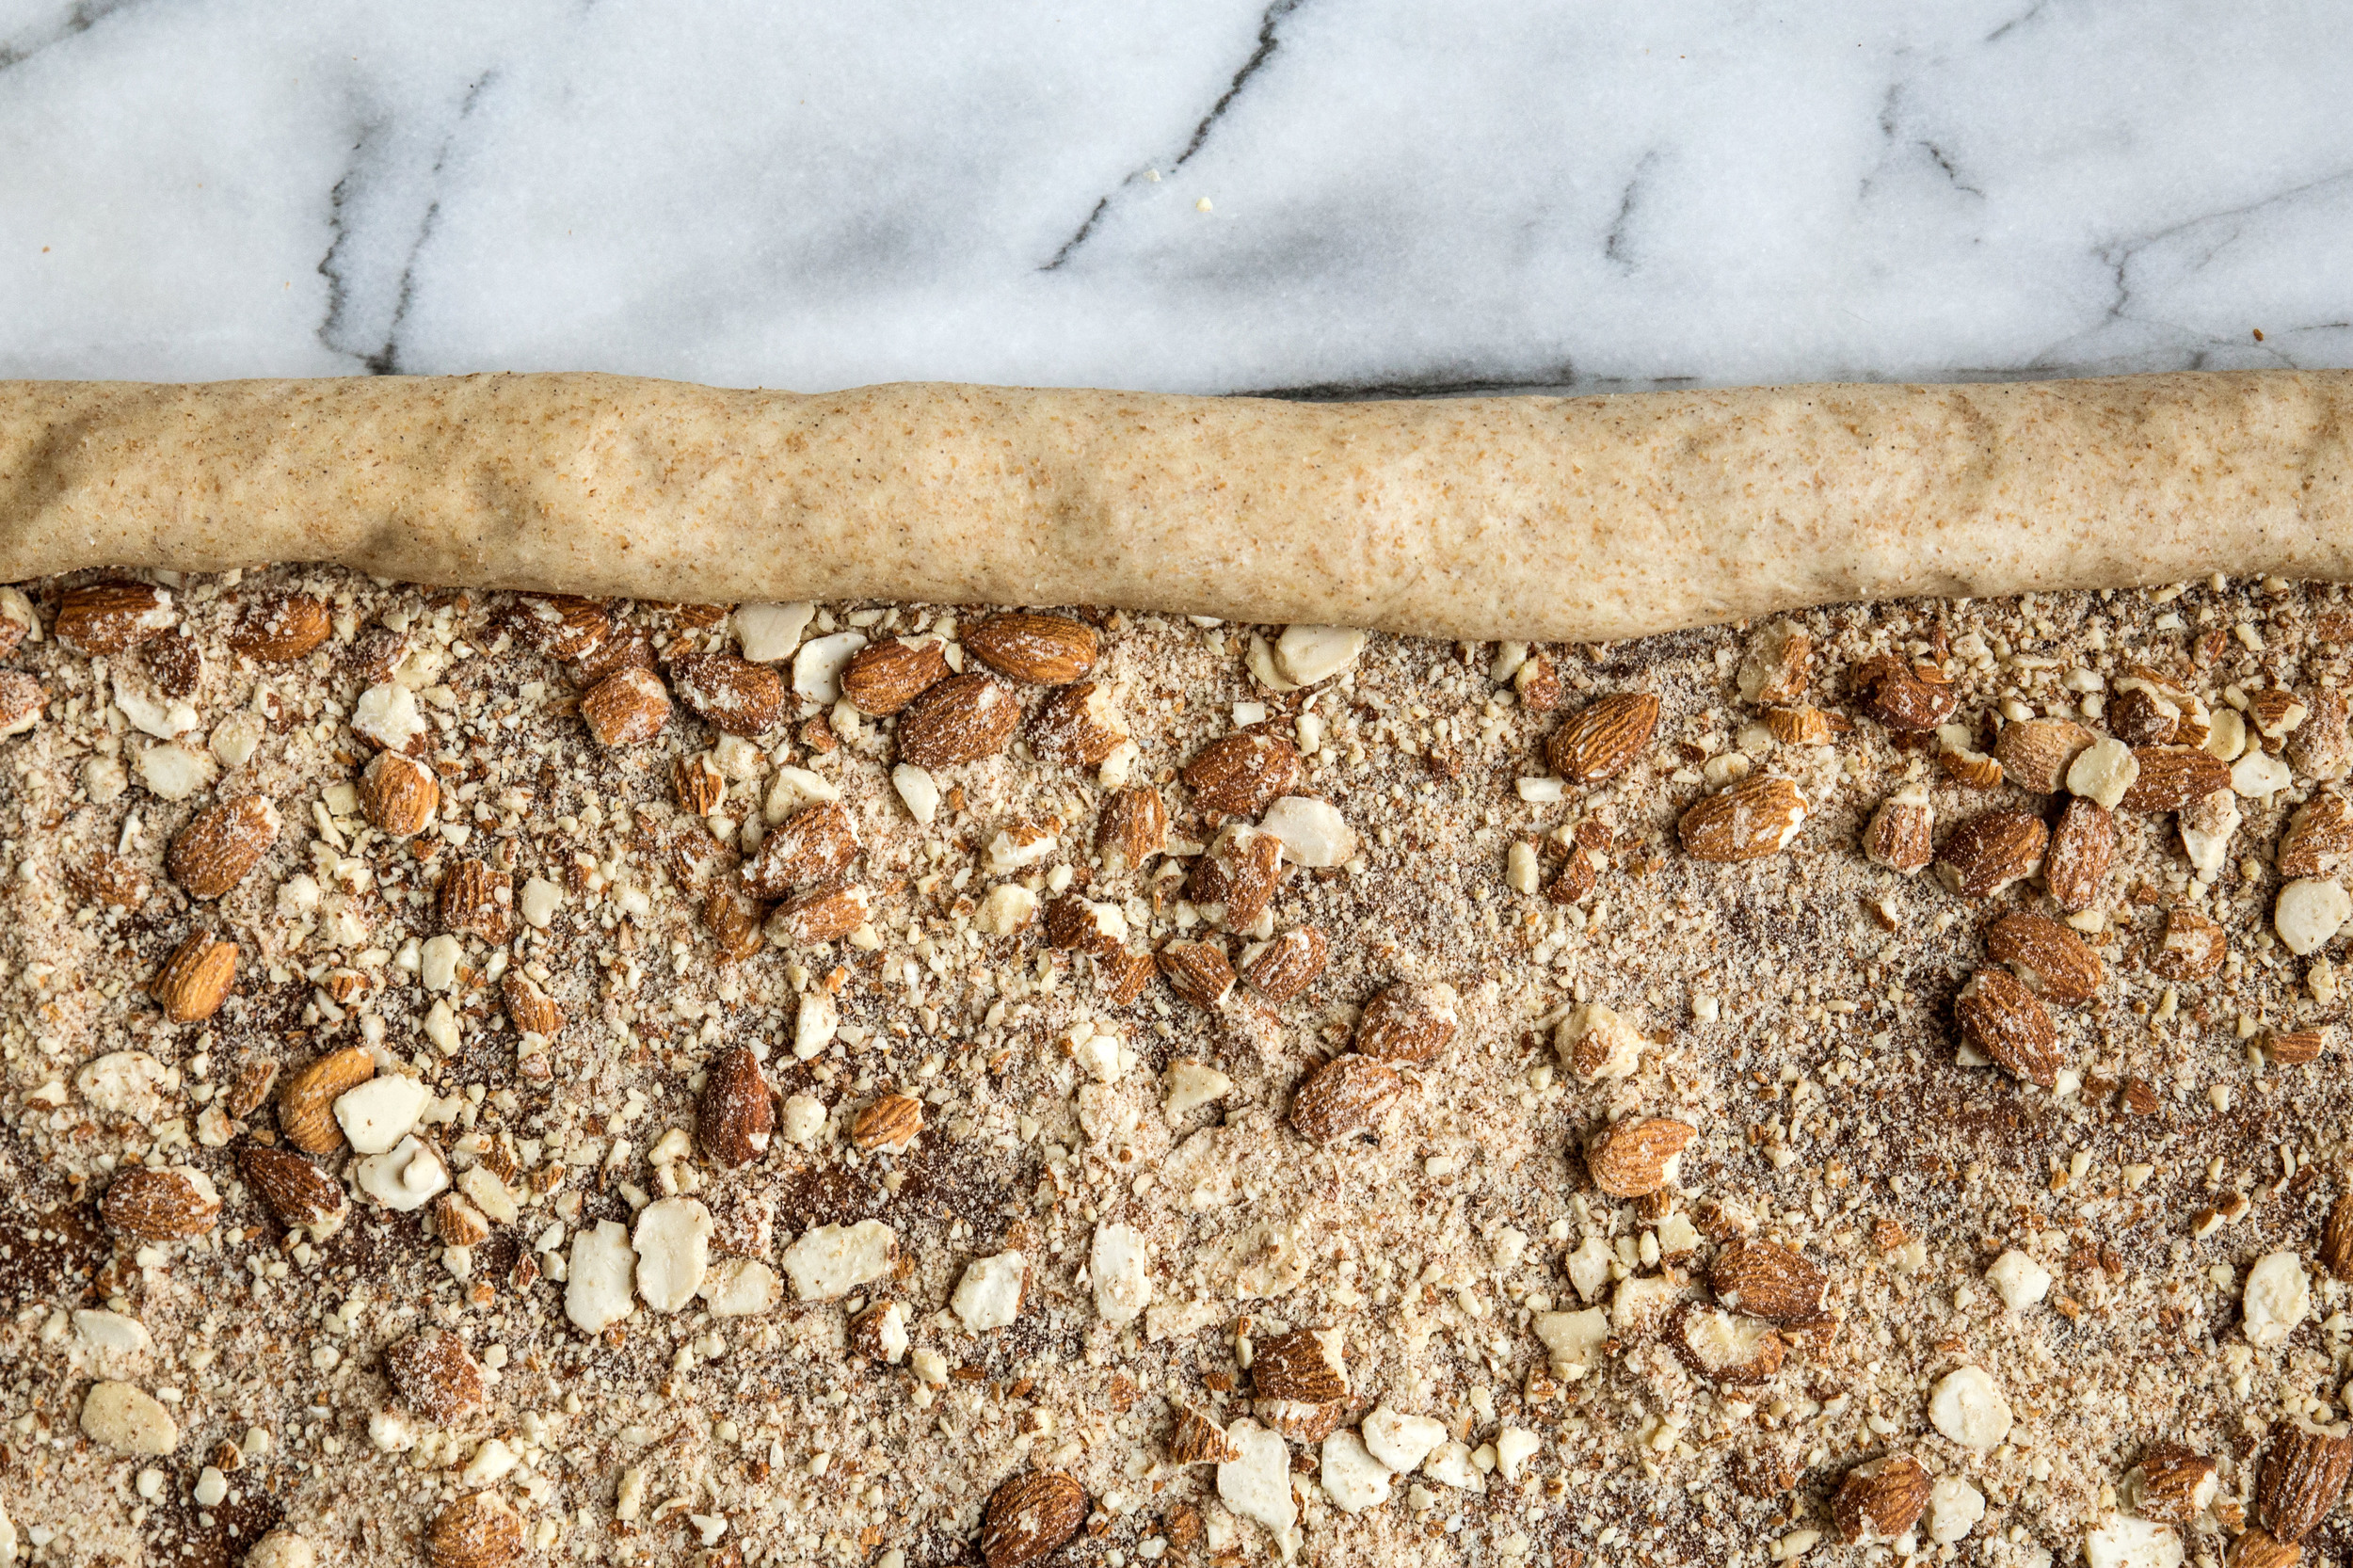
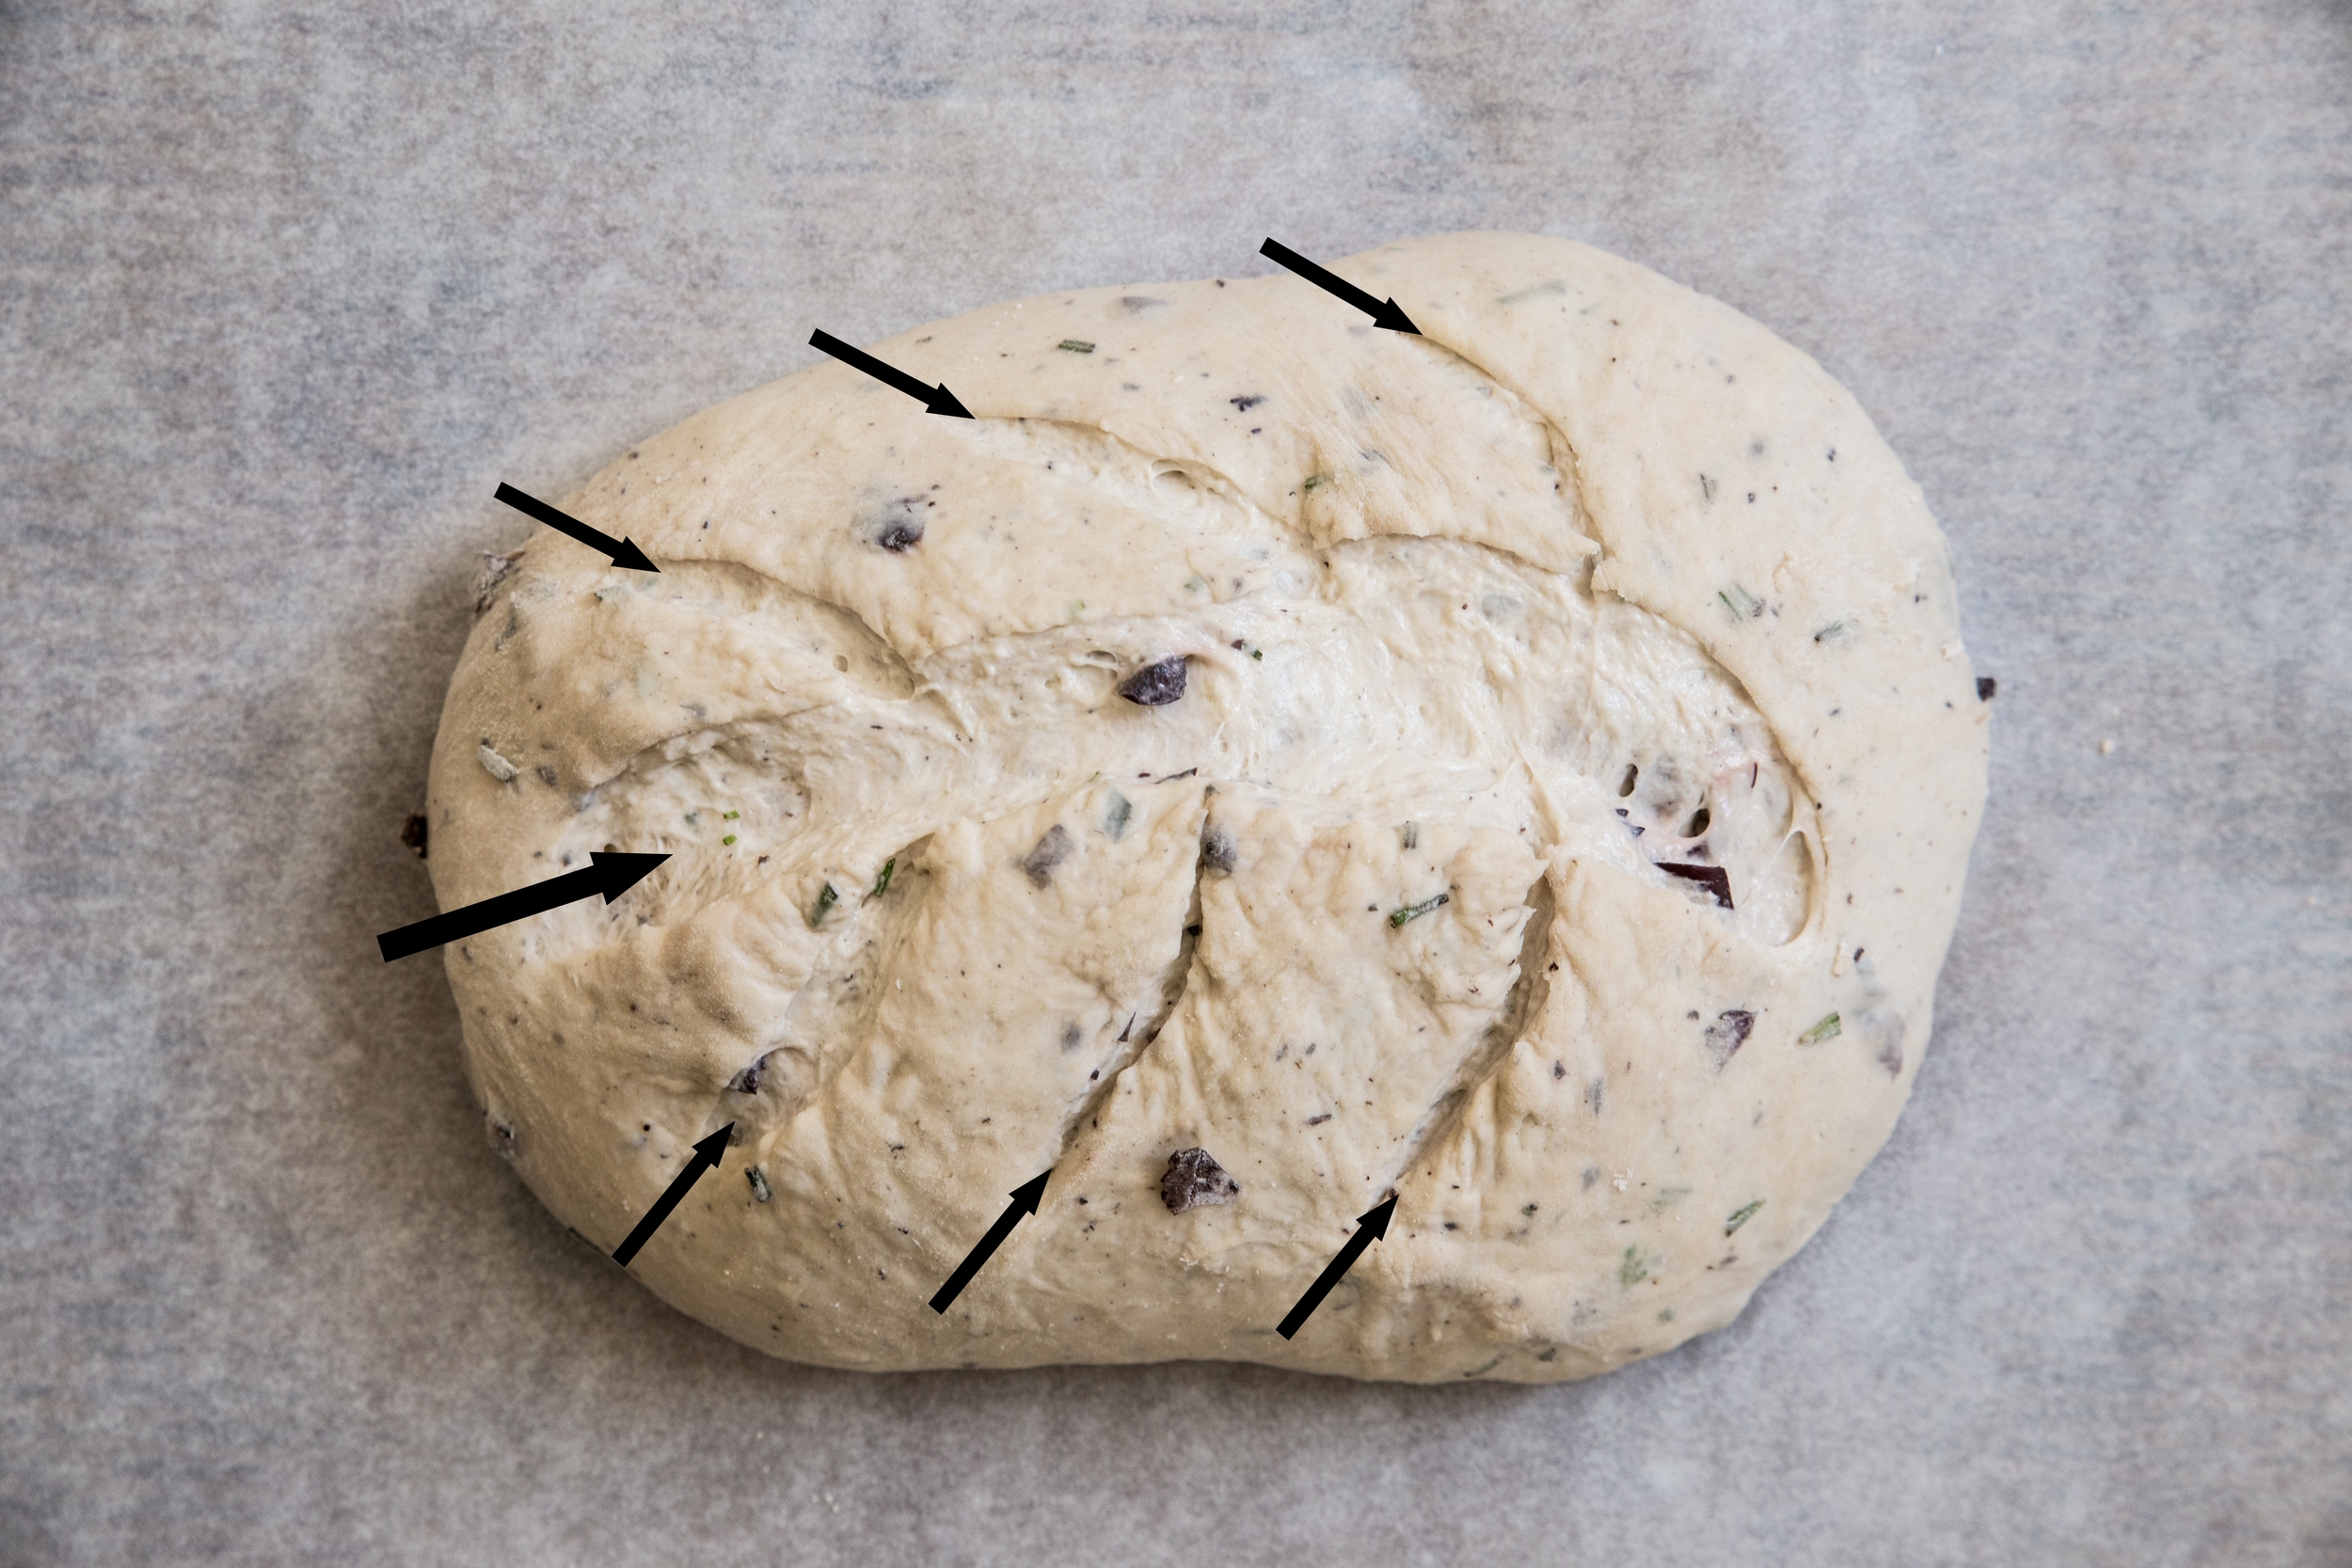
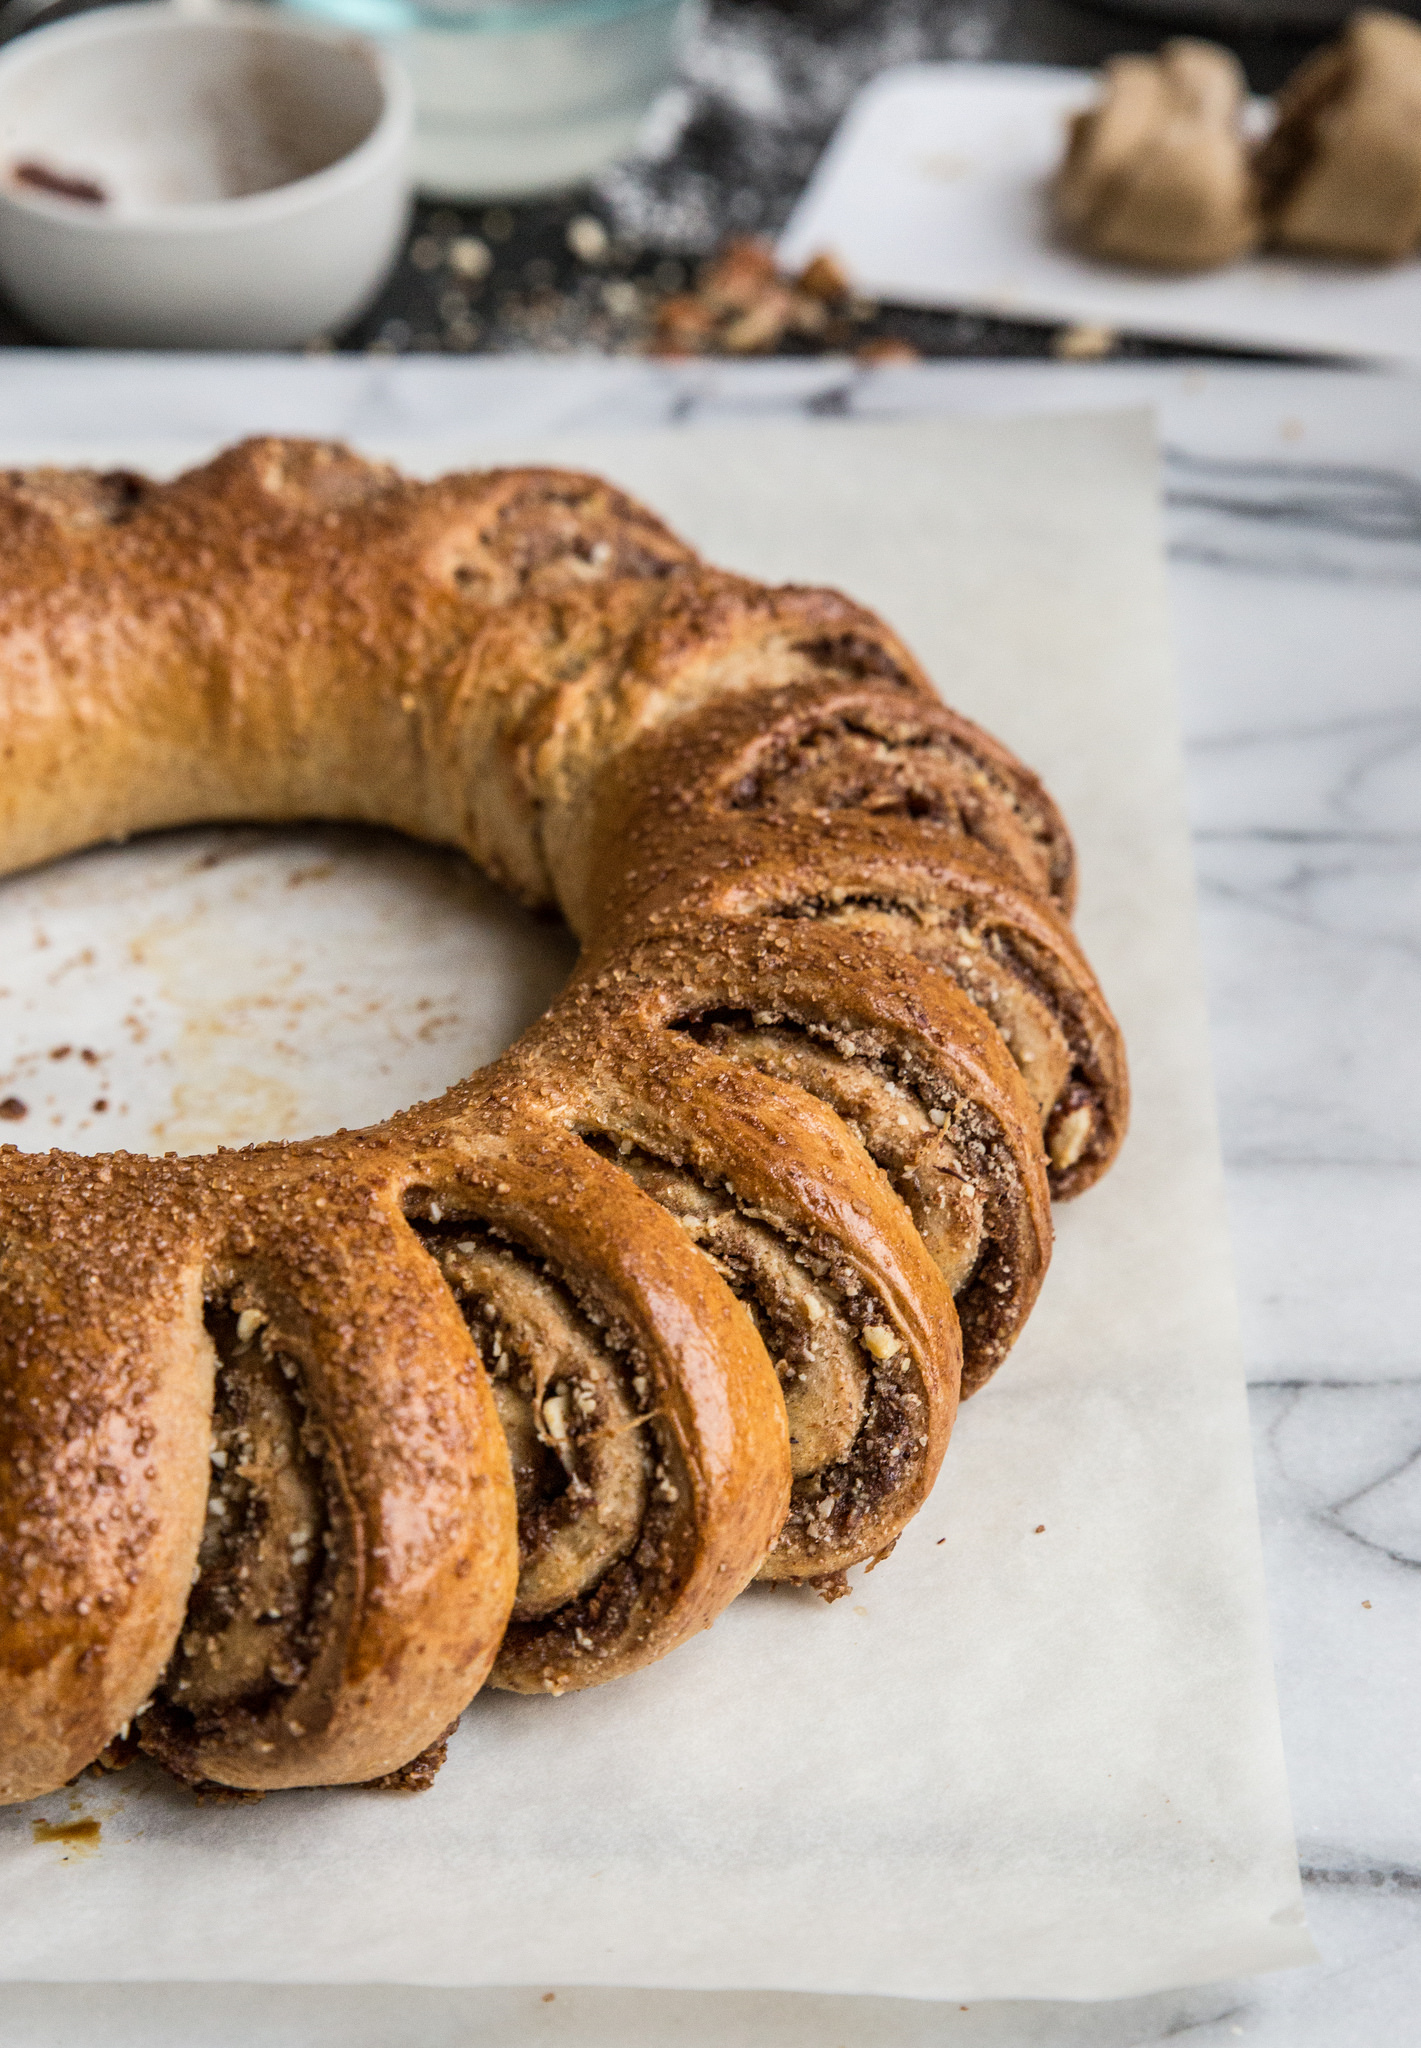
From the long edge, the dough is tightly rolled into a log and placed seam side down onto a baking sheet. The ends are cut off the dough and the exposed ends are brought together to create a circular, ring shape. Pinch the ends together to seal. Using a kitchen shears, cut the log two-thirds of the way through in two-inch thick segments around the circle. Carefully turn the segments upwards so the interior of the dough is exposed. Cover and allow to rise a second time for 30-45 minutes.

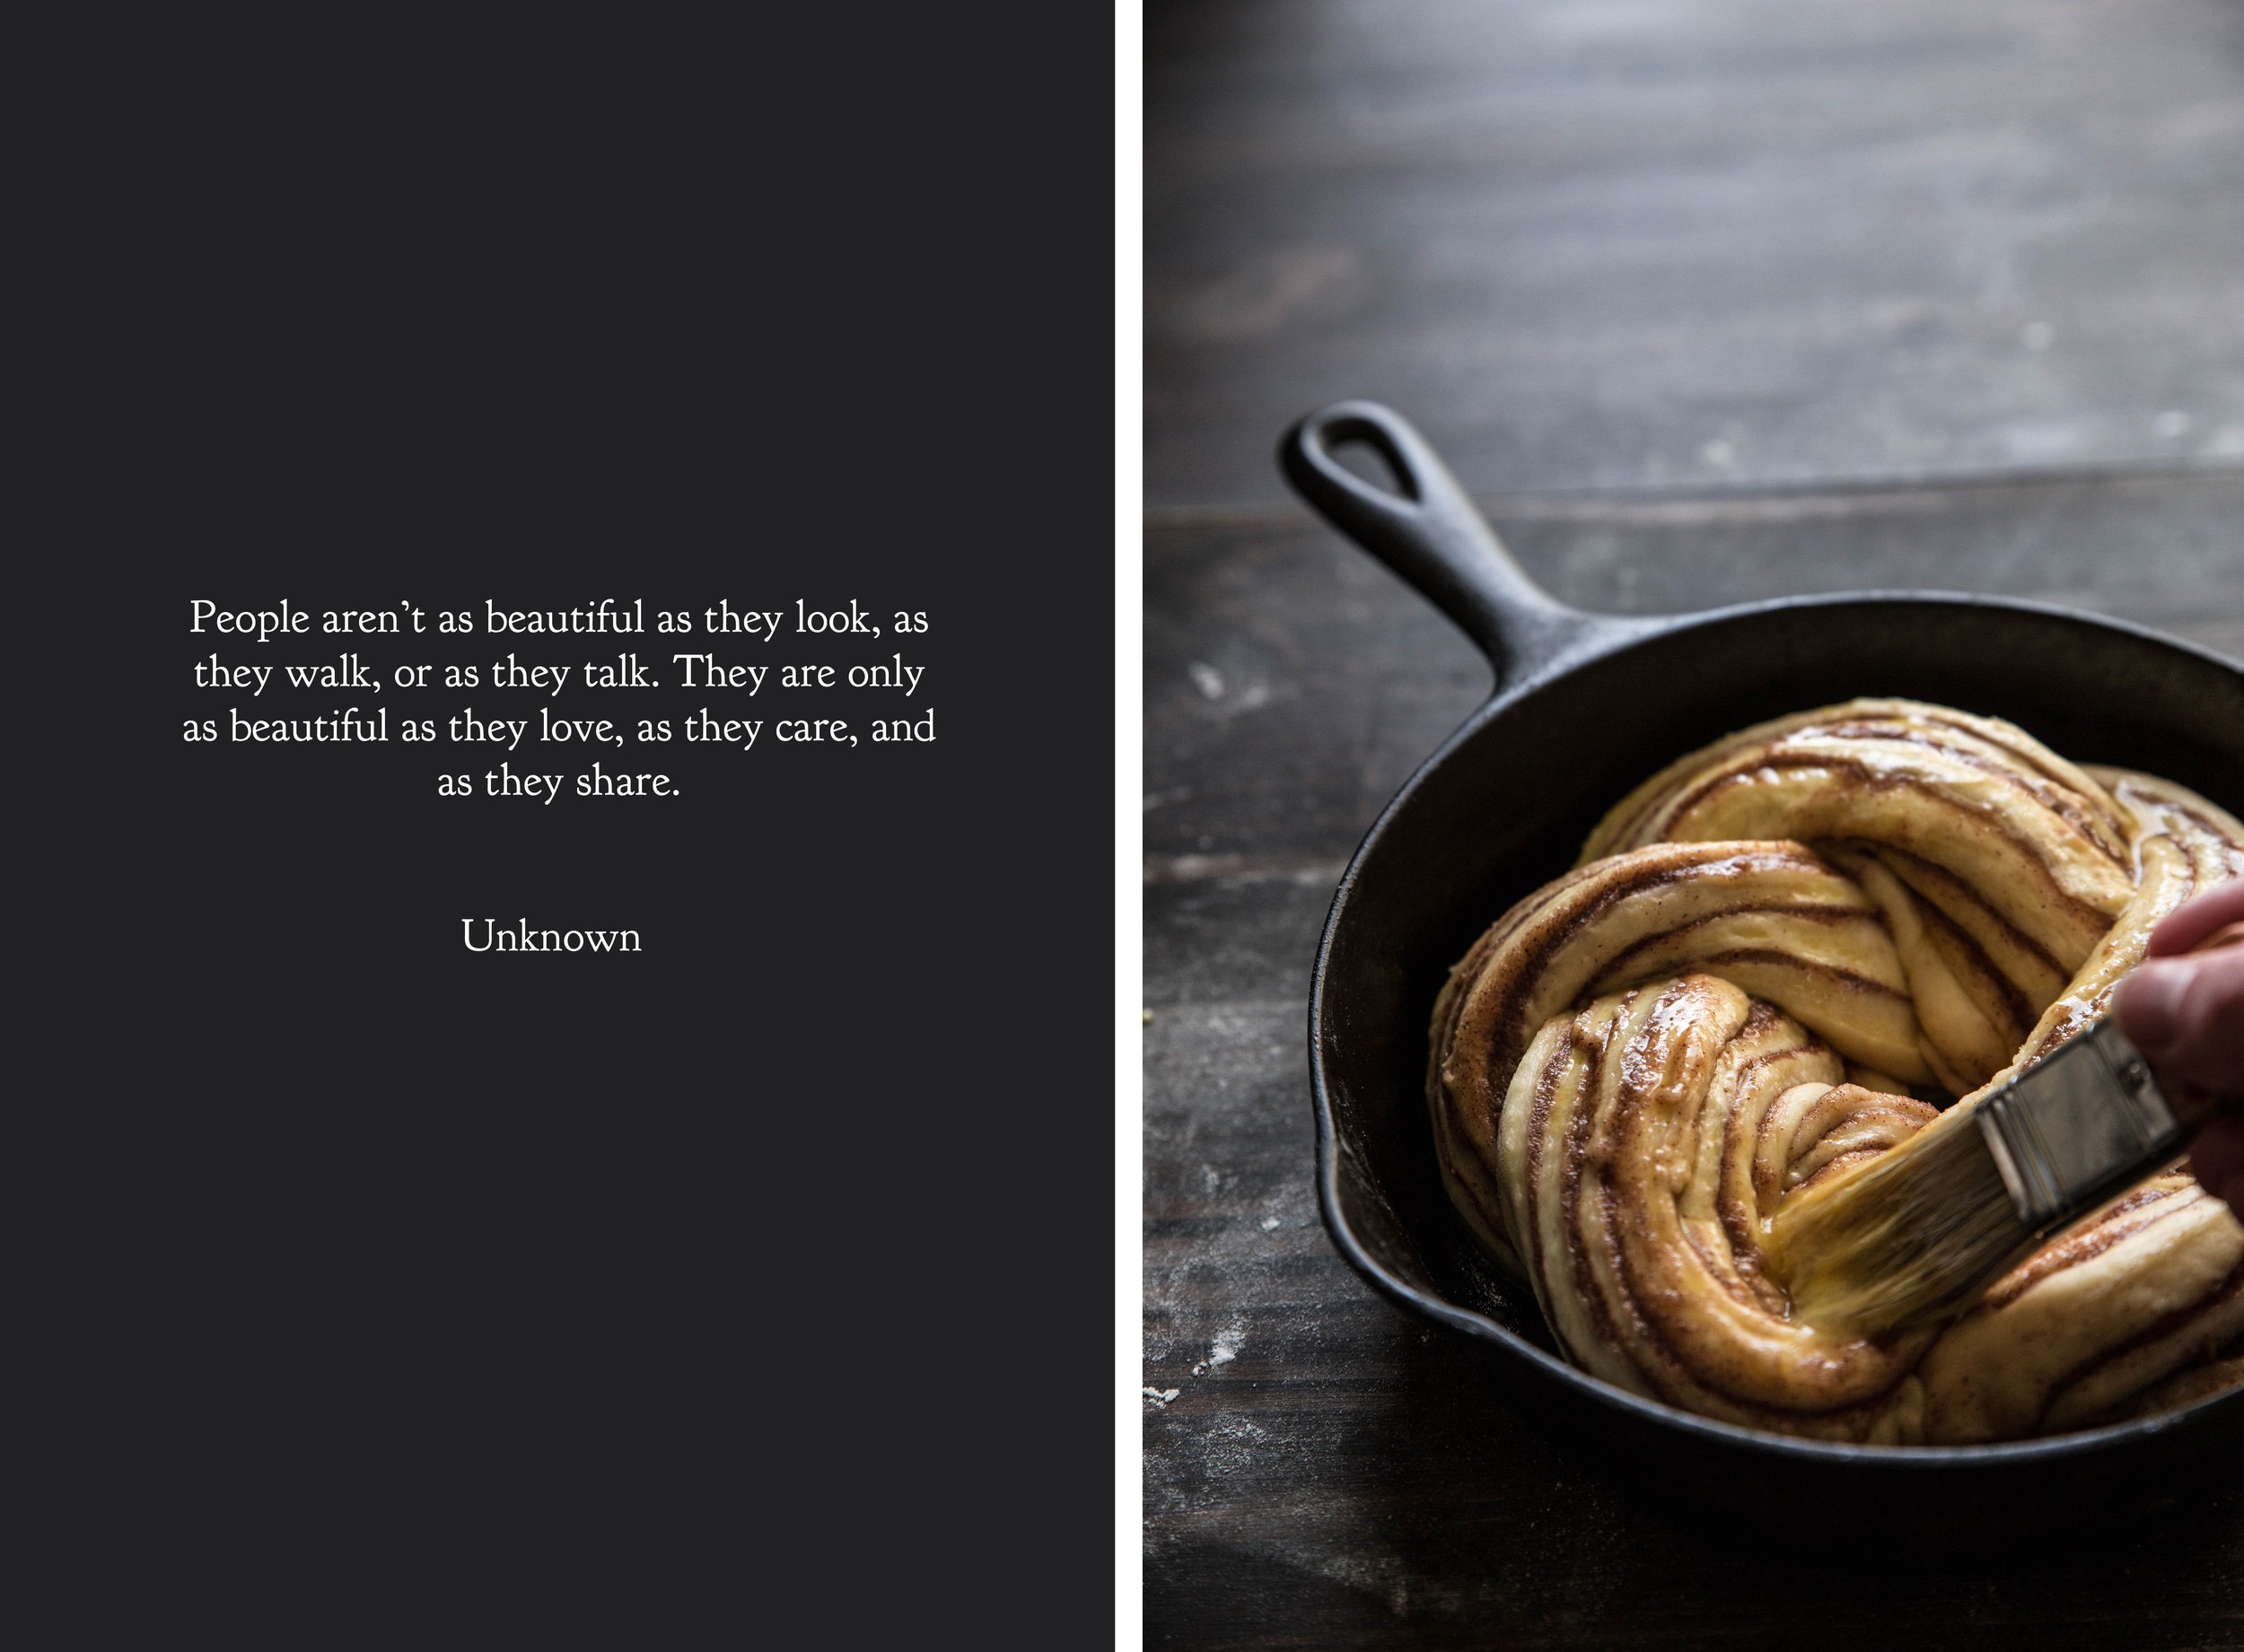
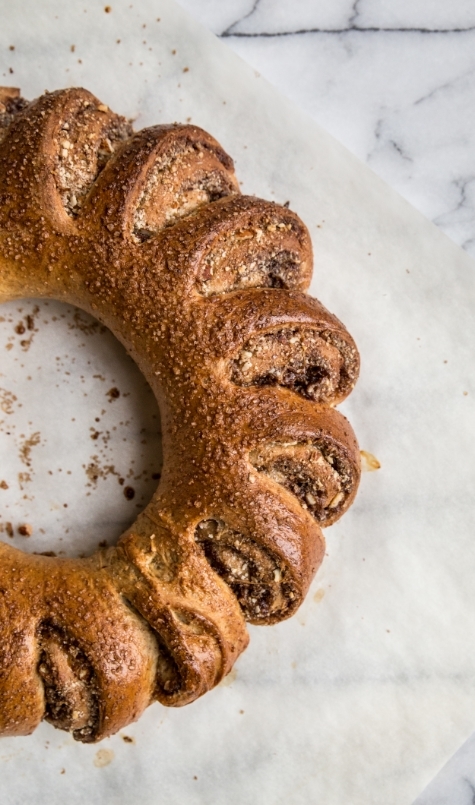
Brush the exterior of the dough with egg wash and sprinkle on additional demerara sugar before baking. The egg wash helps the dough brown to a deep golden color in the oven. The large grains of the demerara sugar keep their shape in the oven, adding a unique look and texture to the final product. Large white crystal sugar can also be used, but avoid granulated or brown sugar because it will melt in the oven and you will not be able to achieve the same look. 

To begin your weekend or holiday morning with a warm slice, the Swedish Tea Ring can be assembled the night before and baked the next morning. The evening before, prepare the dough and arrange it to form the final shape. Wrap the dough tightly in plastic wrap and place in the refrigerator overnight. In the morning, preheat the oven and set out the dough to warm and rise for the second time for 45-60 minutes. Brush on the egg white and sprinkle with demerara sugar just before baking.

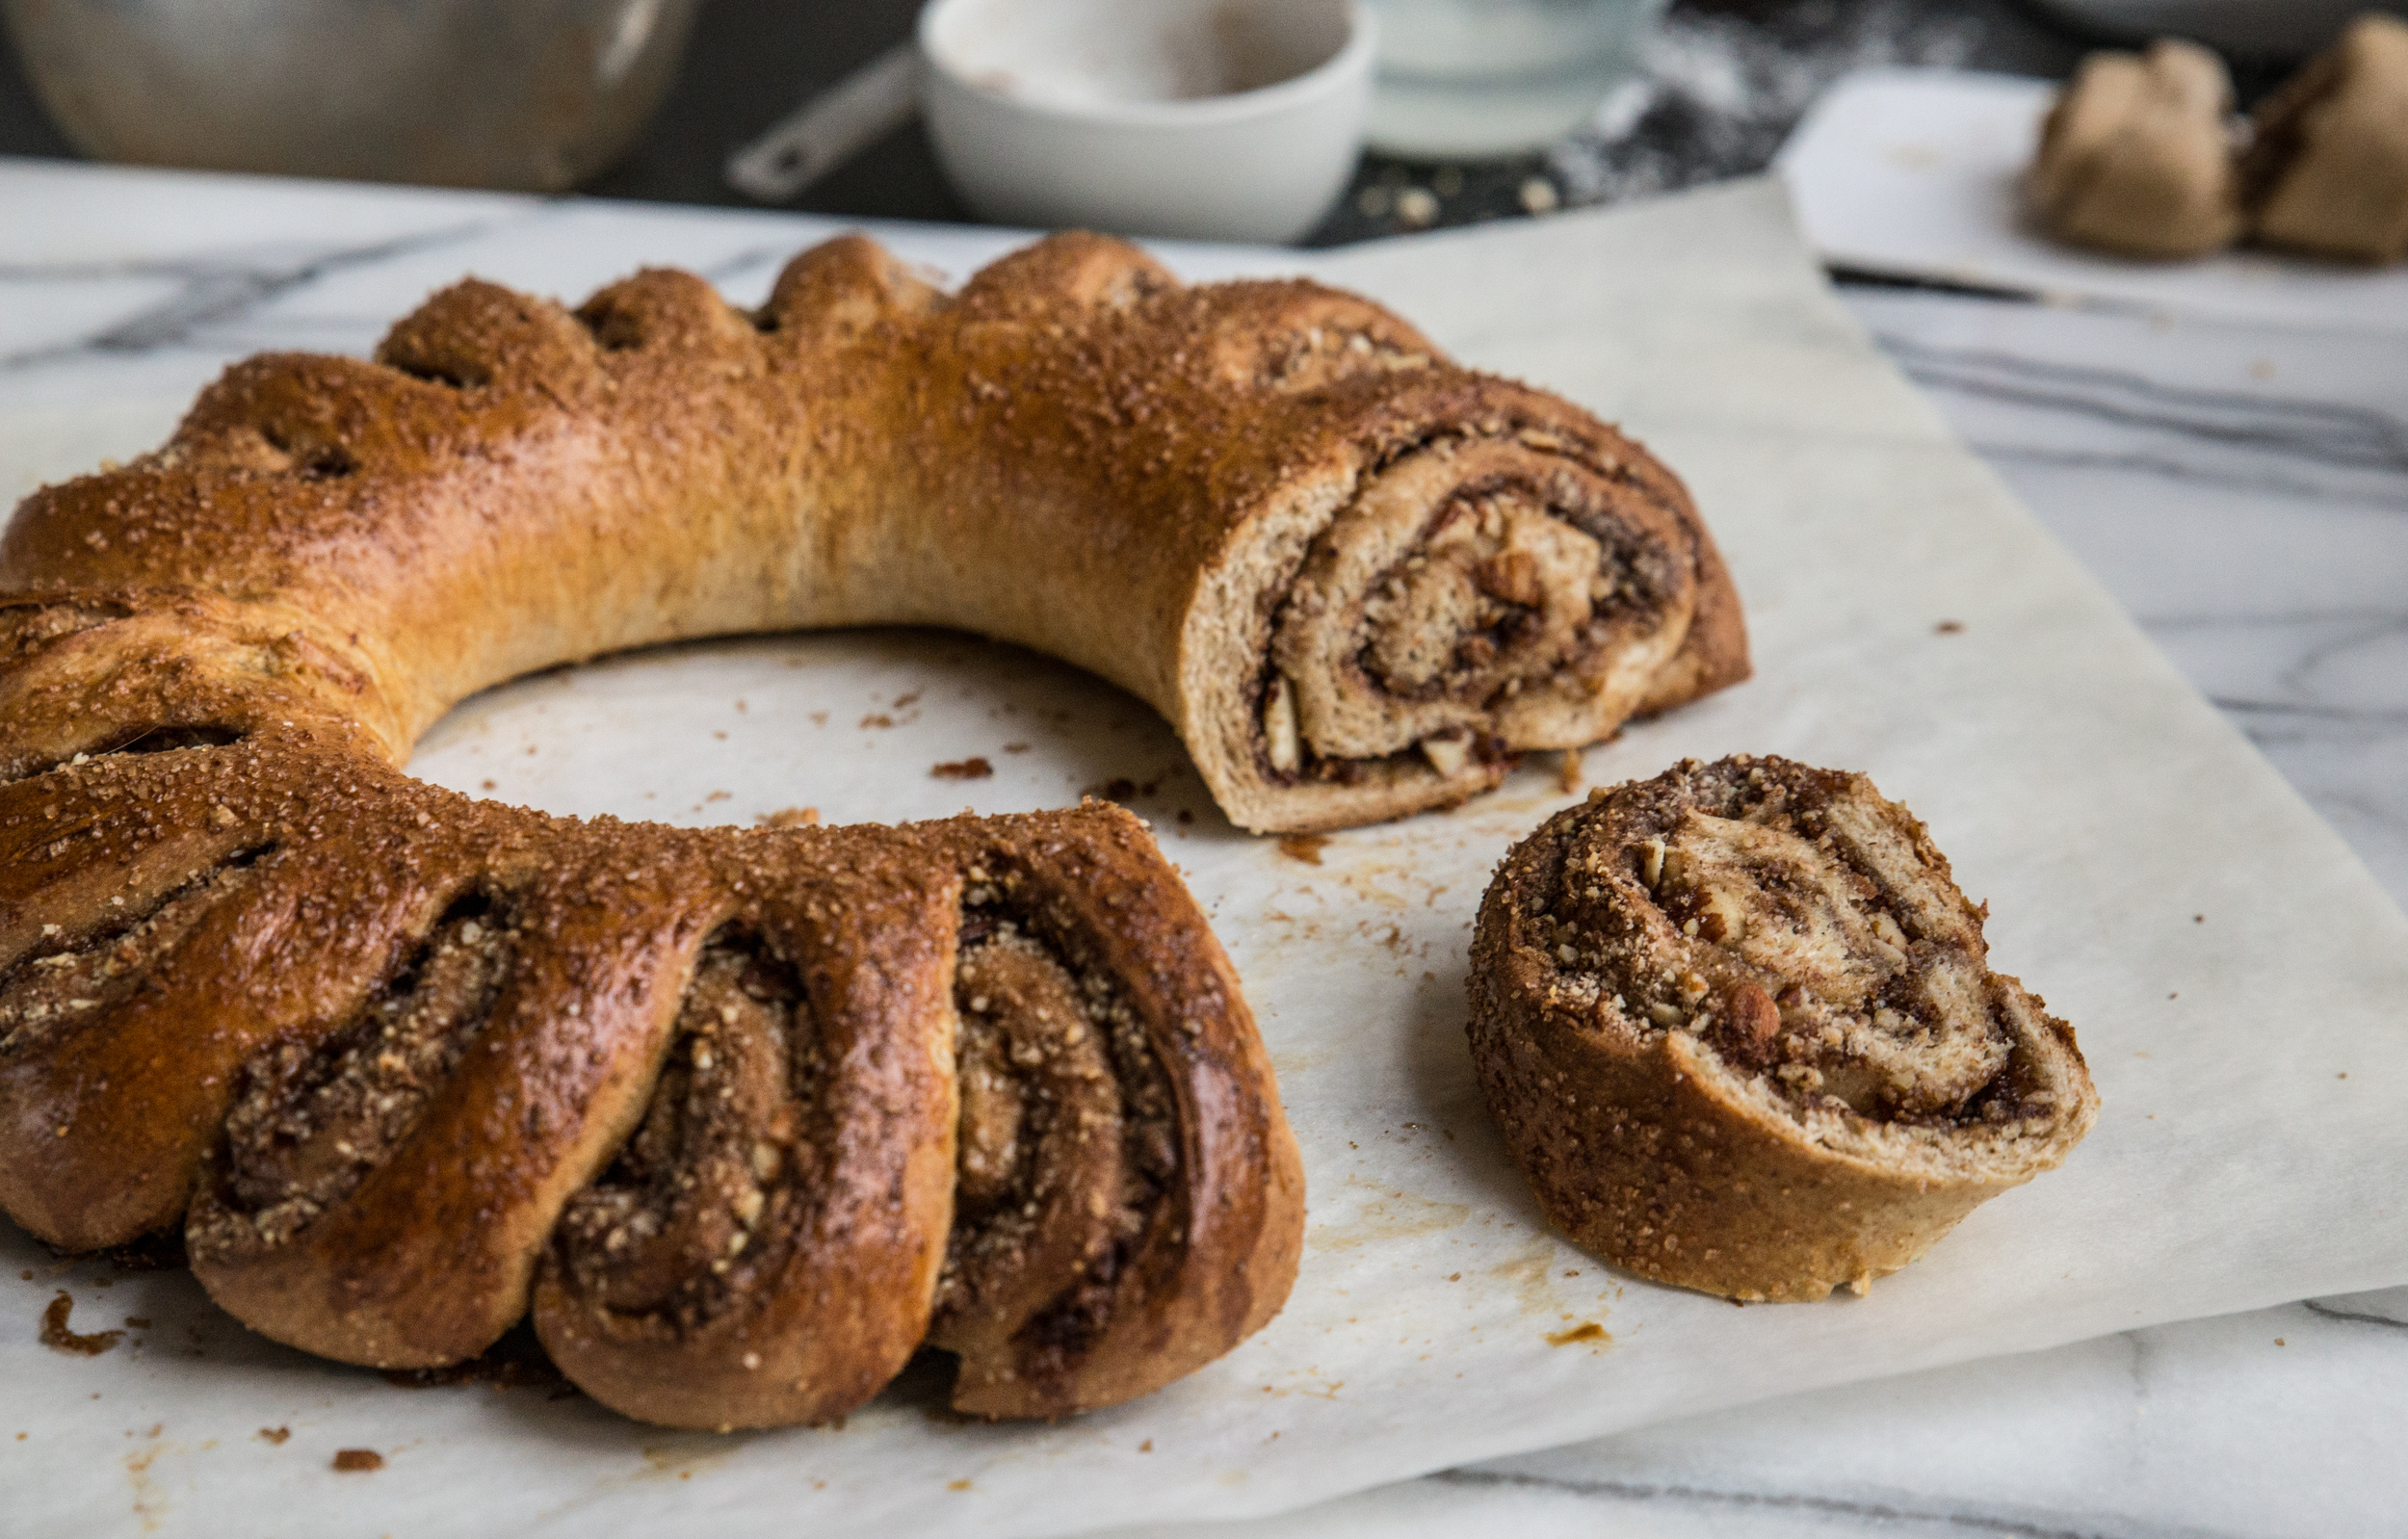
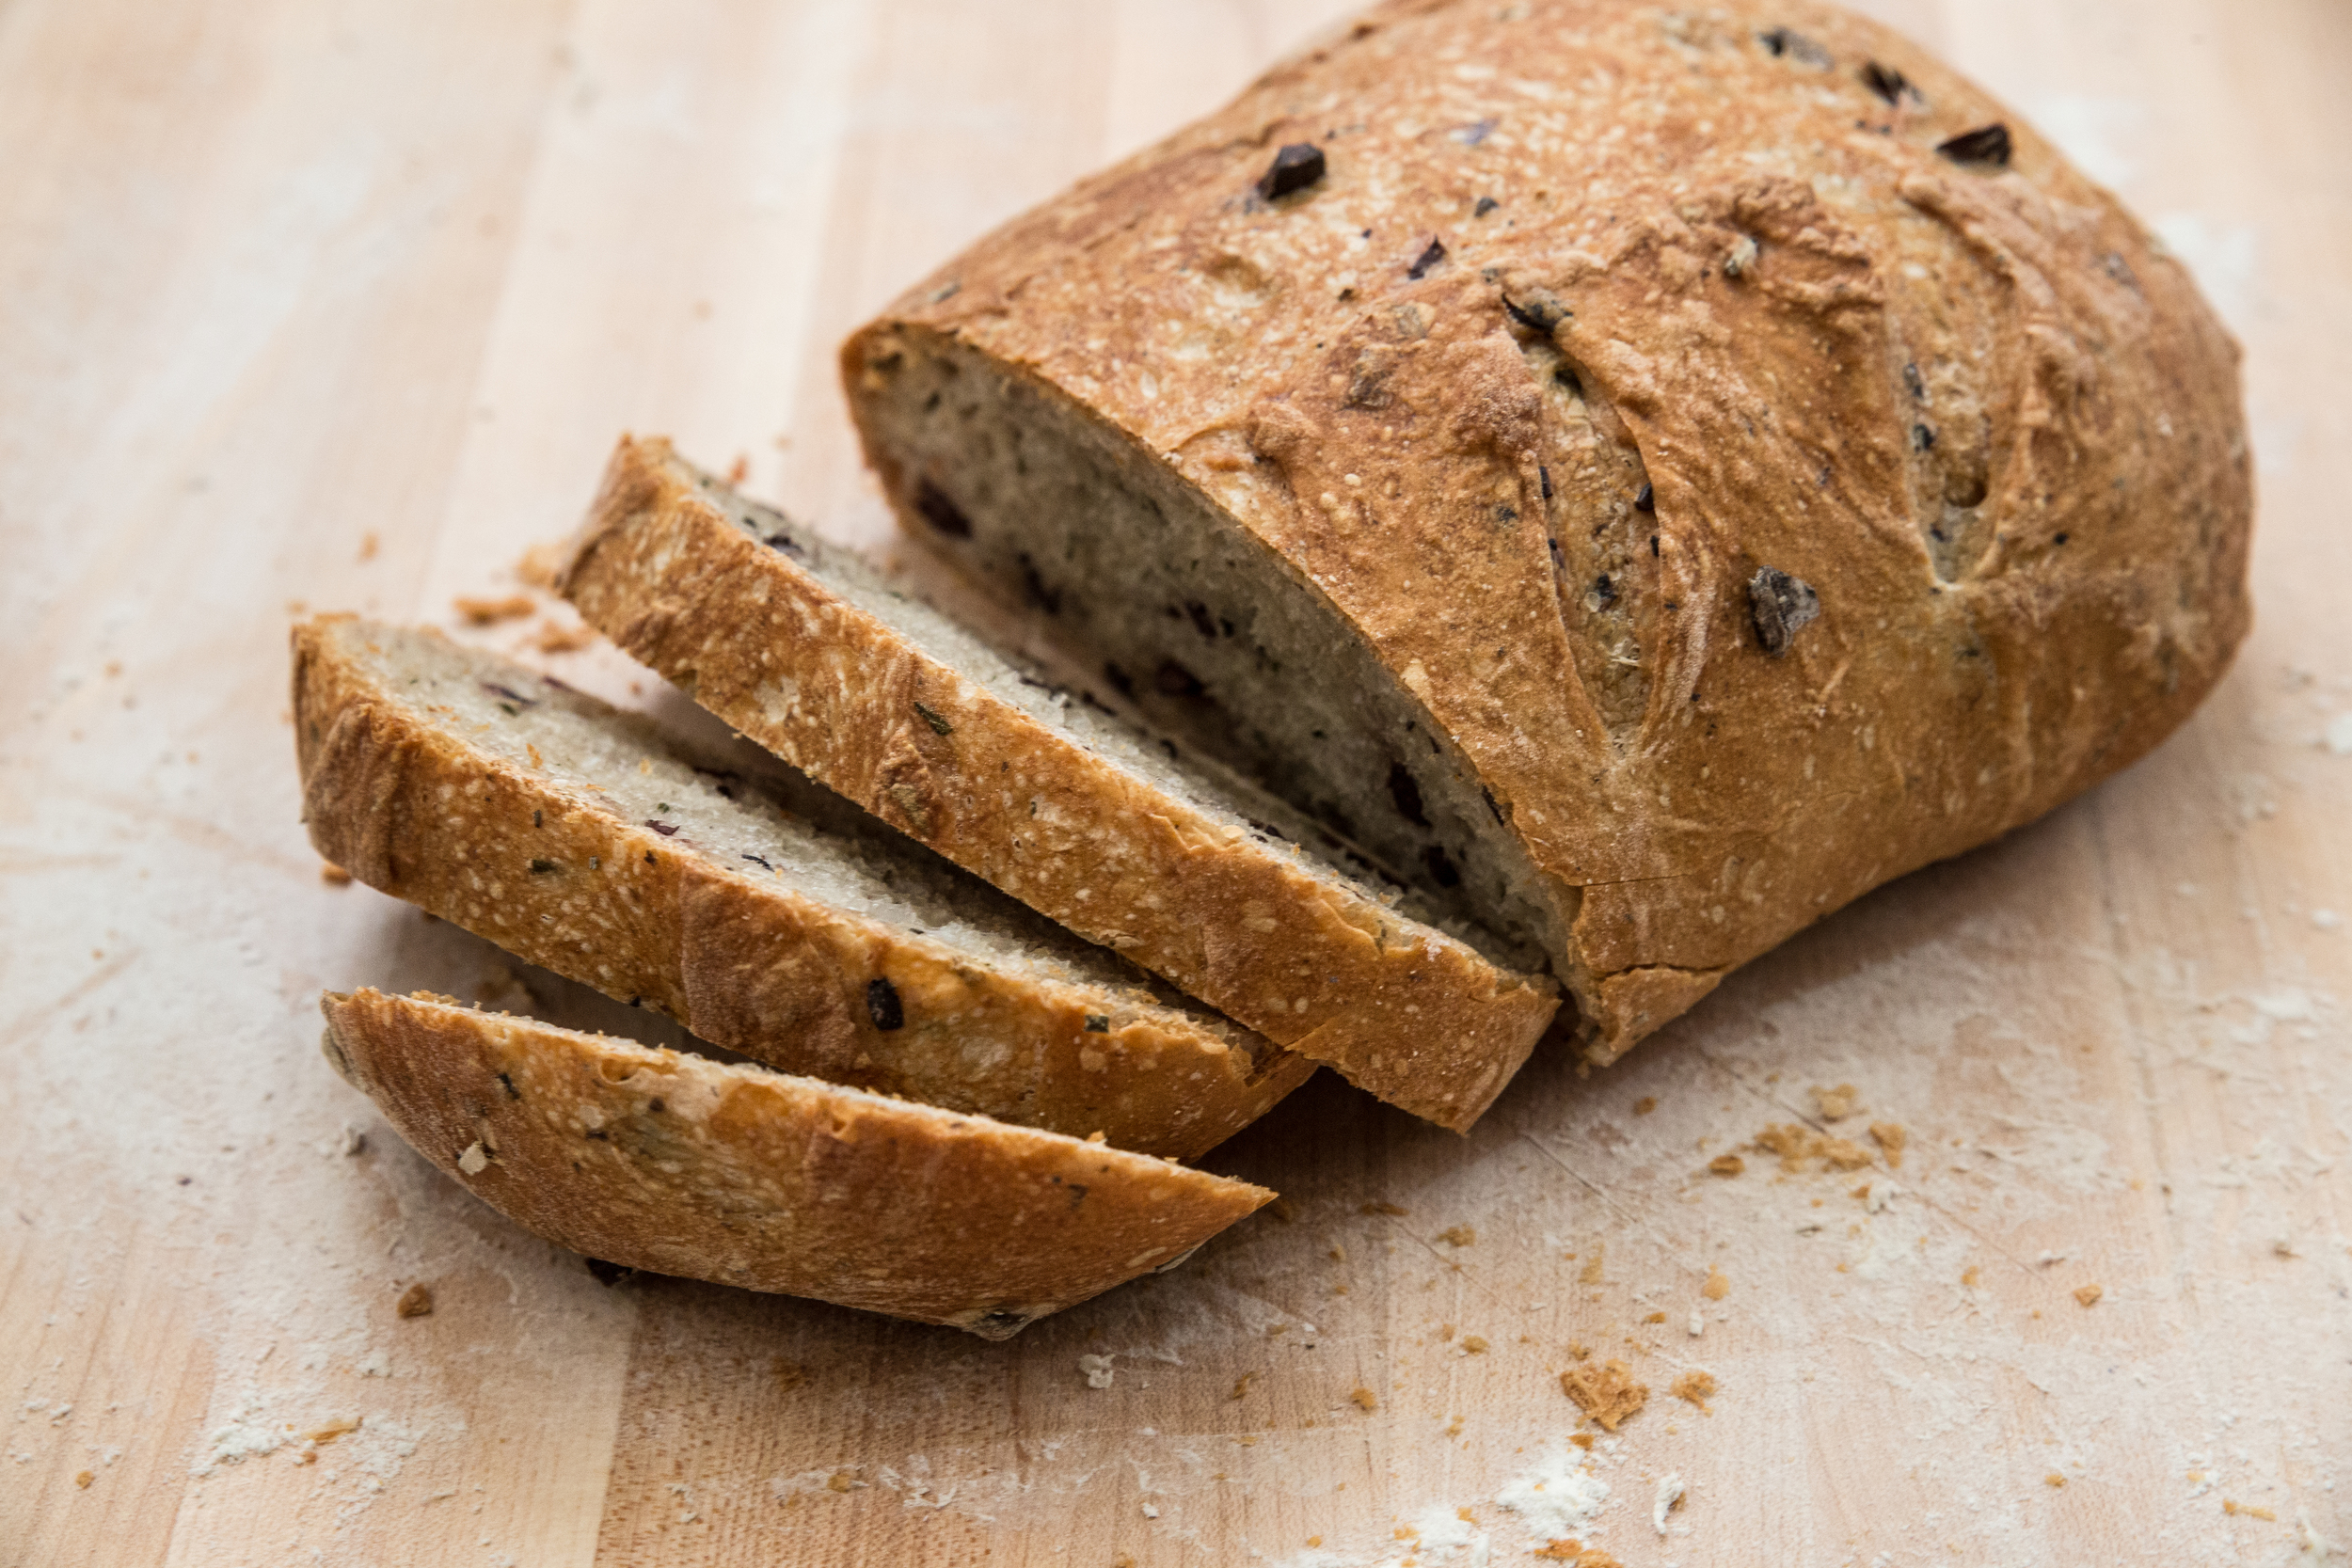
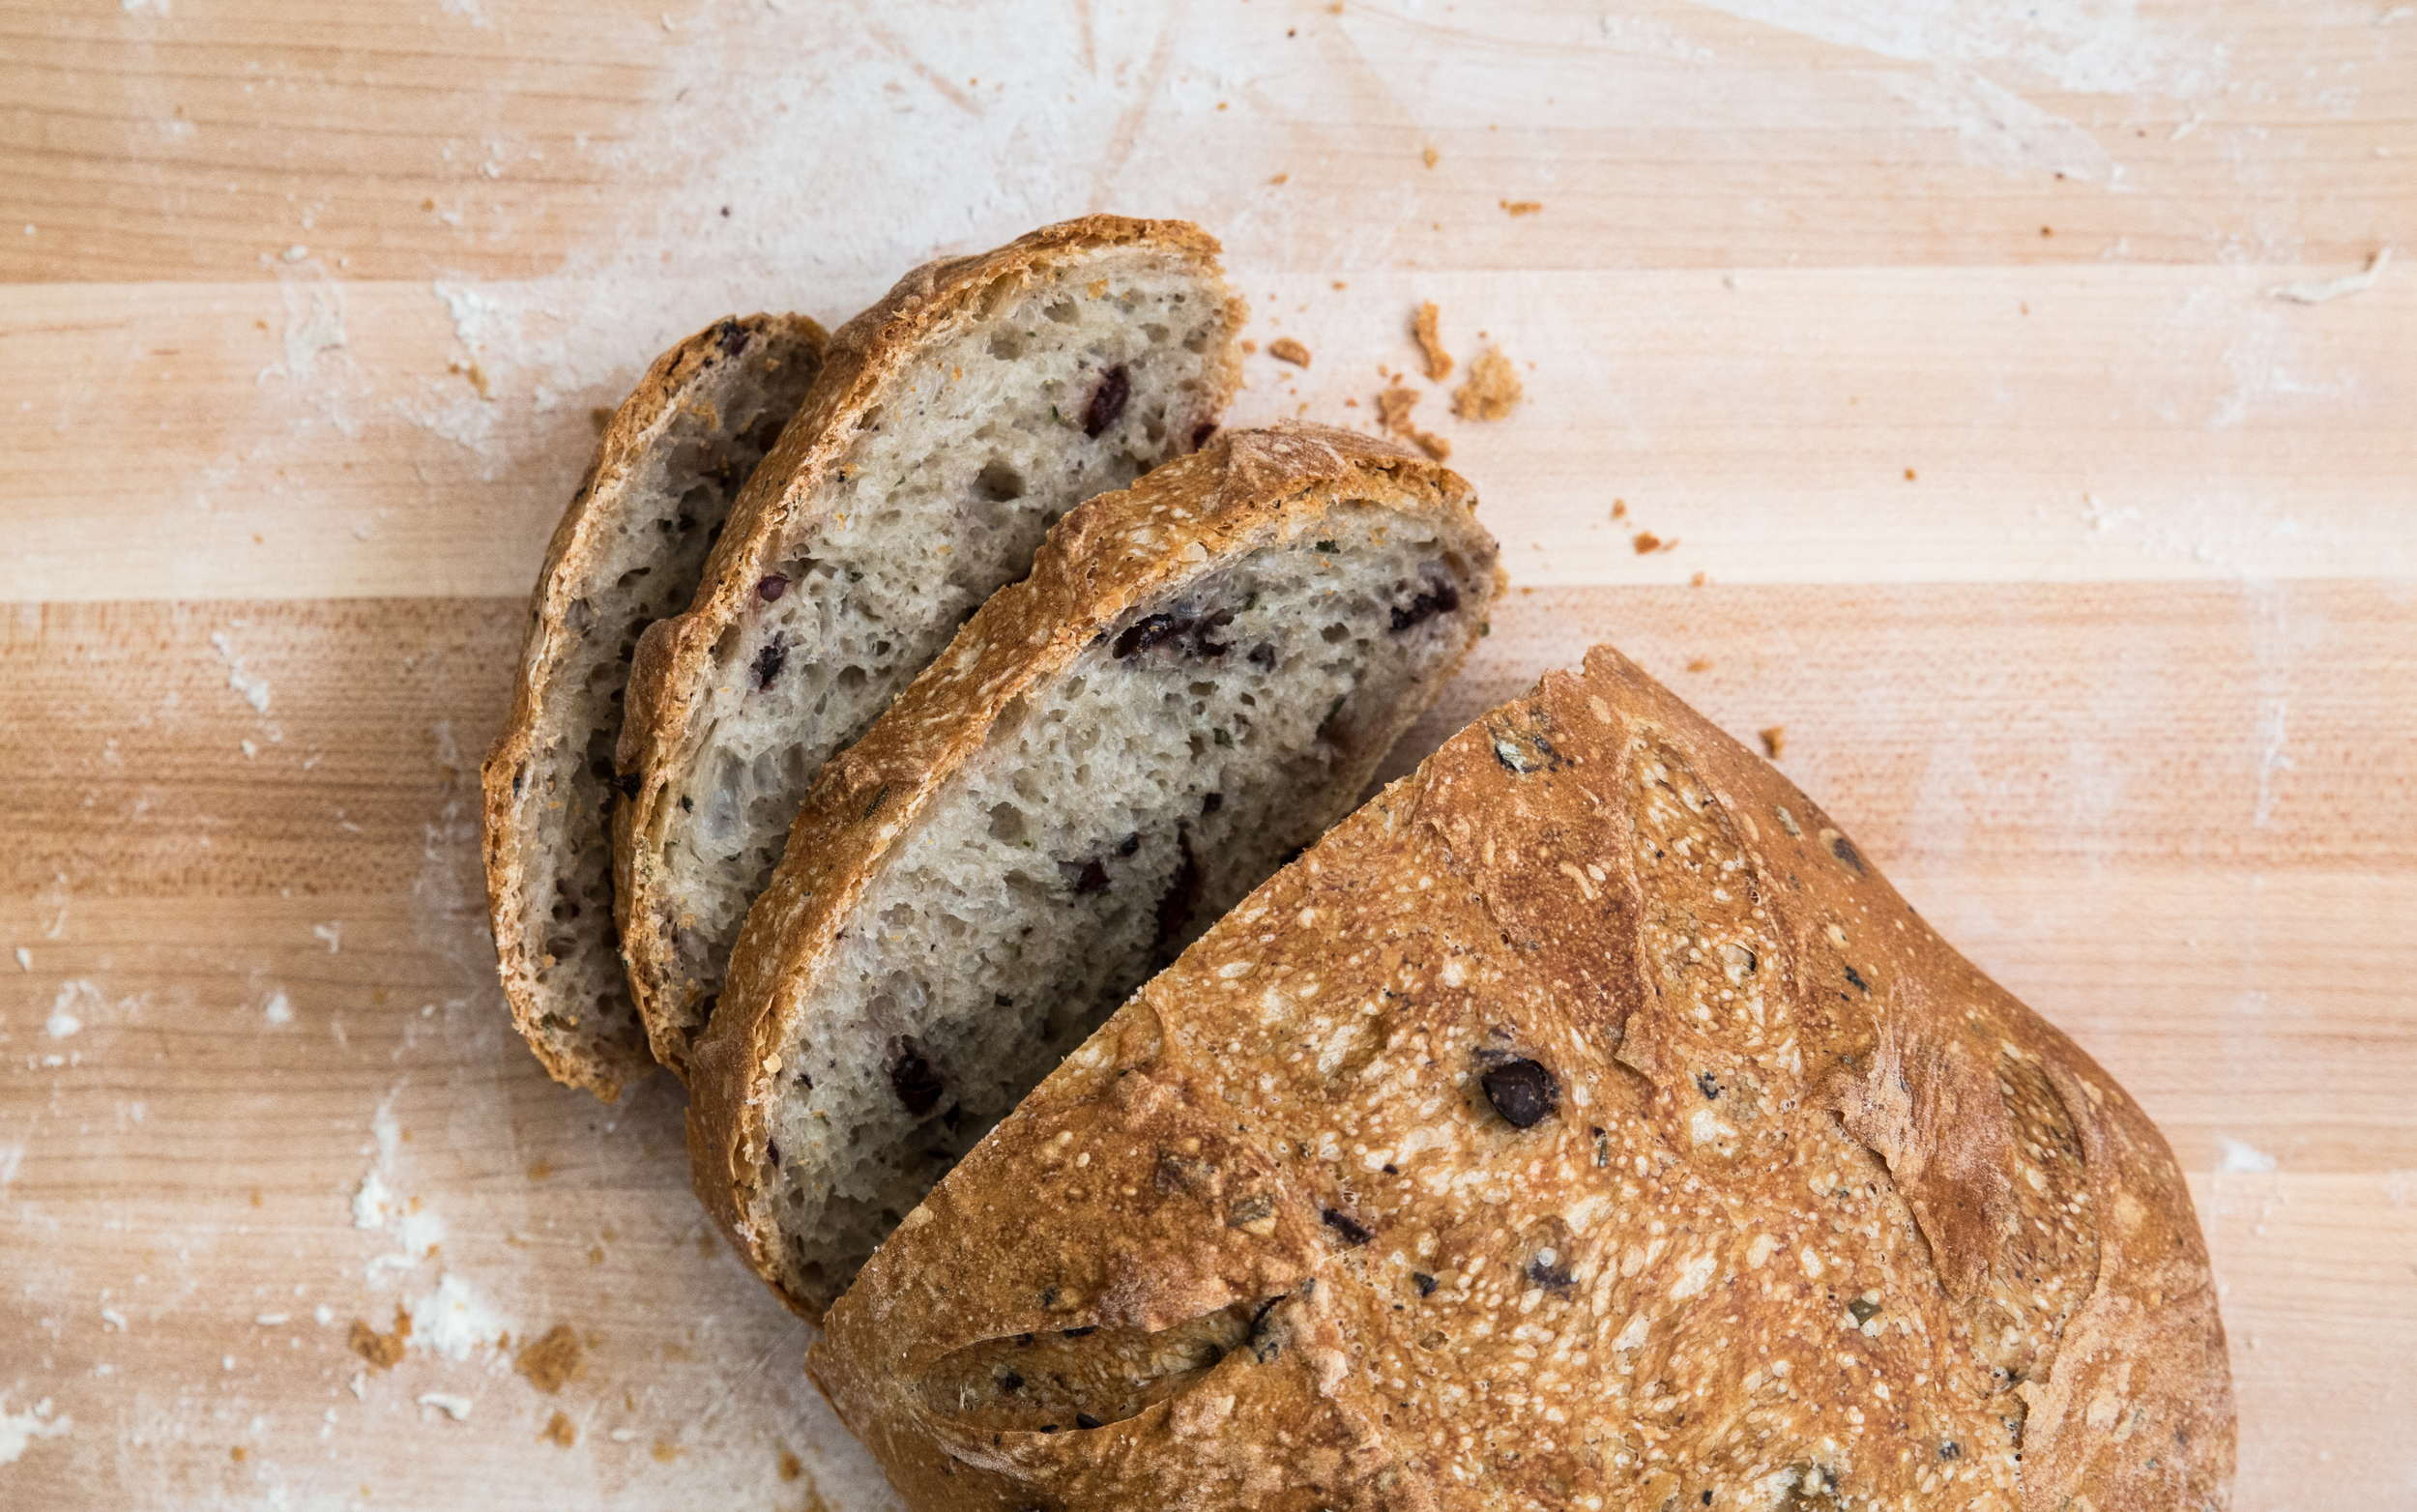
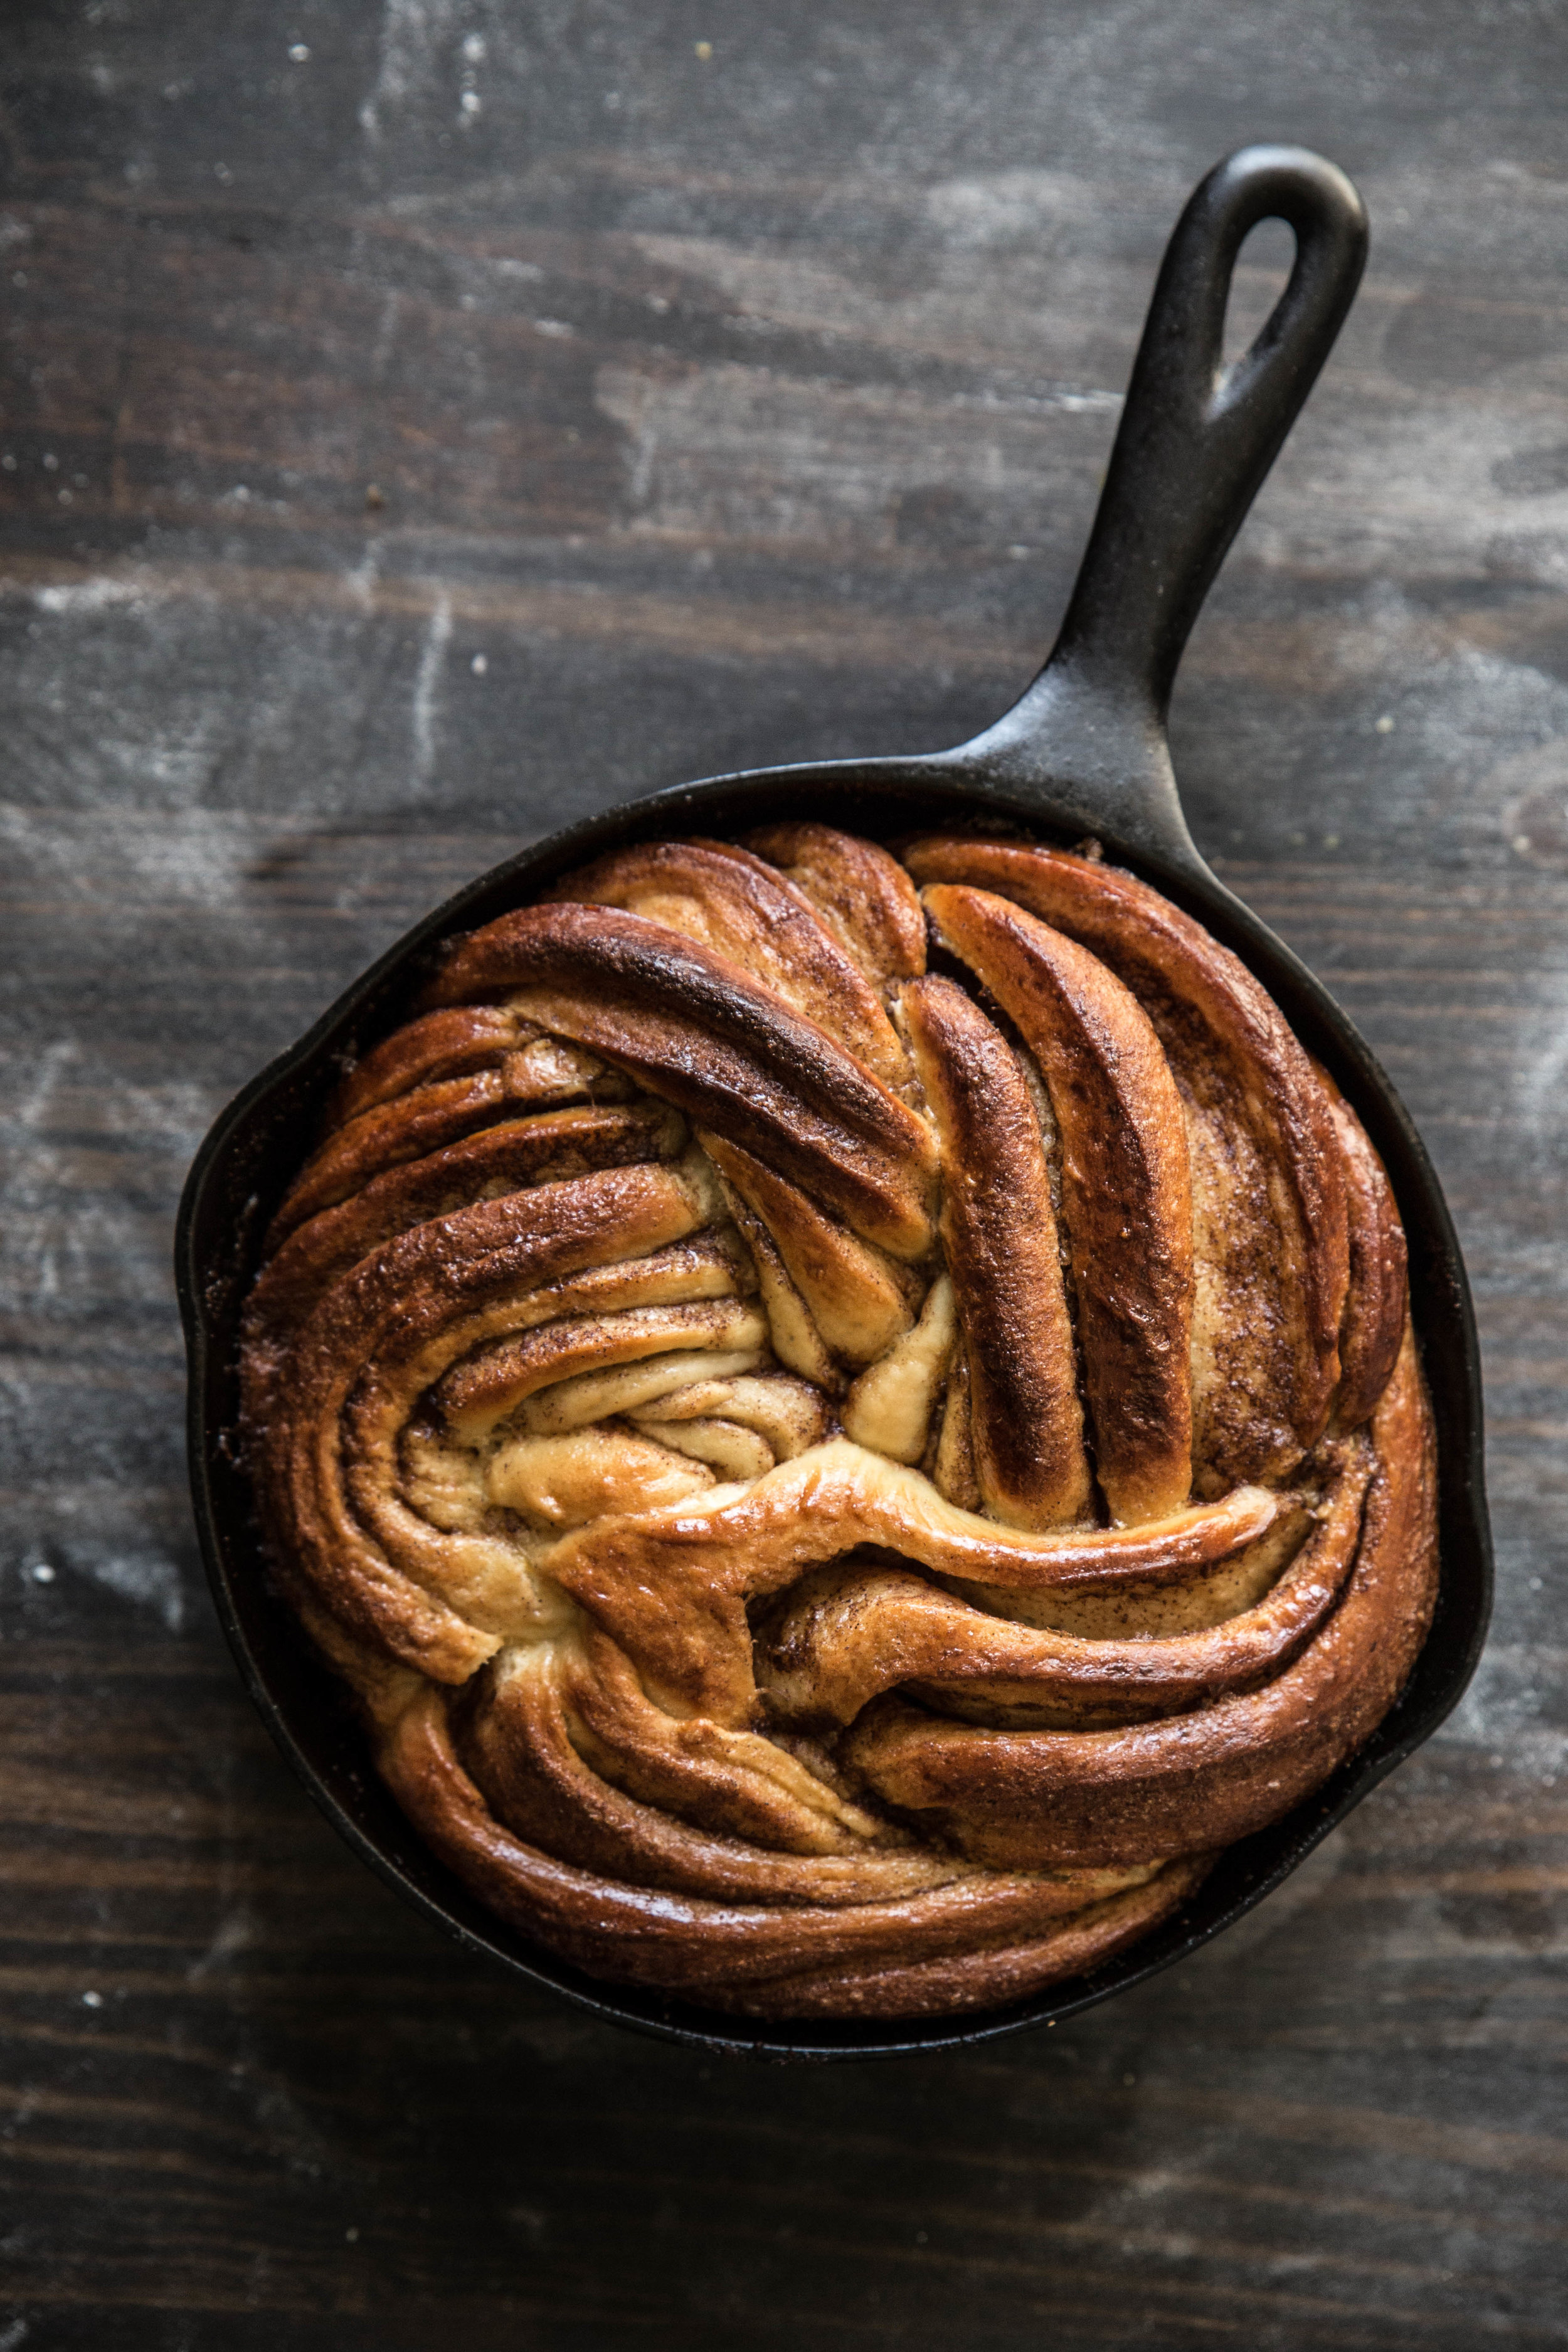
The Swedish Tea Ring brings together the warm winter spices of cinnamon and cardamom in a sweet, buttery bread. The ring is filled with demerara sugar to bring out caramel tones and finely chopped almonds for their nutty flavor and texture. The shape of the sweet bread makes it easy to cut and share with the people you hold near and dear.

One Year Ago: Almond Espresso Cookies
Two Years Ago: Cranberry Upside Down Cake and Peppermint Marshmallows
Three Years Ago: Lemon Cranberry Scones, Chocolate Pomegranate TartAlmond Cardamom RollsRed Wine Chocolate Truffles, and Gingerbread Cookies
Four Years Ago: Pumpkin Panna Cotta, Honey CookiesPeppermint Pinwheels, and Sugar Cookies
Five Years Ago: Blueberry Brownies, White Chocolate Saffron Truffles, Pear ChipsCandy Striped Meringues, and Chocolate Truffles

Swedish Tea Ring

Yields 14-18 servings

Dough
2/3 cup (155 mL) milk, lukewarm in temperature
1/4 cup (50 grams) granulated sugar
1 large egg
4 tablespoons (56 grams) butter, melted
2 teaspoons active dry yeast
2 cups (240 grams) King Arthur Unbleached All-Purpose Flour
1 cup (128 grams) King Arthur Whole Wheat Flour
1 1/2 teaspoons ground cardamom
1/2 teaspoon salt

Filling
4 tablespoons (56 grams) butter, room temperature
1/2 cup (110 grams) demerara sugar, plus extra for sprinkling*
1 tablespoon ground cinnamon
4 ounces (115 grams) almonds, finely chopped
Egg wash (1 large egg + 1 tablespoon water, whisked)

In a large mixing bowl, whisk together the lukewarm milk, sugar, egg, melted butter, and yeast. Using a bowl scraper, fold in the flours, cardamom, and salt until the dough comes together and appears uniform. Turn out the dough onto a lightly floured surface and knead the dough until smooth and elastic, about 8 minutes. If using a stand mixer, knead the dough on low for 3-5 minutes with the dough hook attachment, stopping occasionally to scrape down sides of bowl. 

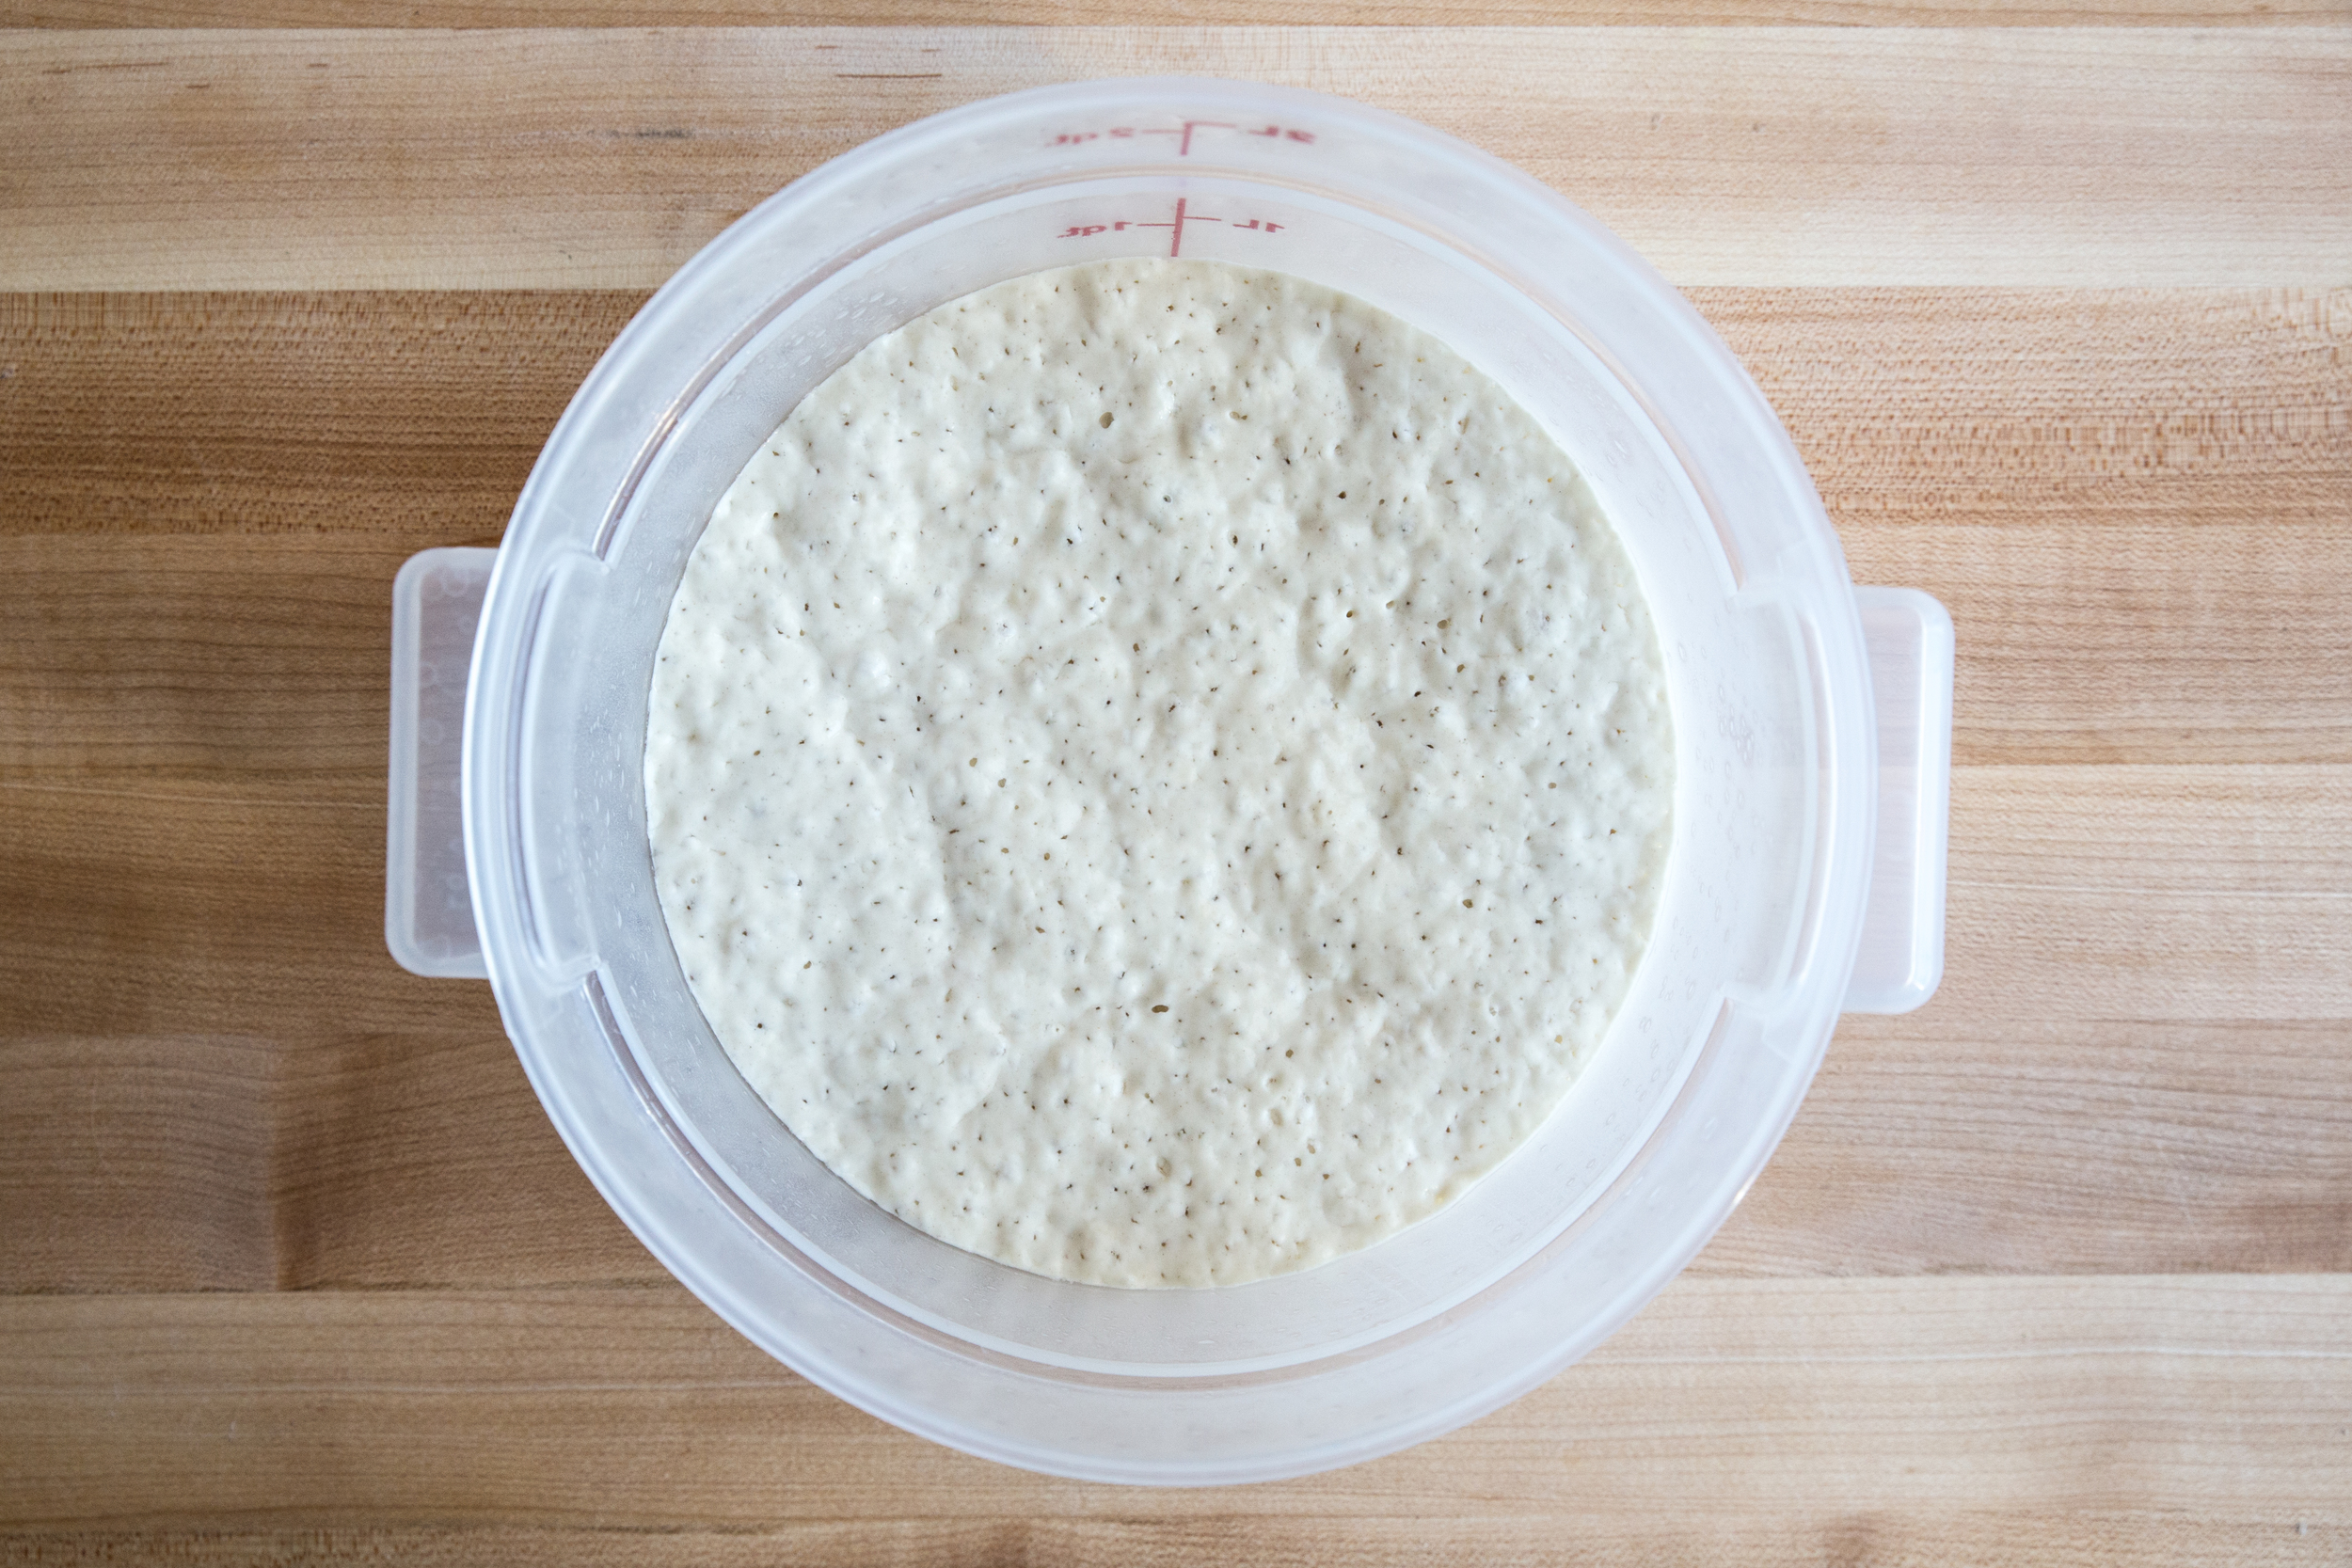
Form the dough into a ball and transfer to a lightly oiled bowl. Cover and allow the dough to rise at room temperature until doubled in volume, about 1 to 2 hours.

To make the filling, mix together the butter, sugar, and cinnamon until it forms uniform paste. 

When the dough has doubled in volume, punch down the dough and, on a lightly floured surface, flatten the dough into a rectangular shape. Roll out the dough to a 12-by-18 inch rectangle. Using an offset spatula, spread the filling over the dough, leaving a 1/2-inch border around all edges. Sprinkle on the finely chopped almonds evenly and press the almonds down lightly into the filling.

From the long end, roll the dough tightly into a log and place seam side down. Cut off the ends so the log appears uniform. Form the log into a ring shape and pinch the open ends together. Using a kitchen shears, cut the dough 2/3 of the way into the log into 2-inch segments. Carefully turn the segments upwards so the interior of the dough is exposed. Cover and let rise for an additional 30-45 minutes. 

While dough is rising, preheat oven to 375 degrees F (190 degrees C). Brush with egg wash and sprinkle lightly with additional demerara sugar. Bake the tea ring for 25 minutes, or until golden. If it browns too quickly, cover with aluminum foil to prevent browning during the last 5-10 minutes. Remove from the oven and transfer to a cooling rack.

This post is sponsored through a partnership with King Arthur Flour. All thoughts and opinions are my own. 

Rosemary Olive Bread

The season of comfort foods and warm stews is upon us. Along with the holiday table classics, my dinner table features homemade breads for soaking up gravy and mashed potatoes. In years past, I have filled the bread basket with soft honey rolls, sweet cranberry orange brioche buns, and lightly spiced pumpkin rolls. As my love for crusty bread grows ever stronger, this year's table will feature a loaf with a thick crust and soft interiora texture perfect for mopping the plate clean.

In partnership with King Arthur Flour, each month I want to challenge you with a new recipe, filled with explanations and fresh techniques to help you grow and develop as a baker. This month we're tackling the crusty loaf and learning how to create it in your own kitchen. The recipe may appear long or complicated at first glance, but these are many details to make the new techniques easier for you. The recipe is at the same difficulty level and takes the same amount of active time as a traditional loaf of bread.

The bread starts with a poolish, which is a French term for a pre-ferment. A pre-ferment is exactly as it sounds dough that has been fermented before baking. The poolish is created the evening before by mixing together flour, water, and a pinch of yeast. Covered tightly with plastic wrap, it is left to rest overnight at room temperature for 12-18 hours. The ideal time for this poolish to be ready is roughly 15 hours, but bread is incredibly forgiving and the poolish will adjust to your own schedule. 

The poolish has a dual purpose: the fermentation adds a greater complexity of flavor to the bread and it helps the baked bread keep for a longer period of time. When ready, the poolish will have a uniform bubbled appearance, shown above.

When the remaining ingredients have been added to the bread, the dough will be very sticky. Contrary to popular belief, this is exactly what we want. A "wet dough" will yield a loaf with an open crumb, which results in a tender interior, and a firmer crust. Although you will have a strong temptation to add more flour, don't do it. Instead, we will knead the dough using wet dough techniques.

The use of a bench knife will be incredibly helpful for the next few steps.

Turn the dough out onto a clean, flourless surface (wooden cutting boards work best, but I have used a clean counter top with no issue). To knead the wet dough, form the dough into a log shape with your bench knife and, starting at one end, cut the dough at roughly a 45 degree angle. Continue the cutting motion, slicing the dough into 4-5 pieces. Use the bench knife to slide the dough pieces back together, rotate the loaf a quarter turn, and repeat the slicing process. Continue kneading in this manner for 3-5 minutes.

The process of cutting the dough helps the gluten to form quickly. After a few repetitions of the kneading process, you will notice the dough change texture. It will go from soft and lax to holding itself together in a tighter formation. When the dough has visibly changed textures (less sticky) and becomes difficult to slice, it is time to change kneading techniques.

rosemaryolivebread6.jpg

The second kneading technique will strengthen the dough and give it elasticity. Using the bench knife, bring the dough into a log shape. The long edge should be facing you. About 1/3 of the way in, pick up the dough with the tips of your fingers (no palms). Imagine picking up a cat under the front paws; the motion is similar. Rotate the dough 90 degrees and slap the bottom of the dough against the surface, pulling the top half of the dough back with your fingers to stretch it. Fold the dough back onto itself by bringing your hands down over the top of the dough, touching the surface, and pulling your hands out sideways to break free. This will help minimize sticking. Every few motions, scrape the surface clean with a bench knife to keep the dough together. 

Be aggressive and move quickly with the dough or it will stick to the table and be more difficult to work with. Don't be afraid of kneading incorrectly; you'll pick up the technique quickly when you can feel how your motions affect the dough. After 3-5 minutes of kneading, the dough will be ready. It will have a smooth appearance, lose much of its stickiness (you should be able to poke the dough without it sticking to your finger), and feel like a muscle (elastic). 

To clean your hands of sticky dough while kneading, rub them with a small amount of flour. The dough will come off easily, making it faster and less messy than using water or a towel. 

Place the kneaded dough into a bowl, cover, and let it to rise until it doubles in volume. This will take anywhere from 1-2 hours depending on the temperature of the room. I recommend putting the dough into a container with volume measurements (like the dough doubler pictured above)—it makes it easy to see exactly how much your dough has risen and how much farther it has left to go.

rosemaryolivebread1.jpg

When the dough has doubled in volume, turn it out onto a very lightly floured surface to prevent any sticking. (1) Take the corners of the dough and pull them into the center of the loaf. (2) This will create a square or rectangular appearance. (3) Then, take two adjacent corners and fold them in to form a triangular end. (4) Starting on this end, roll the dough into itself tightly, forming a loaf shape. Place the loaf seam side down onto parchment paper, cover with a towel, and let it rise until doubled in volume (30-40 minutes).

Before forming the loaf, turn on the oven to preheat the baking stone in the middle rack of the oven. It takes much longer than the oven to come to full temperature and should be given plenty of time to heat. I heat the oven while the bread completes its second rise. The use of a baking stone helps the loaf bake evenly by dispersing the heat evenly and helps the bottom of the loaf become crusty without burning. If you don't have a baking stone, a thick baking sheet can be used as a substitute. Place a cast iron pan (or edged broiler pan) on a different rack below the baking stone to heat as well; this will be used to create steam.

Just before baking, slash the loaf no more than 1/4" deep with a lame (or sharp knife) in a decorative pattern (I made a leaf). The slashes allow the loaf to rise evenly, with no breaks along the sides or top.

Use parchment paper to slide the dough onto the heated baking stone in the oven without disturbing the shape. Next, pour 1/2 cup water into the cast iron pan on the rack below. Quickly shut the oven door to trap the steam. The steam helps the bread rise and helps create the firm crust on the final loaf. The bread is ready when it has a well caramelized appearance and firm crust on all sides. Allow the bread to rest for 10-15 minutes before slicing. This will allow the moisture to distribute evenly and set the interior texture.

Rosemary Olive Bread is a hearty, full bodied bread to serve with warm dinners and stews. The fresh rosemary lends a subtle flavor, breathed in with each bite; the olives have a pleasant, salty flavor. Even though the olives are pervasive throughout the loaf, only the larger pieces provide strong flavor. These quiet flavors do not overpower, making this a versatile dinner loaf, whether it is served with a spread of butter or used to soak up a hearty stew.  

One Year Ago: Pumpkin Pie (Dairy-Free)
Two Years Ago: Stovetop Popcorn and Gingerbread Bundt Cake with Pear Caramel Glaze
Three Years Ago: Marbled Butternut Squash Bread, Chai Pear Scones, Hot Bourbon Apple Cider, and Pumpkin Pie Espresso Bars
Four Years Ago: Banana Muffins, Cranberry Orange Brioche Rolls, and Cranberry Sauce
Five Years Ago: Cranberry Cocoa Cinnamon Rolls, 30 Second Sangria, and Raspberry Vanilla Creme Brulee

Rosemary Olive Bread

Yields 1 loaf

Poolish
1 cup (120 grams) King Arthur Unbleached Bread Flour
3/4 cup (177 mL) water
1 pinch (approximately 1/16 teaspoon) active dry yeast

Final Dough
2 cups (240 grams)  King Arthur Unbleached Bread Flour*
1/2 cup (118 mL) water
1 tablespoon fresh rosemary, chopped (or 1 teaspoon dried rosemary)
1/3 cup (50 grams) Kalamata black olives, chopped and patted dry
1 teaspoon active dry yeast
1 teaspoon salt

To create the poolish, stir together the flour, water, and a pinch of yeast the evening before baking. Cover tightly with plastic wrap and allow to rest for 12-18 hours at room temperature. The poolish will have a bubbled appearance when ready.

To create the final dough, add the remaining ingredients to the poolish and fold until uniform. The dough will be sticky; resist the temptation to add any additional flour. Turn the dough out onto a clean, flourless surface. To knead the wet dough, form dough into a log and, using a bench knife, cut the dough at an angle into 4-5 slices. Use the bench knife to bring the dough back together into the log shape and repeat the slicing process. Continue kneading for another 3-5 minutes. The dough will gradually change texture as the gluten forms.

When the dough easily holds together, form the log shape and, using your hands, pick up the dough 1/3 from the top of the log. Rotate the dough 90 degrees and "slap" the bottom of the dough onto the surface while pulling the top half of the dough towards you. This will stretch the dough. Fold the dough back onto itself by bringing your hands down over the top of the dough, touching the surface, and pulling your hands out sideways to break free. Repeat the process. This step must be completed quickly or the dough will stick to the surface. Use a dough knife to clean the surface as needed. Continue kneading for another 3-5 minutes. The dough will become easier to work with and have a smooth, elastic appearance when ready.

Place dough into a bowl and cover, allowing it to rise an additional 1-2 hours, or until doubled in size.

Preheat oven and baking stone (or cookie sheet) to 450 degrees F (230 degrees C). Place a cast iron pan (or edged broiler pan) on the bottom rack.

Turn out dough onto a very lightly floured surface and bring all four corners of the dough together until it resembles a rectangular shape. Take the two bottom corners together and fold them in again, creating a triangular shape on the edge. Begin rolling the dough from this end onto itself, placing the roll seam side down to create a loaf shape. Place on parchment paper and cover with a clean dish towel. Allow to rise an additional 30-40 minutes.

Using a lame (or sharp knife), slash a design into the top of the loaf. Slide the parchment paper onto the baking stone in the oven and quickly pour 1/2 cup water into the cast iron pan before closing the oven. This will create steam; do not open the oven door. Bake for 30-35 minutes, or until the loaf is well caramelized and the edges are very firm. Cool for 10-15 minutes before slicing and serving.

To restore the "crustiness" of the crust after the loaf has been stored, reheat in a 350 degree F (180 degree C) oven for 5-10 minutes, or until crusty.

*If using all-purpose flour, use only 1/2 cup water in the poolish instead of 3/4 cup. Bread and all-purpose flour absorb different levels of water and the recipe needs to be adjusted to accommodate this.

This post is sponsored through a partnership with King Arthur Flour. All thoughts and opinions are my own. 

Cinnamon Sugar Swirl Loaf

IMG_1851.jpg

When I imagine rolling pins and sheets of dough, I think of my grandmother. When I was young, just tall enough to peer over the kitchen counter, I would watch her construct German dishes from scratch. A bowl of dough was her beginning—a blank slate. She would create her coveted bread rolls in the palms of her hands. A long cylinder would be cut into logs to create shoop noodles. Sheets were rolled, paper thin, and coiled for strudels (which were later unraveled by greedy, hungry hands).

The motions were practiced, repeated thousands of time over her many years, but the awe factor never diminished for me.

IMG_1886.jpg

I am learning to see dough as a blank slate, a starting point instead of an unfinished product. Though my motions may still be clumsy, inexperienced from my few years, I can feel the progress beneath my fingertips. This past weekend, I kneaded together a sweet dough, challenging myself to roll it into a shape new to me. I have long admired braided and swirled breads for their intricate designs and used the pattern as my inspiration.

Though braided and swirled loaves may often look beyond the reach of a home baker, I can assure that most are well within the realm. This dough begins as cinnamon rolls do—a rectangle, which is rolled into a coil. Instead of being cut into individual rolls, however, the dough is split lengthwise down the center and the inside is revealed. The dough is braided, the ends pinched together, and it goes into the pan to bake.

The complicated layers and swirls are revealed in the oven. Each time the pattern may be new, but you can count on the flavor to remain the same.

PS: Pastry Affair has been nominated for Saveur Magazine's 2015 food blog awards in the Best Baking & Desserts Category! It is your support that has brought me here. Again, I want to take a moment to say thank you. To vote, head over to Saveur's website, take a moment to register, and select your favorites

This Cinnamon Sugar Swirled Loaf falls somewhere between a breakfast roll and a slice of coffee cake in texture. Cinnamon and sugar are present in every layer, adding a spiced sweetness that pervades the loaf. Served with a cup of black tea or coffee, the loaf becomes a part of a weekend breakfast or mid-morning treat.

One Year Ago: Coconut Tapioca Pudding
Two Years Ago: Mango Lassi, Peanut Butter & Jelly Muffinsand Almond Butter Chocolate Chip Cookies
Three Years Ago: Blackberry Goat Cheese Tart, Arborio Rice Pudding, Chocolate Marshmallow Whoopie Pies, and Hot Cross Buns
Four Years Ago: Flourless Peanut Butter Cookies, Orange Scones, Strawberry Oat Parfait, and Honey Rolls

Cinnamon Sugar Swirl Loaf

Yields 1 loaf

Dough
1/2 cup (120 ml) milk 
3 tablespoons (43 grams) butter, melted 
2 to 2 1/4 cups (250-280 grams) all purpose flour
1/4 cup (50 grams) granulated sugar 
1 large egg 
1 1/2 teaspoons active dry yeast
1/2 teaspoon salt

Warm milk and butter until about 100 degrees F (38 degrees C), or until lightly warm to the touch. Transfer to a large mixing bowl and add 2 cups flour, sugar, egg, yeast, and salt. Fold together until the batter forms a dough. If the dough is too sticky, add more flour by the tablespoonful until it begins to form a ball. On a lightly floured surface, place the the dough and knead until smooth and elastic, about 5-8 minutes. Form into a ball.

Transfer the dough to a lightly oiled bowl. Cover and allow the dough to rise in a warm environment until doubled in volume, about 2 hours.

Filling
1/3 cup (66 grams) brown sugar, packed 
1 tablespoon ground cinnamon 
3 tablespoons (43 grams) butter, room temperature
1 large egg, beaten

Preheat oven to 375 degrees F (190 degrees C).

In a small bowl, mix together the brown sugar, cinnamon, and butter until it forms a uniform spread. Set aside.

On a lightly floured surface, roll out the dough to approximately an 11 x 15-inch rectangle. Using an offset spatula, spread the brown sugar mixture uniformly on the dough, leaving a 1/2-inch border around the edge. Starting lengthwise, roll the dough until coiled. Pinch together the edges to seal.

Using a sharp serrated knife, cut the coil in half lengthwise and face the inside upwards. Pinch together one end of the dough and braid the two long strands, facing the cut side upwards at all times. Pinch together the remaining end. Form the dough into a circular shape and pinch together the pinched ends. Transfer the circle to a lightly greased cast-iron pan or 10-inch round cake pan and brush with the beaten egg. Bake for 25-30 minutes, or until dark brown and fragrant.

Run a knife around the outside of the pan and allow to rest for 15-20 minutes before serving.