Rosemary Olive Bread

The season of comfort foods and warm stews is upon us. Along with the holiday table classics, my dinner table features homemade breads for soaking up gravy and mashed potatoes. In years past, I have filled the bread basket with soft honey rolls, sweet cranberry orange brioche buns, and lightly spiced pumpkin rolls. As my love for crusty bread grows ever stronger, this year's table will feature a loaf with a thick crust and soft interiora texture perfect for mopping the plate clean.

In partnership with King Arthur Flour, each month I want to challenge you with a new recipe, filled with explanations and fresh techniques to help you grow and develop as a baker. This month we're tackling the crusty loaf and learning how to create it in your own kitchen. The recipe may appear long or complicated at first glance, but these are many details to make the new techniques easier for you. The recipe is at the same difficulty level and takes the same amount of active time as a traditional loaf of bread.

The bread starts with a poolish, which is a French term for a pre-ferment. A pre-ferment is exactly as it sounds dough that has been fermented before baking. The poolish is created the evening before by mixing together flour, water, and a pinch of yeast. Covered tightly with plastic wrap, it is left to rest overnight at room temperature for 12-18 hours. The ideal time for this poolish to be ready is roughly 15 hours, but bread is incredibly forgiving and the poolish will adjust to your own schedule. 

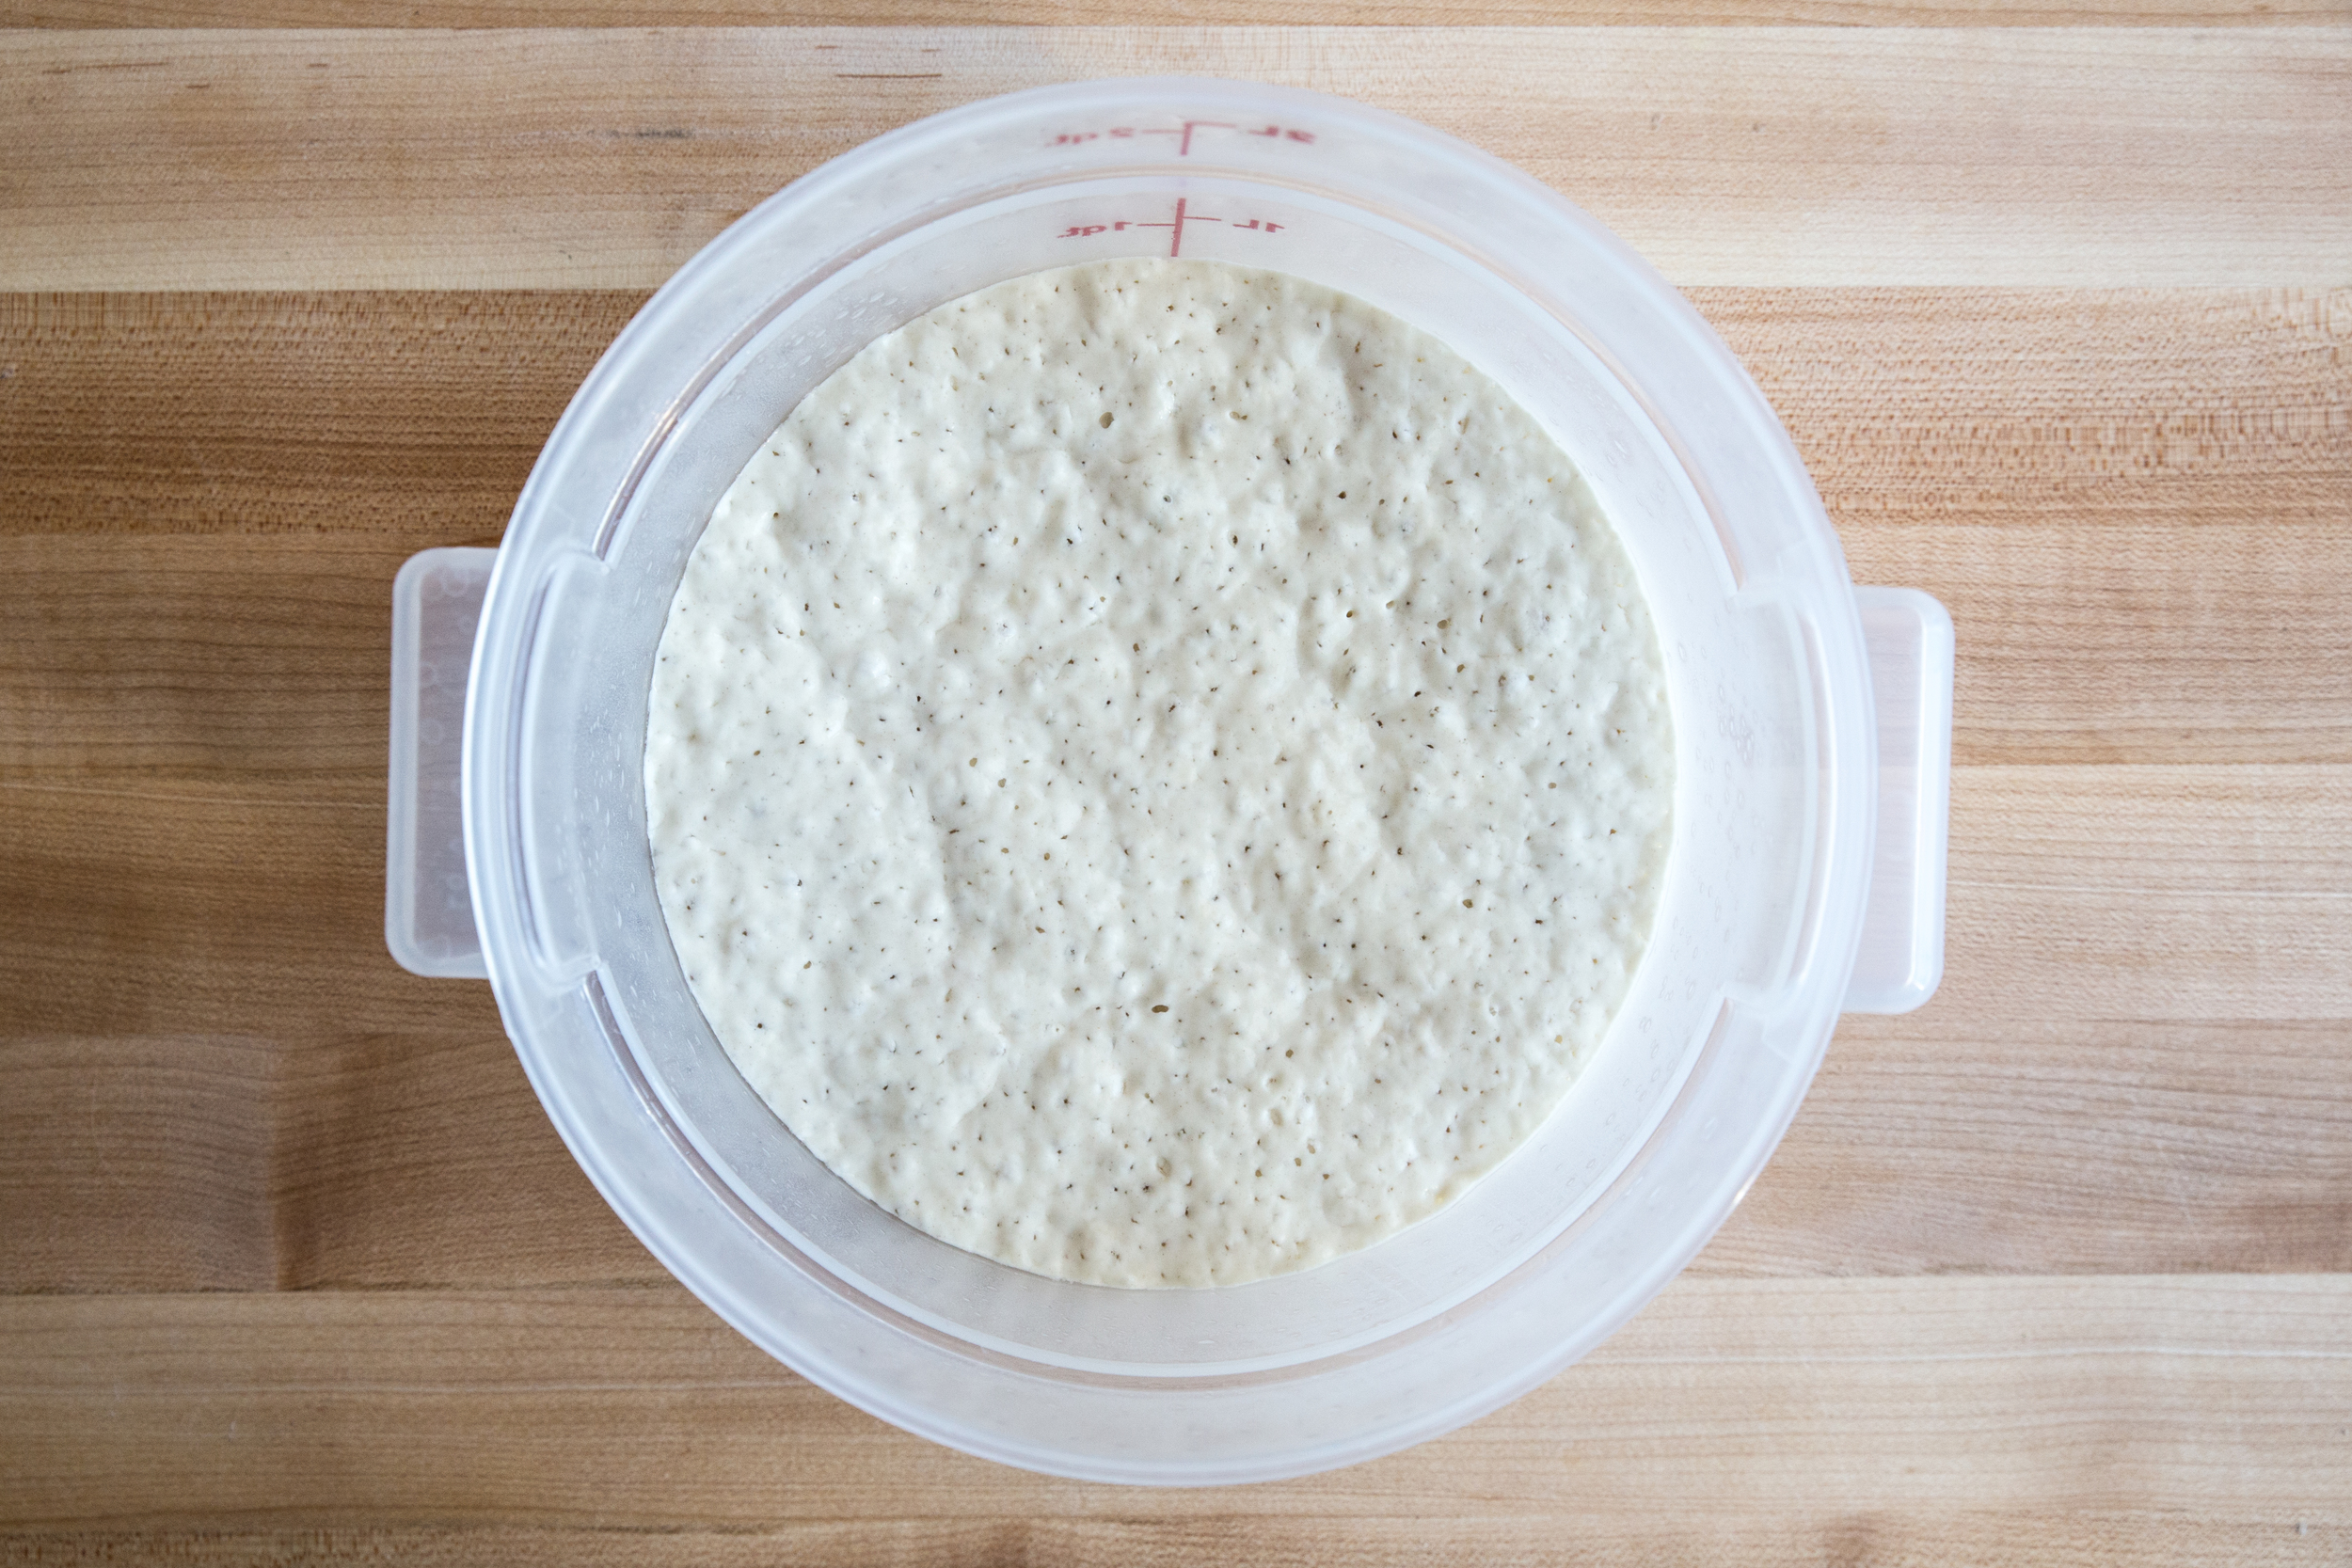
The poolish has a dual purpose: the fermentation adds a greater complexity of flavor to the bread and it helps the baked bread keep for a longer period of time. When ready, the poolish will have a uniform bubbled appearance, shown above.

When the remaining ingredients have been added to the bread, the dough will be very sticky. Contrary to popular belief, this is exactly what we want. A "wet dough" will yield a loaf with an open crumb, which results in a tender interior, and a firmer crust. Although you will have a strong temptation to add more flour, don't do it. Instead, we will knead the dough using wet dough techniques.

The use of a bench knife will be incredibly helpful for the next few steps.

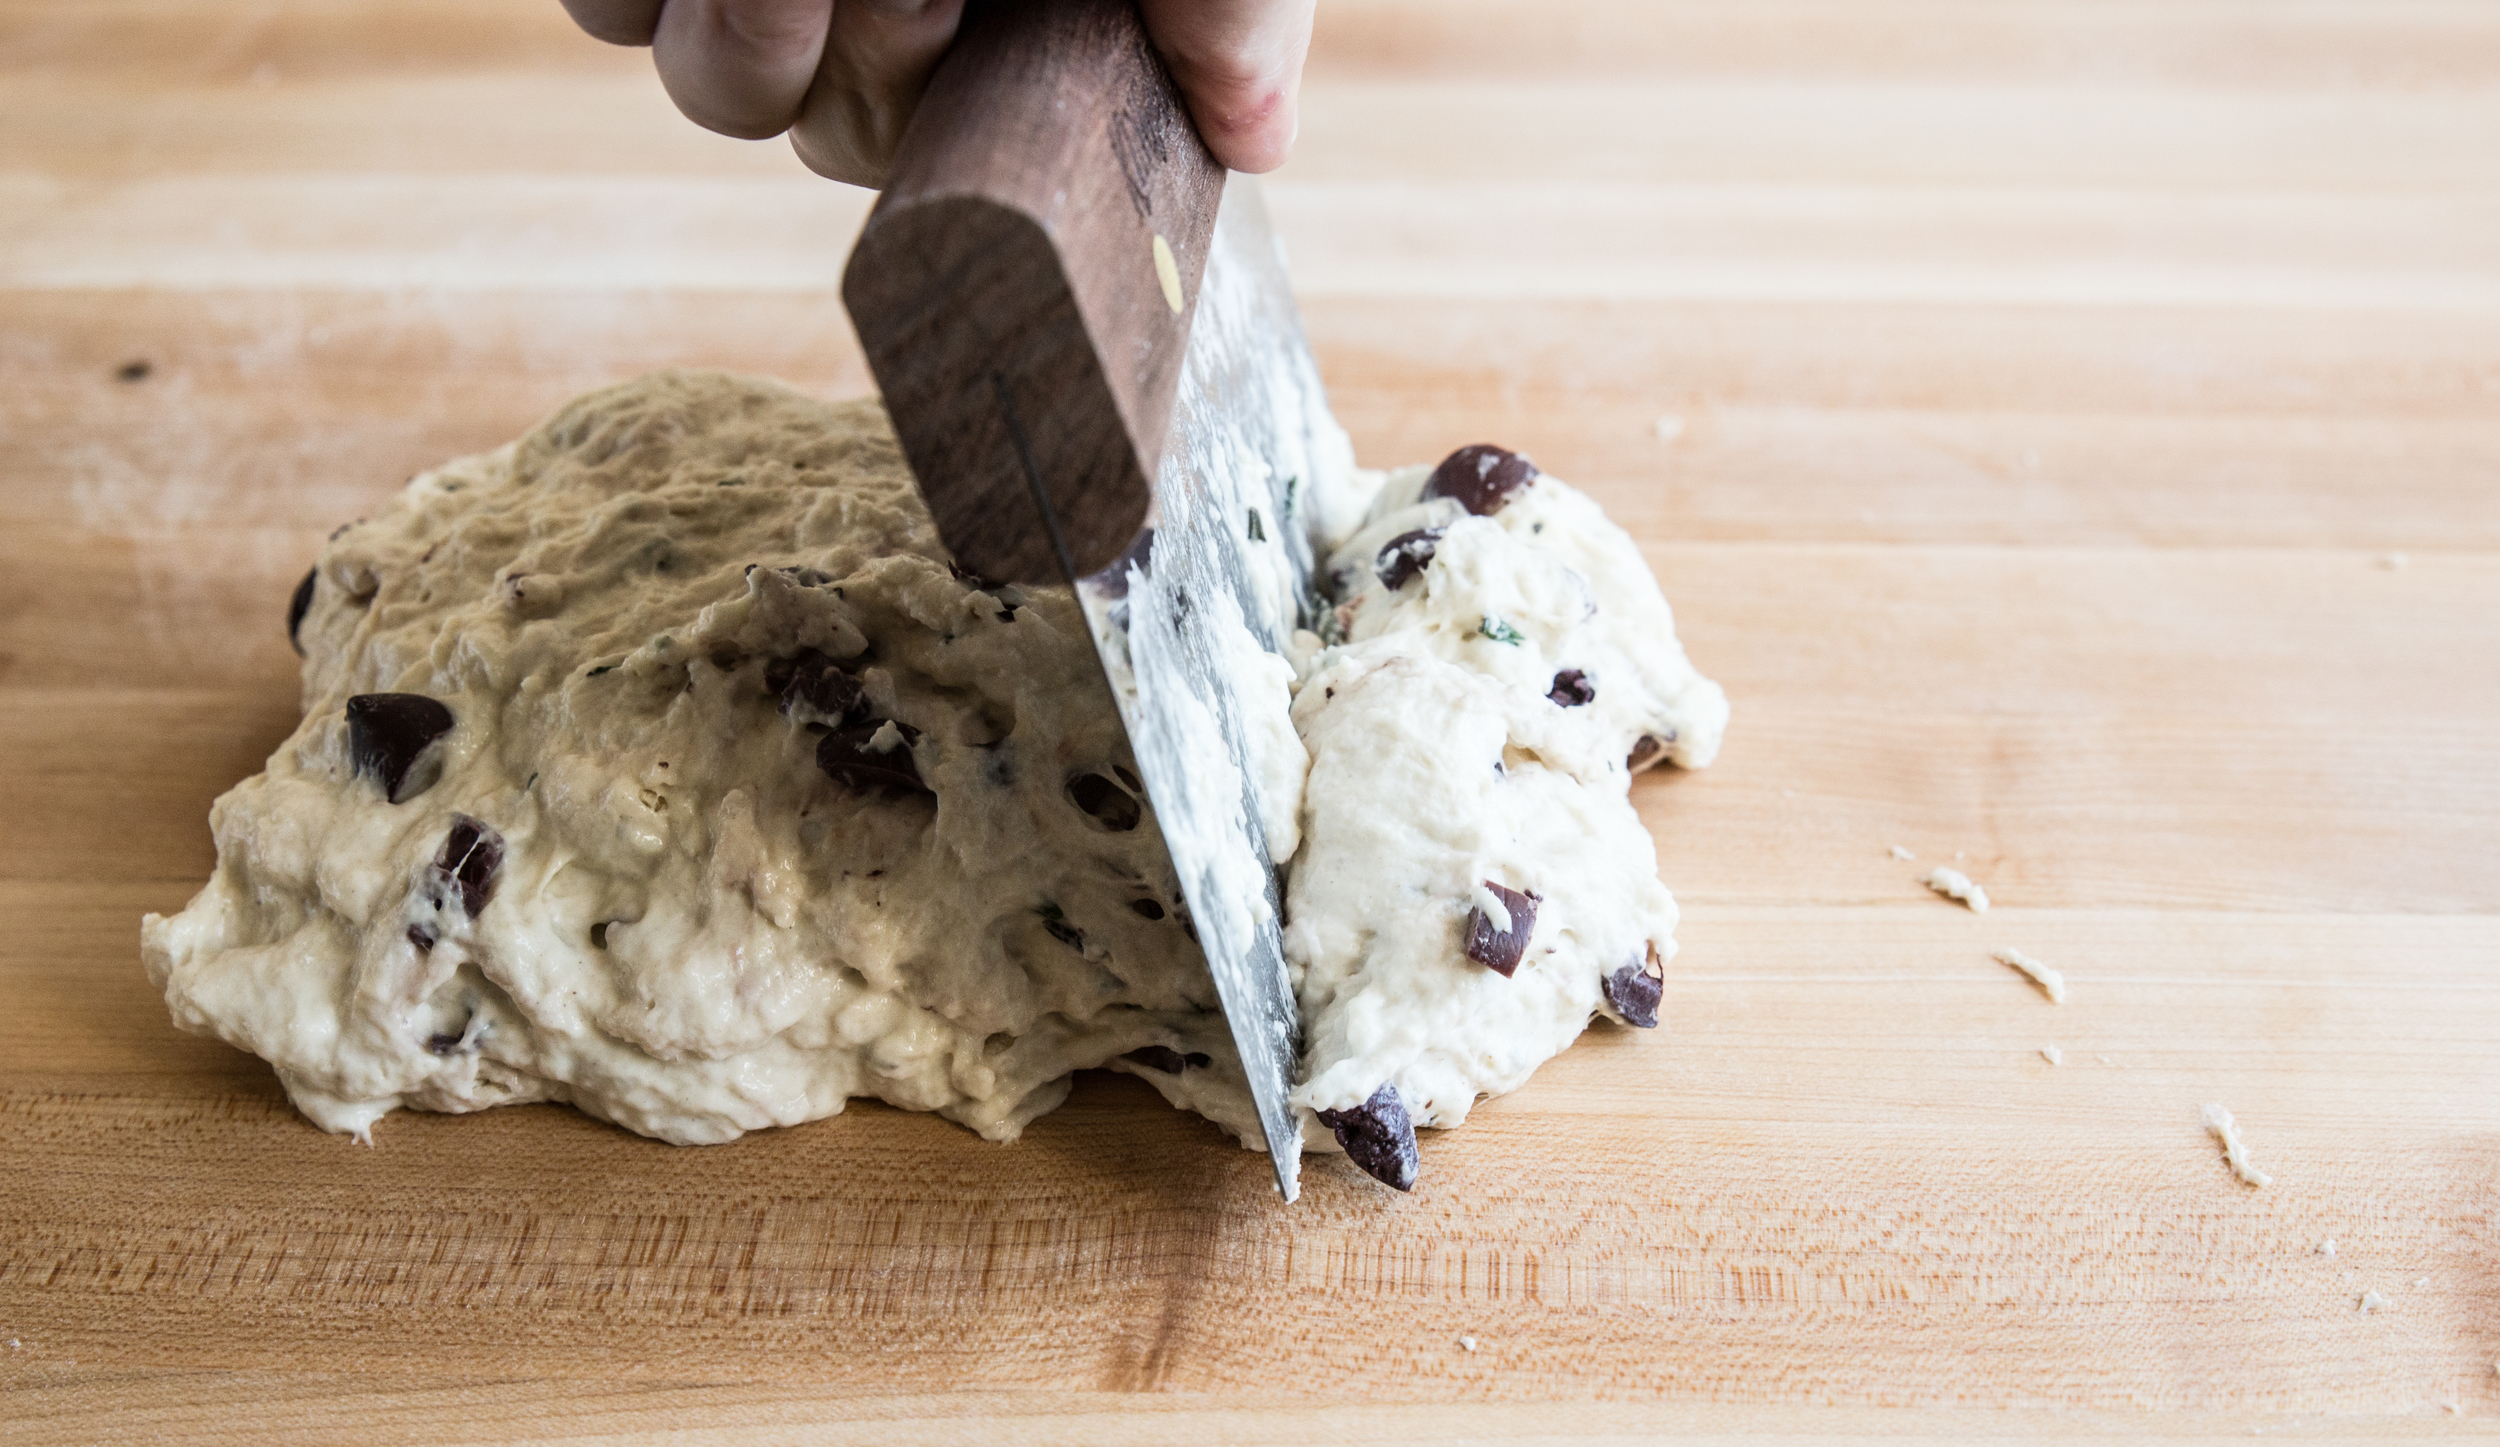
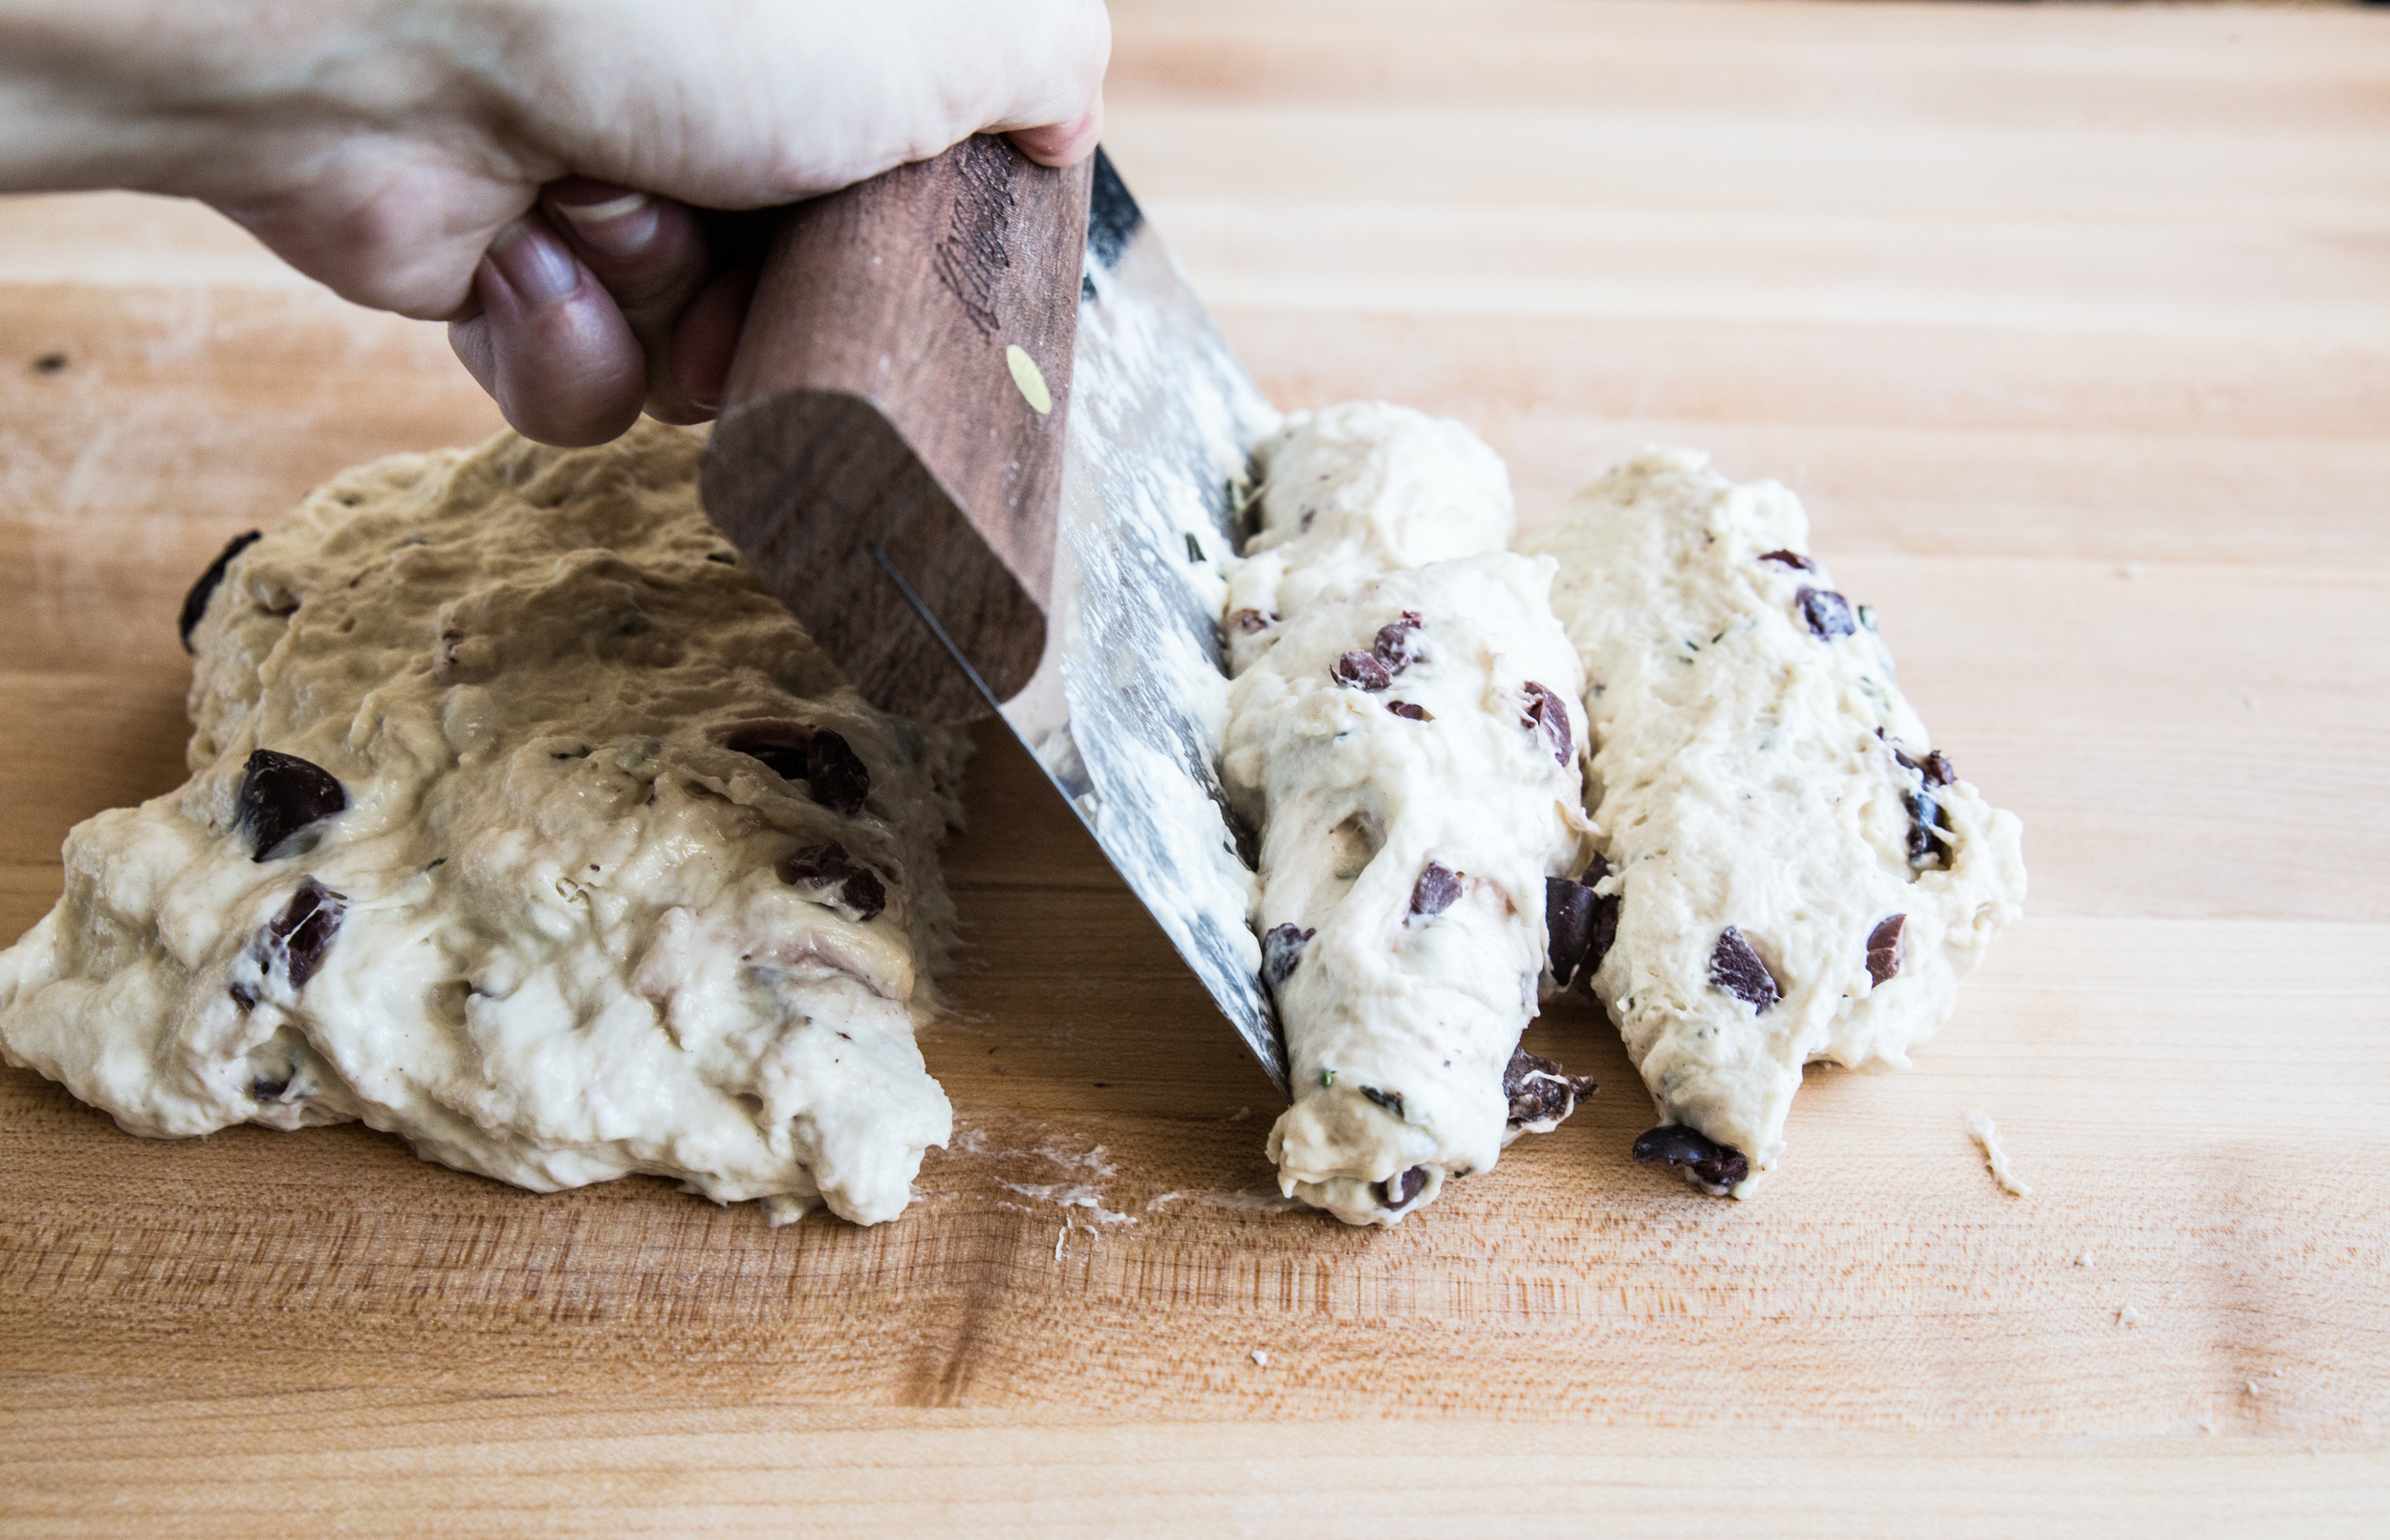
Turn the dough out onto a clean, flourless surface (wooden cutting boards work best, but I have used a clean counter top with no issue). To knead the wet dough, form the dough into a log shape with your bench knife and, starting at one end, cut the dough at roughly a 45 degree angle. Continue the cutting motion, slicing the dough into 4-5 pieces. Use the bench knife to slide the dough pieces back together, rotate the loaf a quarter turn, and repeat the slicing process. Continue kneading in this manner for 3-5 minutes.

The process of cutting the dough helps the gluten to form quickly. After a few repetitions of the kneading process, you will notice the dough change texture. It will go from soft and lax to holding itself together in a tighter formation. When the dough has visibly changed textures (less sticky) and becomes difficult to slice, it is time to change kneading techniques.

rosemaryolivebread6.jpg

The second kneading technique will strengthen the dough and give it elasticity. Using the bench knife, bring the dough into a log shape. The long edge should be facing you. About 1/3 of the way in, pick up the dough with the tips of your fingers (no palms). Imagine picking up a cat under the front paws; the motion is similar. Rotate the dough 90 degrees and slap the bottom of the dough against the surface, pulling the top half of the dough back with your fingers to stretch it. Fold the dough back onto itself by bringing your hands down over the top of the dough, touching the surface, and pulling your hands out sideways to break free. This will help minimize sticking. Every few motions, scrape the surface clean with a bench knife to keep the dough together. 

Be aggressive and move quickly with the dough or it will stick to the table and be more difficult to work with. Don't be afraid of kneading incorrectly; you'll pick up the technique quickly when you can feel how your motions affect the dough. After 3-5 minutes of kneading, the dough will be ready. It will have a smooth appearance, lose much of its stickiness (you should be able to poke the dough without it sticking to your finger), and feel like a muscle (elastic). 

To clean your hands of sticky dough while kneading, rub them with a small amount of flour. The dough will come off easily, making it faster and less messy than using water or a towel. 

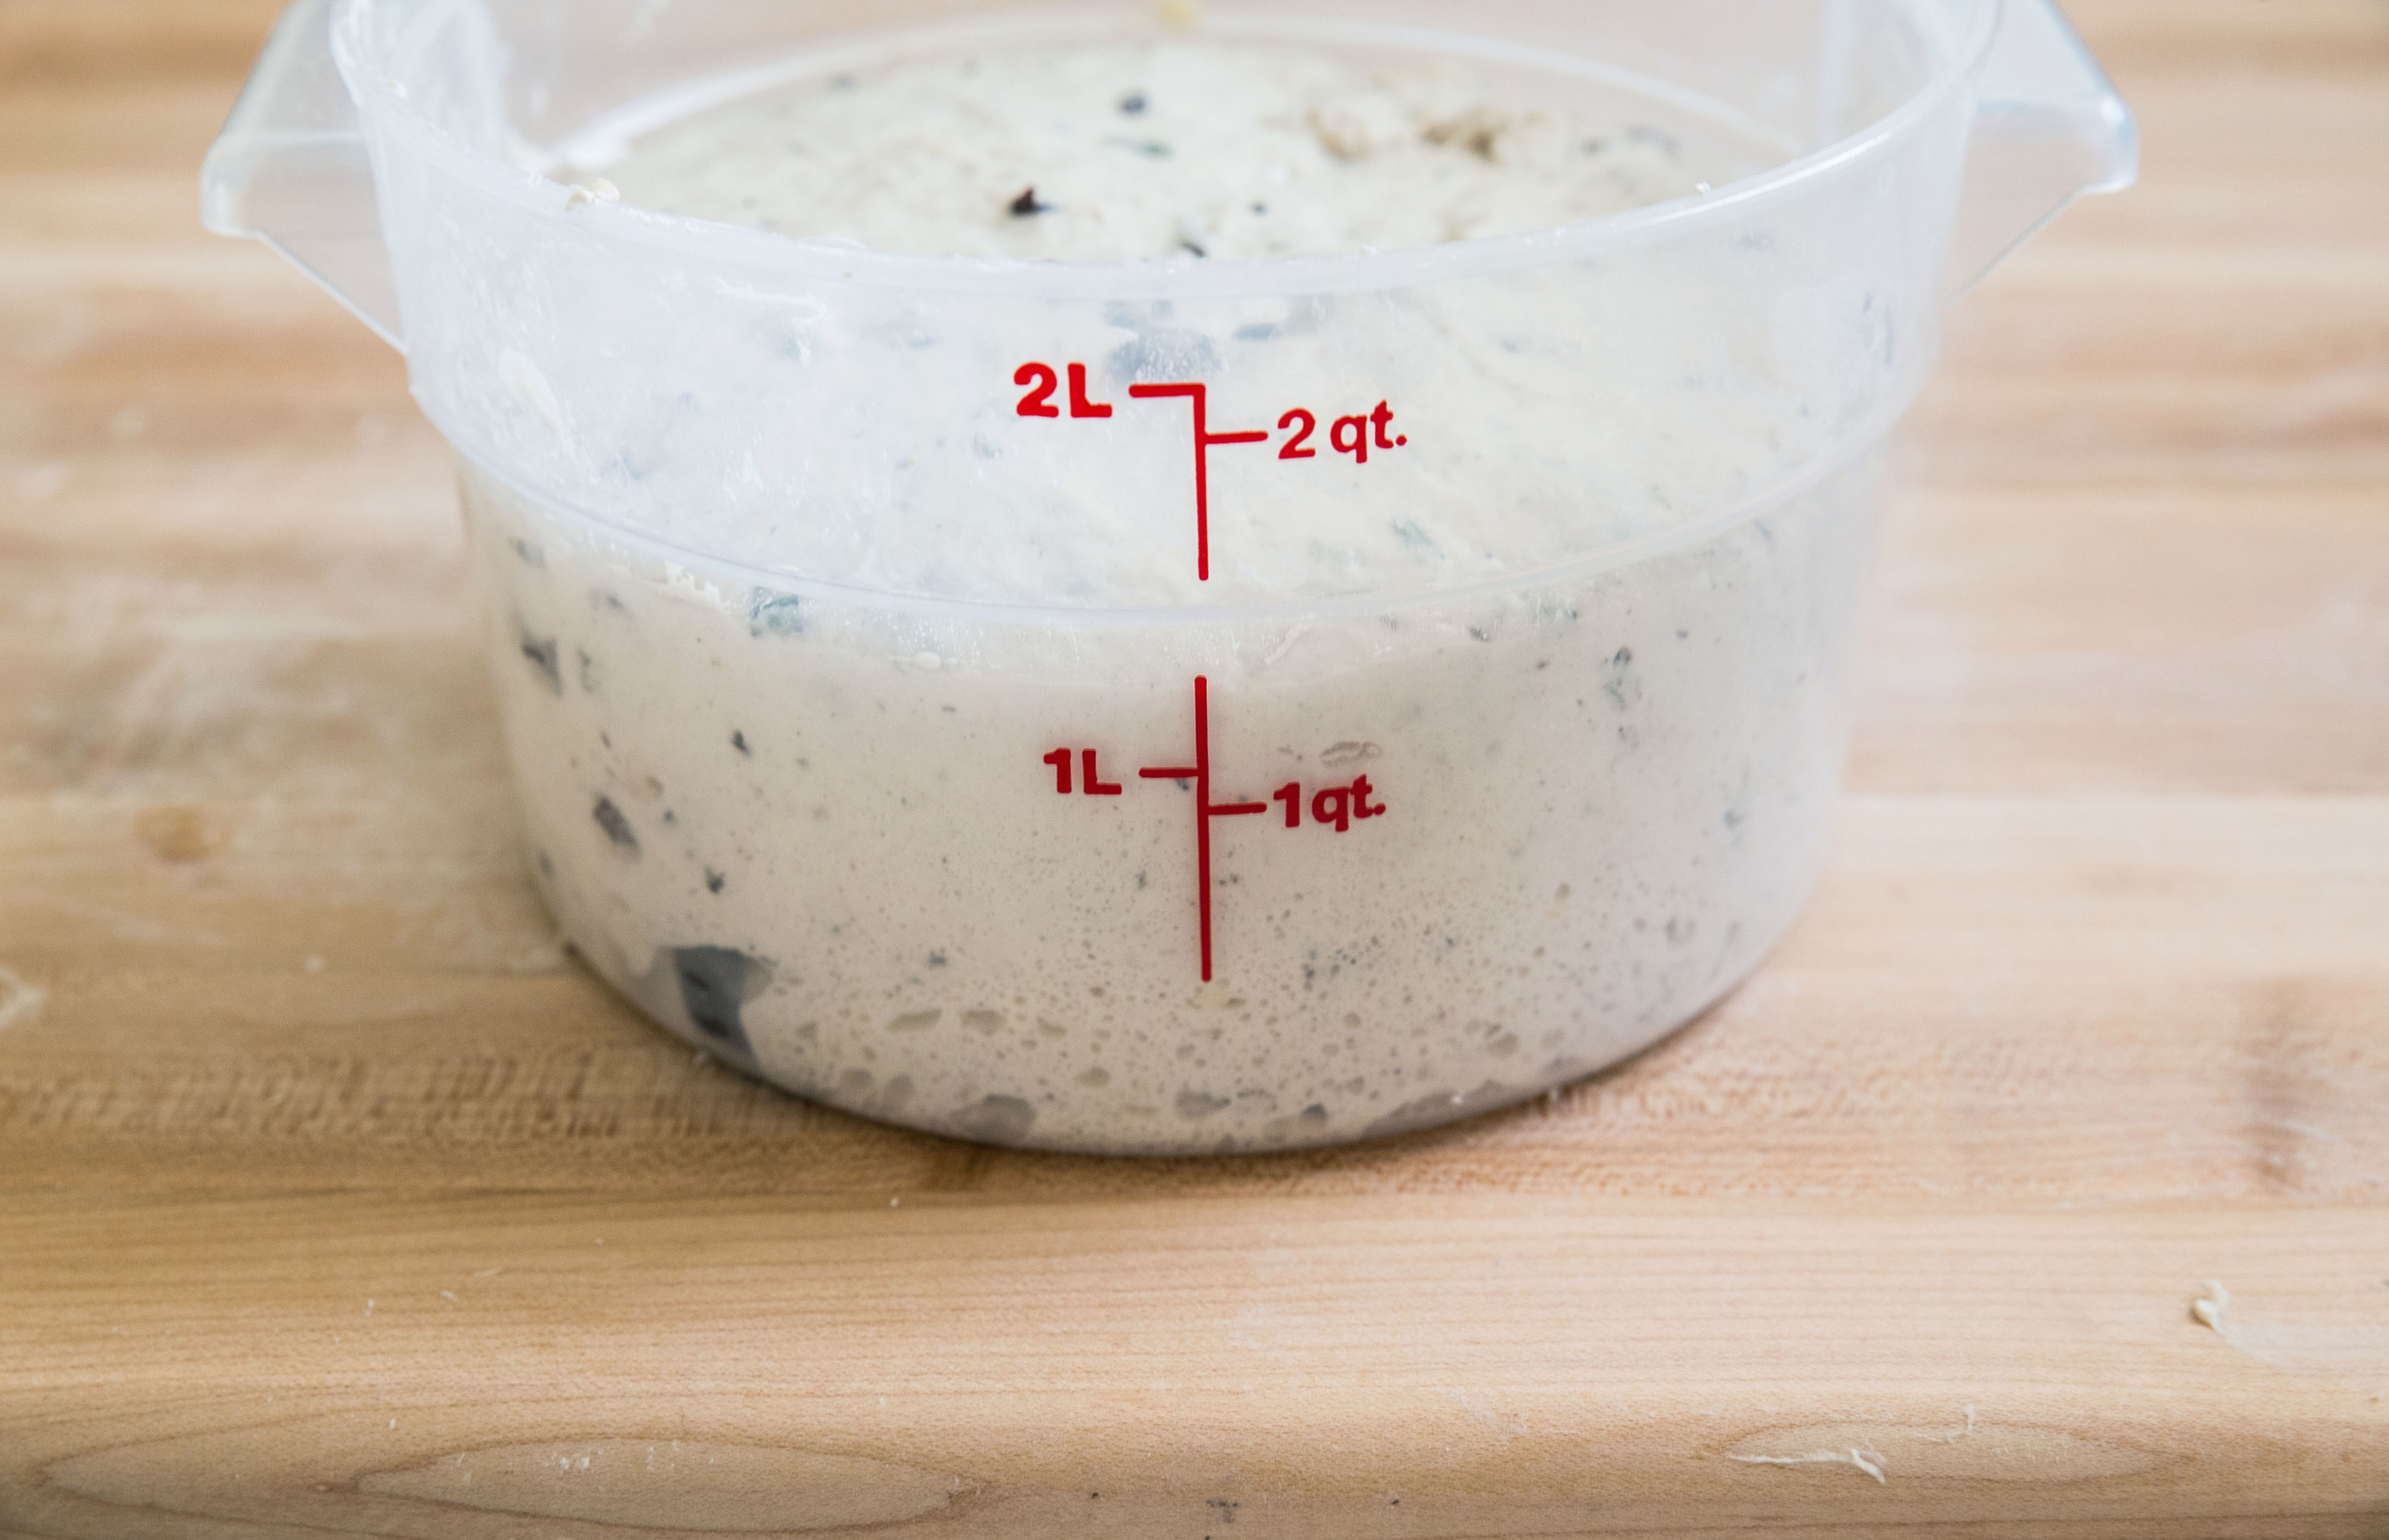
Place the kneaded dough into a bowl, cover, and let it to rise until it doubles in volume. This will take anywhere from 1-2 hours depending on the temperature of the room. I recommend putting the dough into a container with volume measurements (like the dough doubler pictured above)—it makes it easy to see exactly how much your dough has risen and how much farther it has left to go.

rosemaryolivebread1.jpg

When the dough has doubled in volume, turn it out onto a very lightly floured surface to prevent any sticking. (1) Take the corners of the dough and pull them into the center of the loaf. (2) This will create a square or rectangular appearance. (3) Then, take two adjacent corners and fold them in to form a triangular end. (4) Starting on this end, roll the dough into itself tightly, forming a loaf shape. Place the loaf seam side down onto parchment paper, cover with a towel, and let it rise until doubled in volume (30-40 minutes).

Before forming the loaf, turn on the oven to preheat the baking stone in the middle rack of the oven. It takes much longer than the oven to come to full temperature and should be given plenty of time to heat. I heat the oven while the bread completes its second rise. The use of a baking stone helps the loaf bake evenly by dispersing the heat evenly and helps the bottom of the loaf become crusty without burning. If you don't have a baking stone, a thick baking sheet can be used as a substitute. Place a cast iron pan (or edged broiler pan) on a different rack below the baking stone to heat as well; this will be used to create steam.

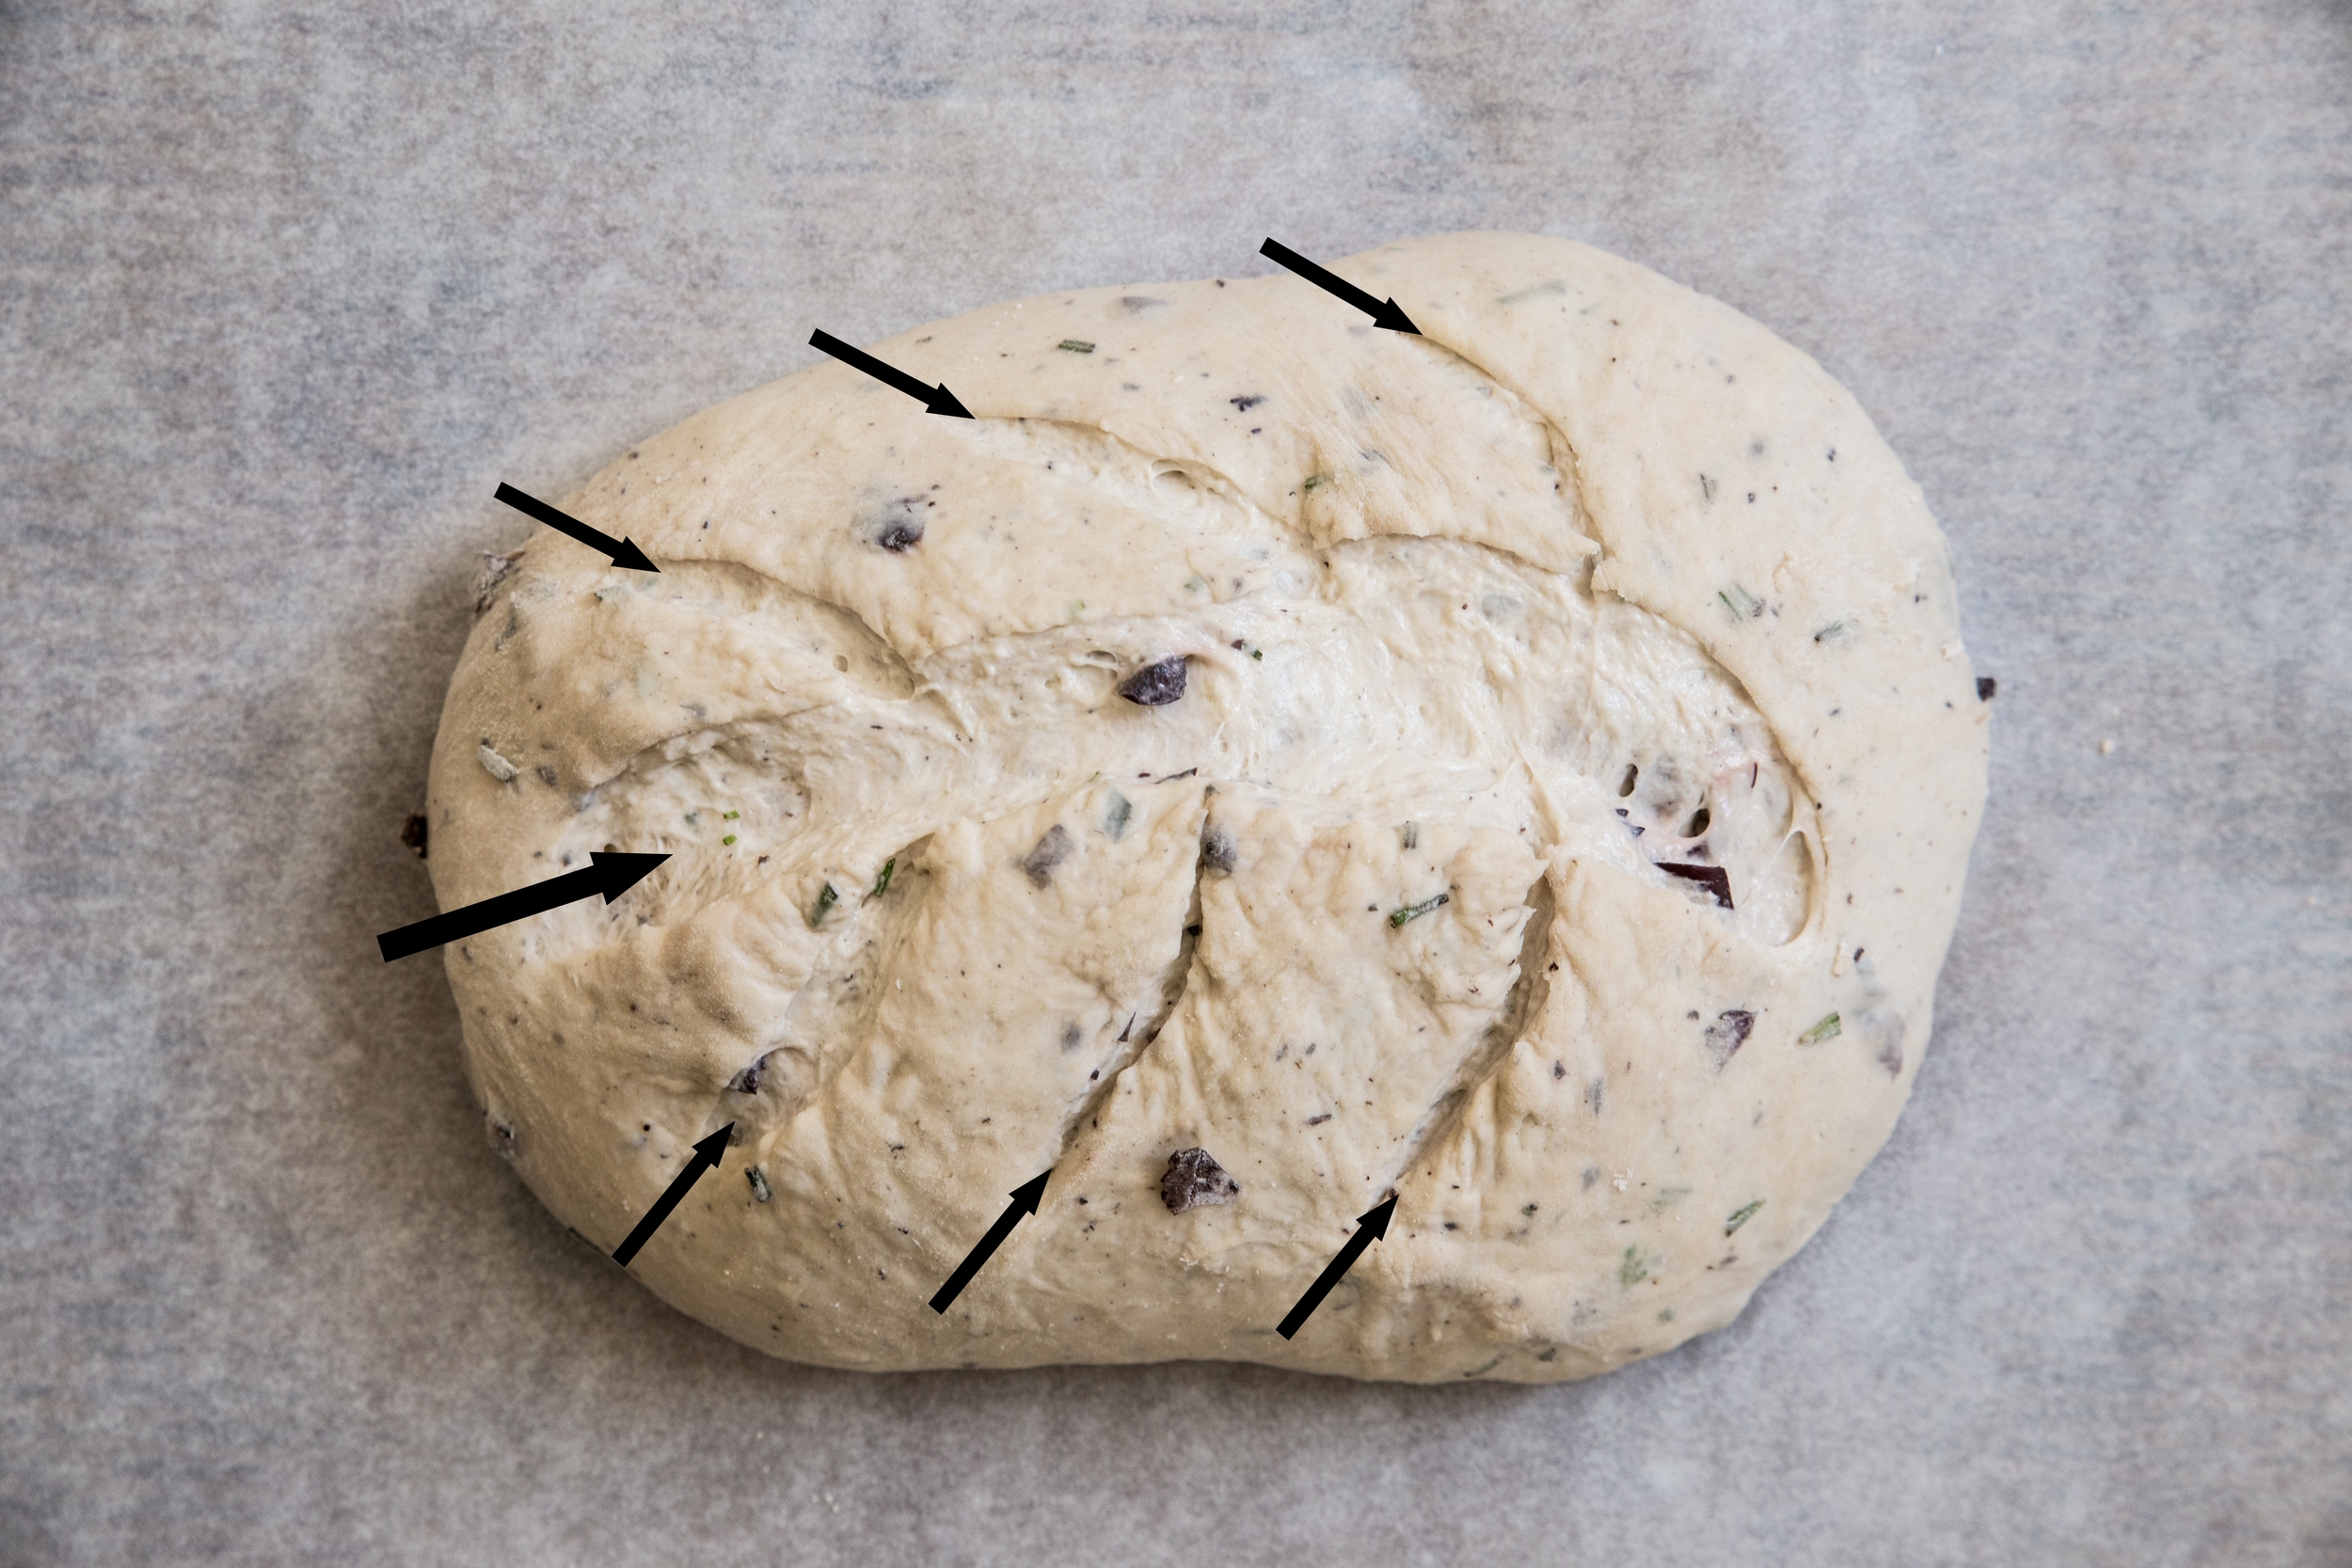
Just before baking, slash the loaf no more than 1/4" deep with a lame (or sharp knife) in a decorative pattern (I made a leaf). The slashes allow the loaf to rise evenly, with no breaks along the sides or top.

Use parchment paper to slide the dough onto the heated baking stone in the oven without disturbing the shape. Next, pour 1/2 cup water into the cast iron pan on the rack below. Quickly shut the oven door to trap the steam. The steam helps the bread rise and helps create the firm crust on the final loaf. The bread is ready when it has a well caramelized appearance and firm crust on all sides. Allow the bread to rest for 10-15 minutes before slicing. This will allow the moisture to distribute evenly and set the interior texture.

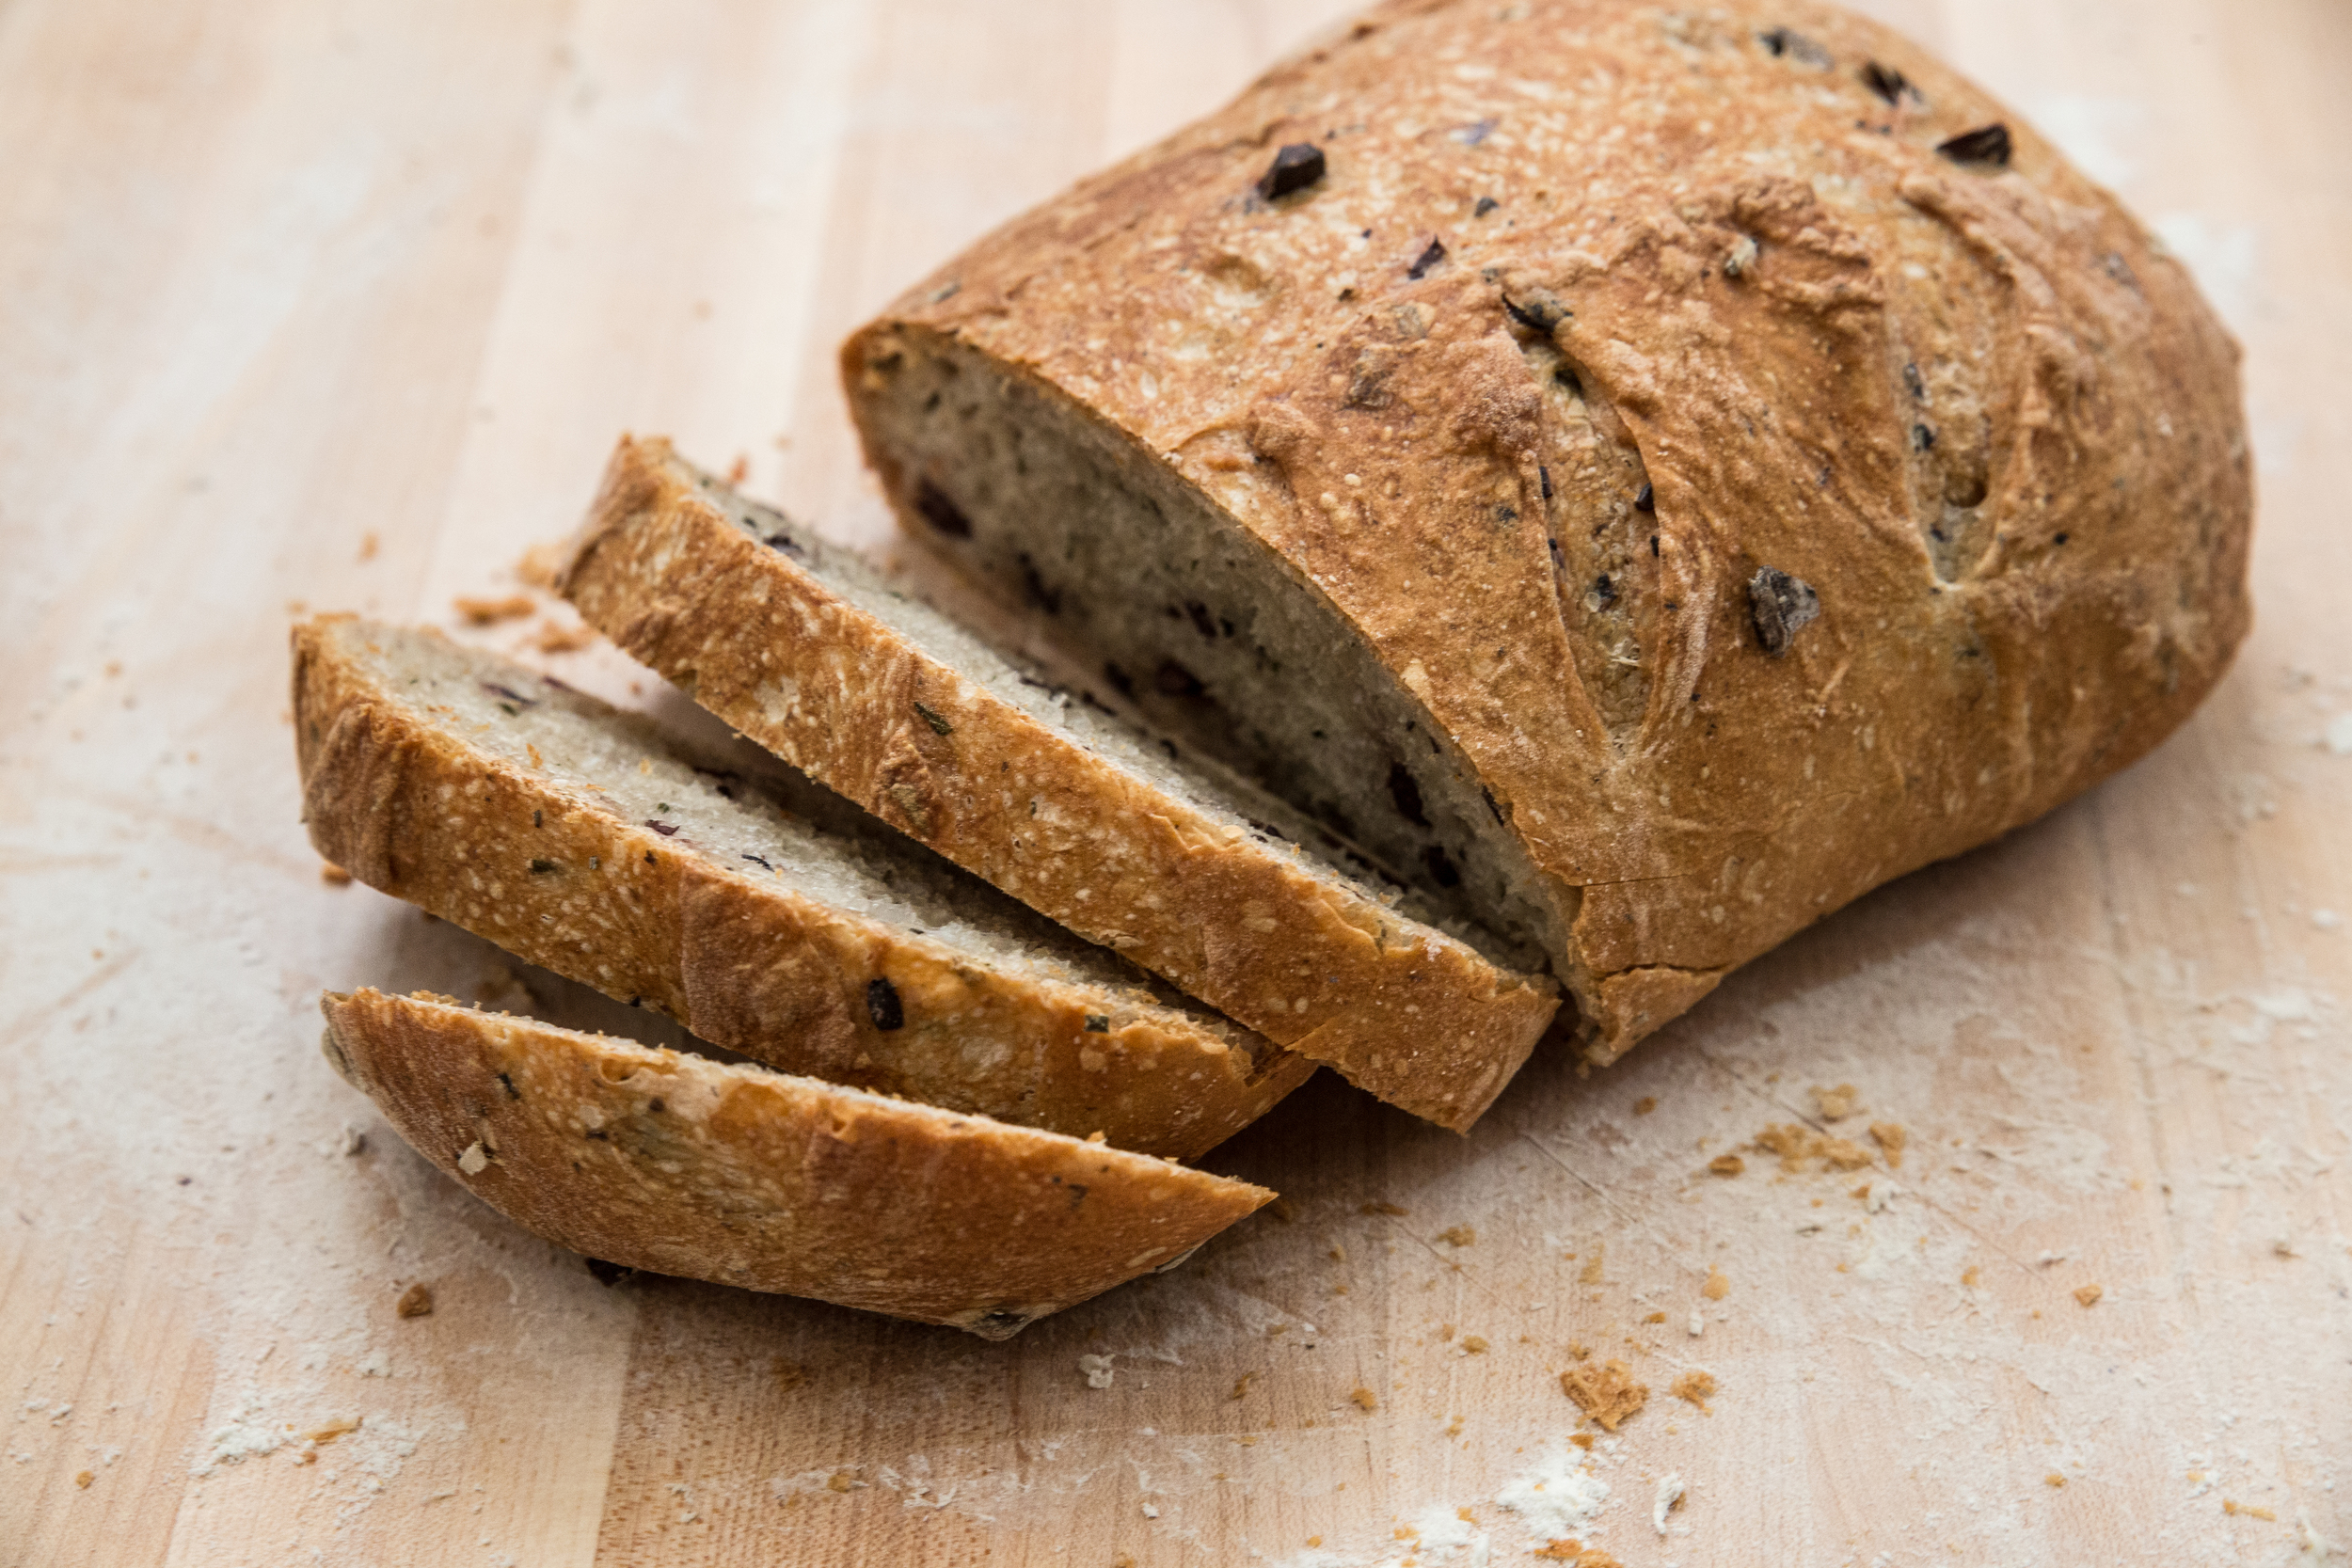
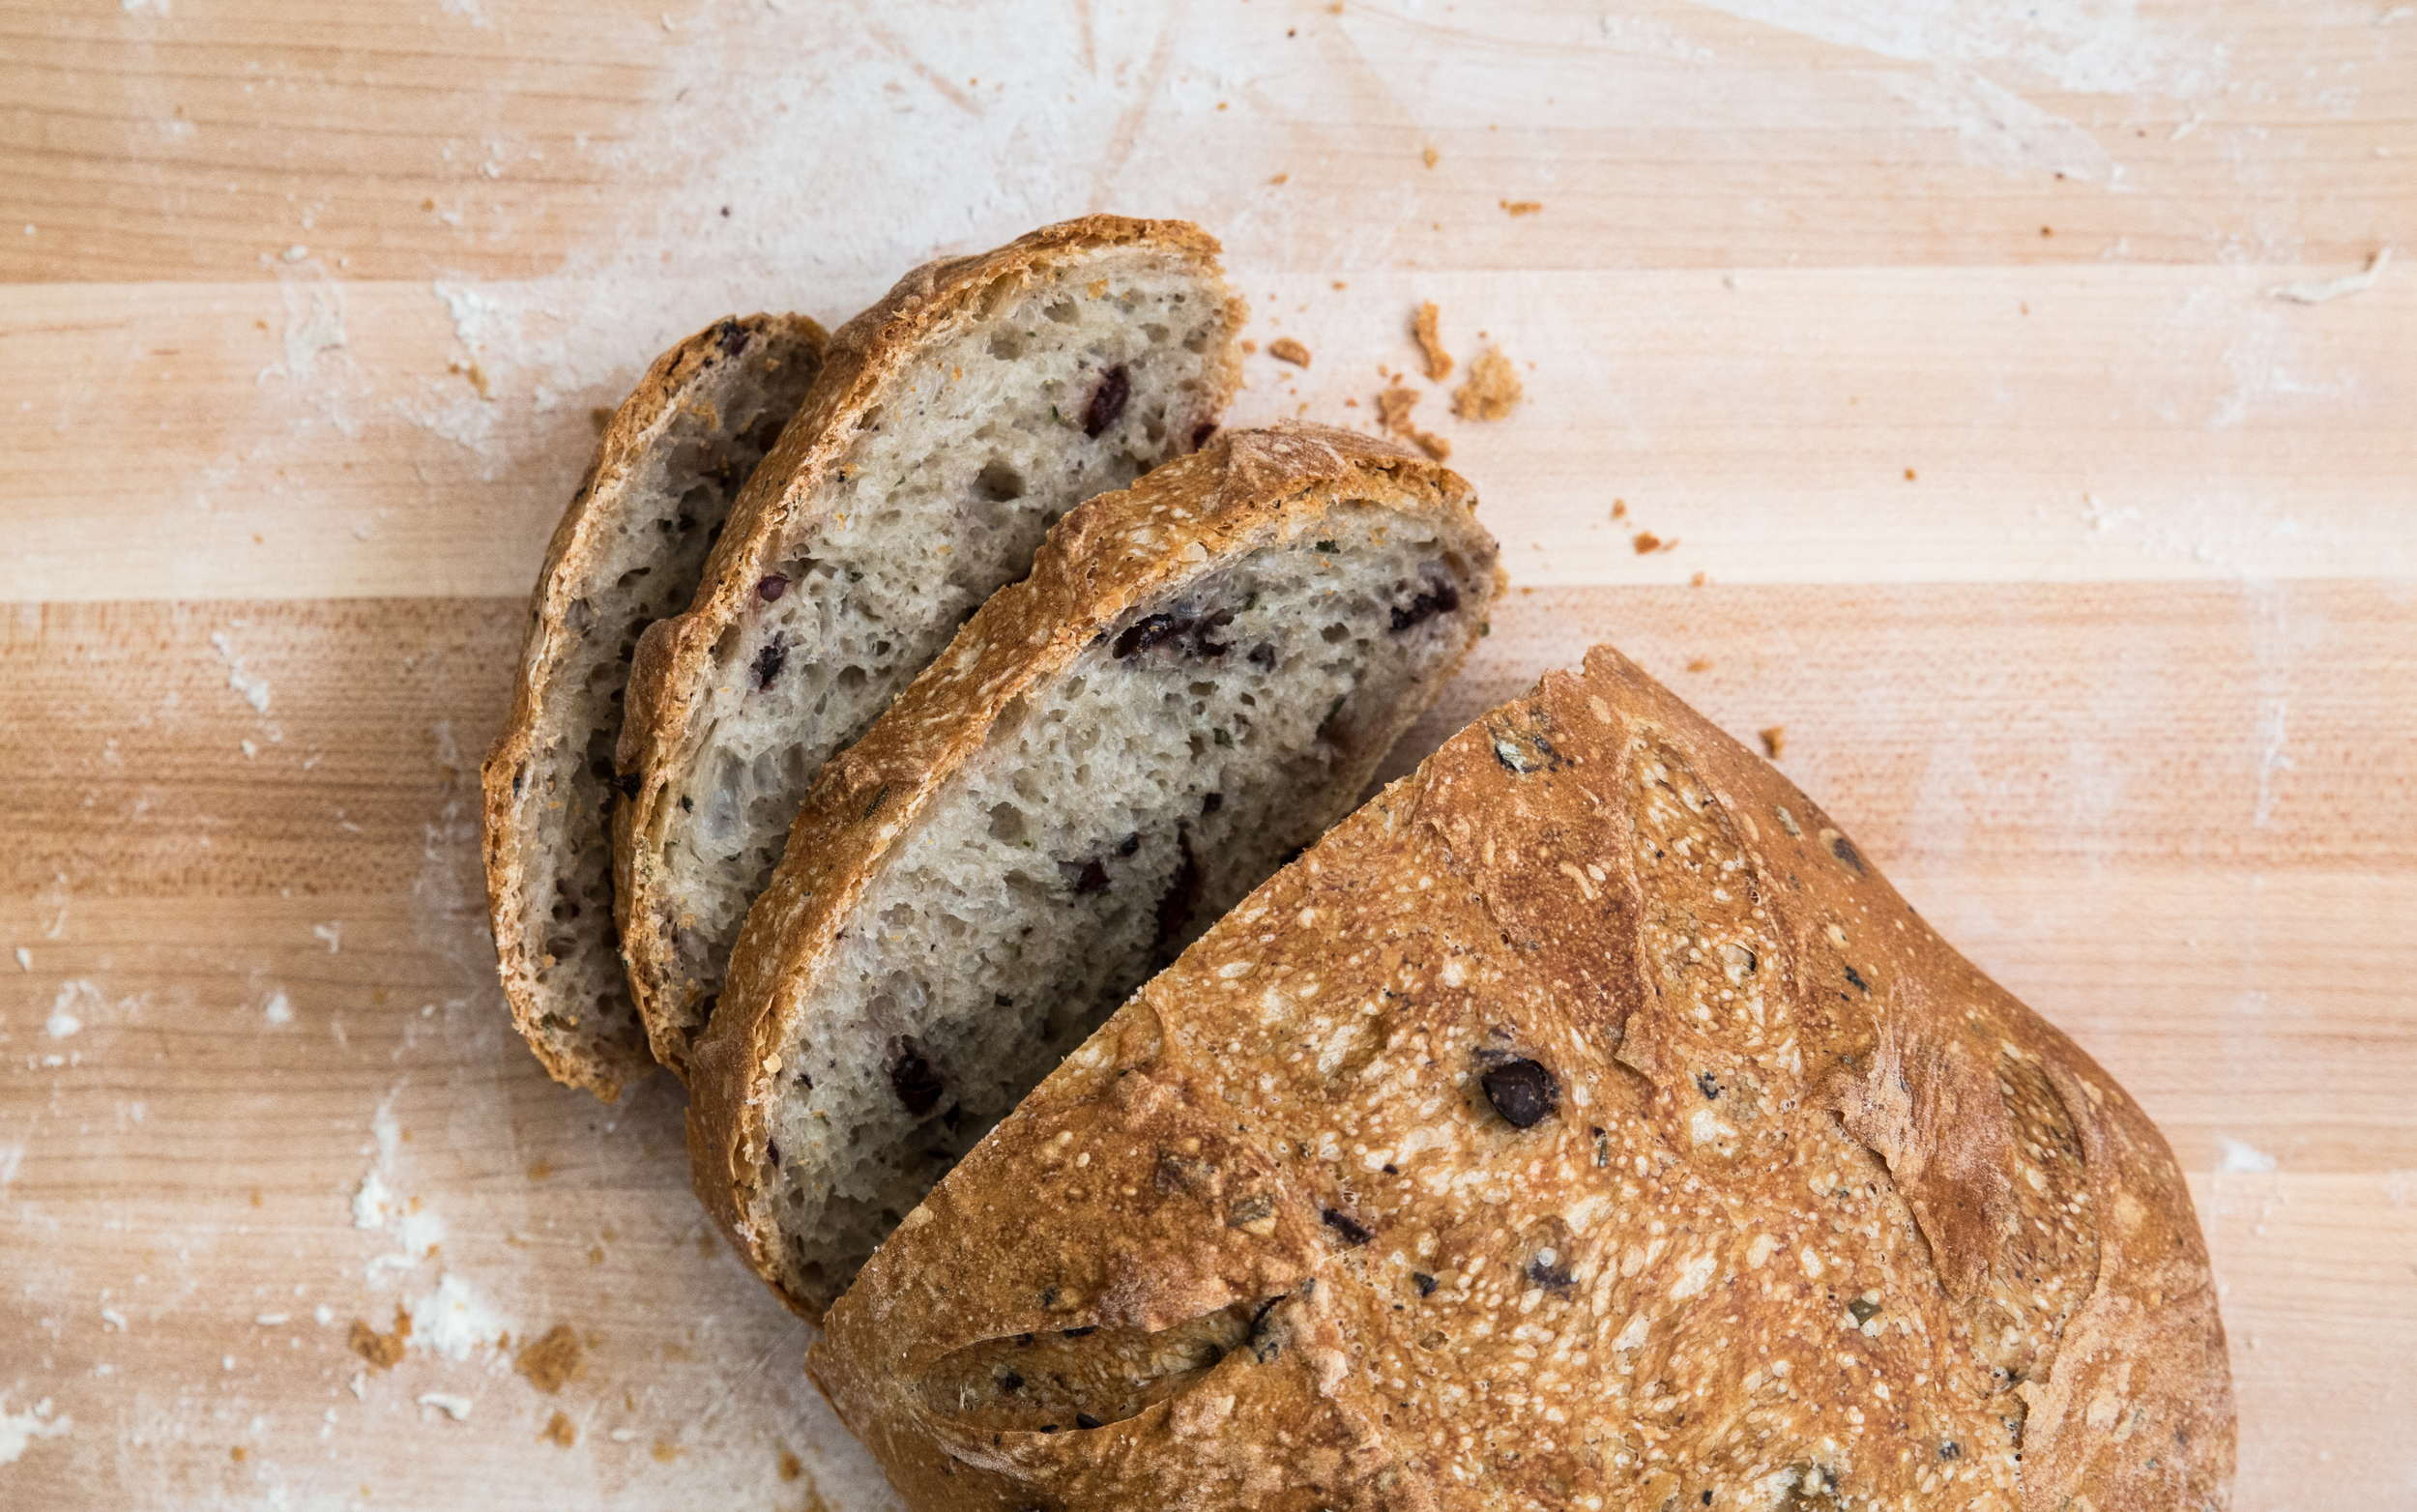
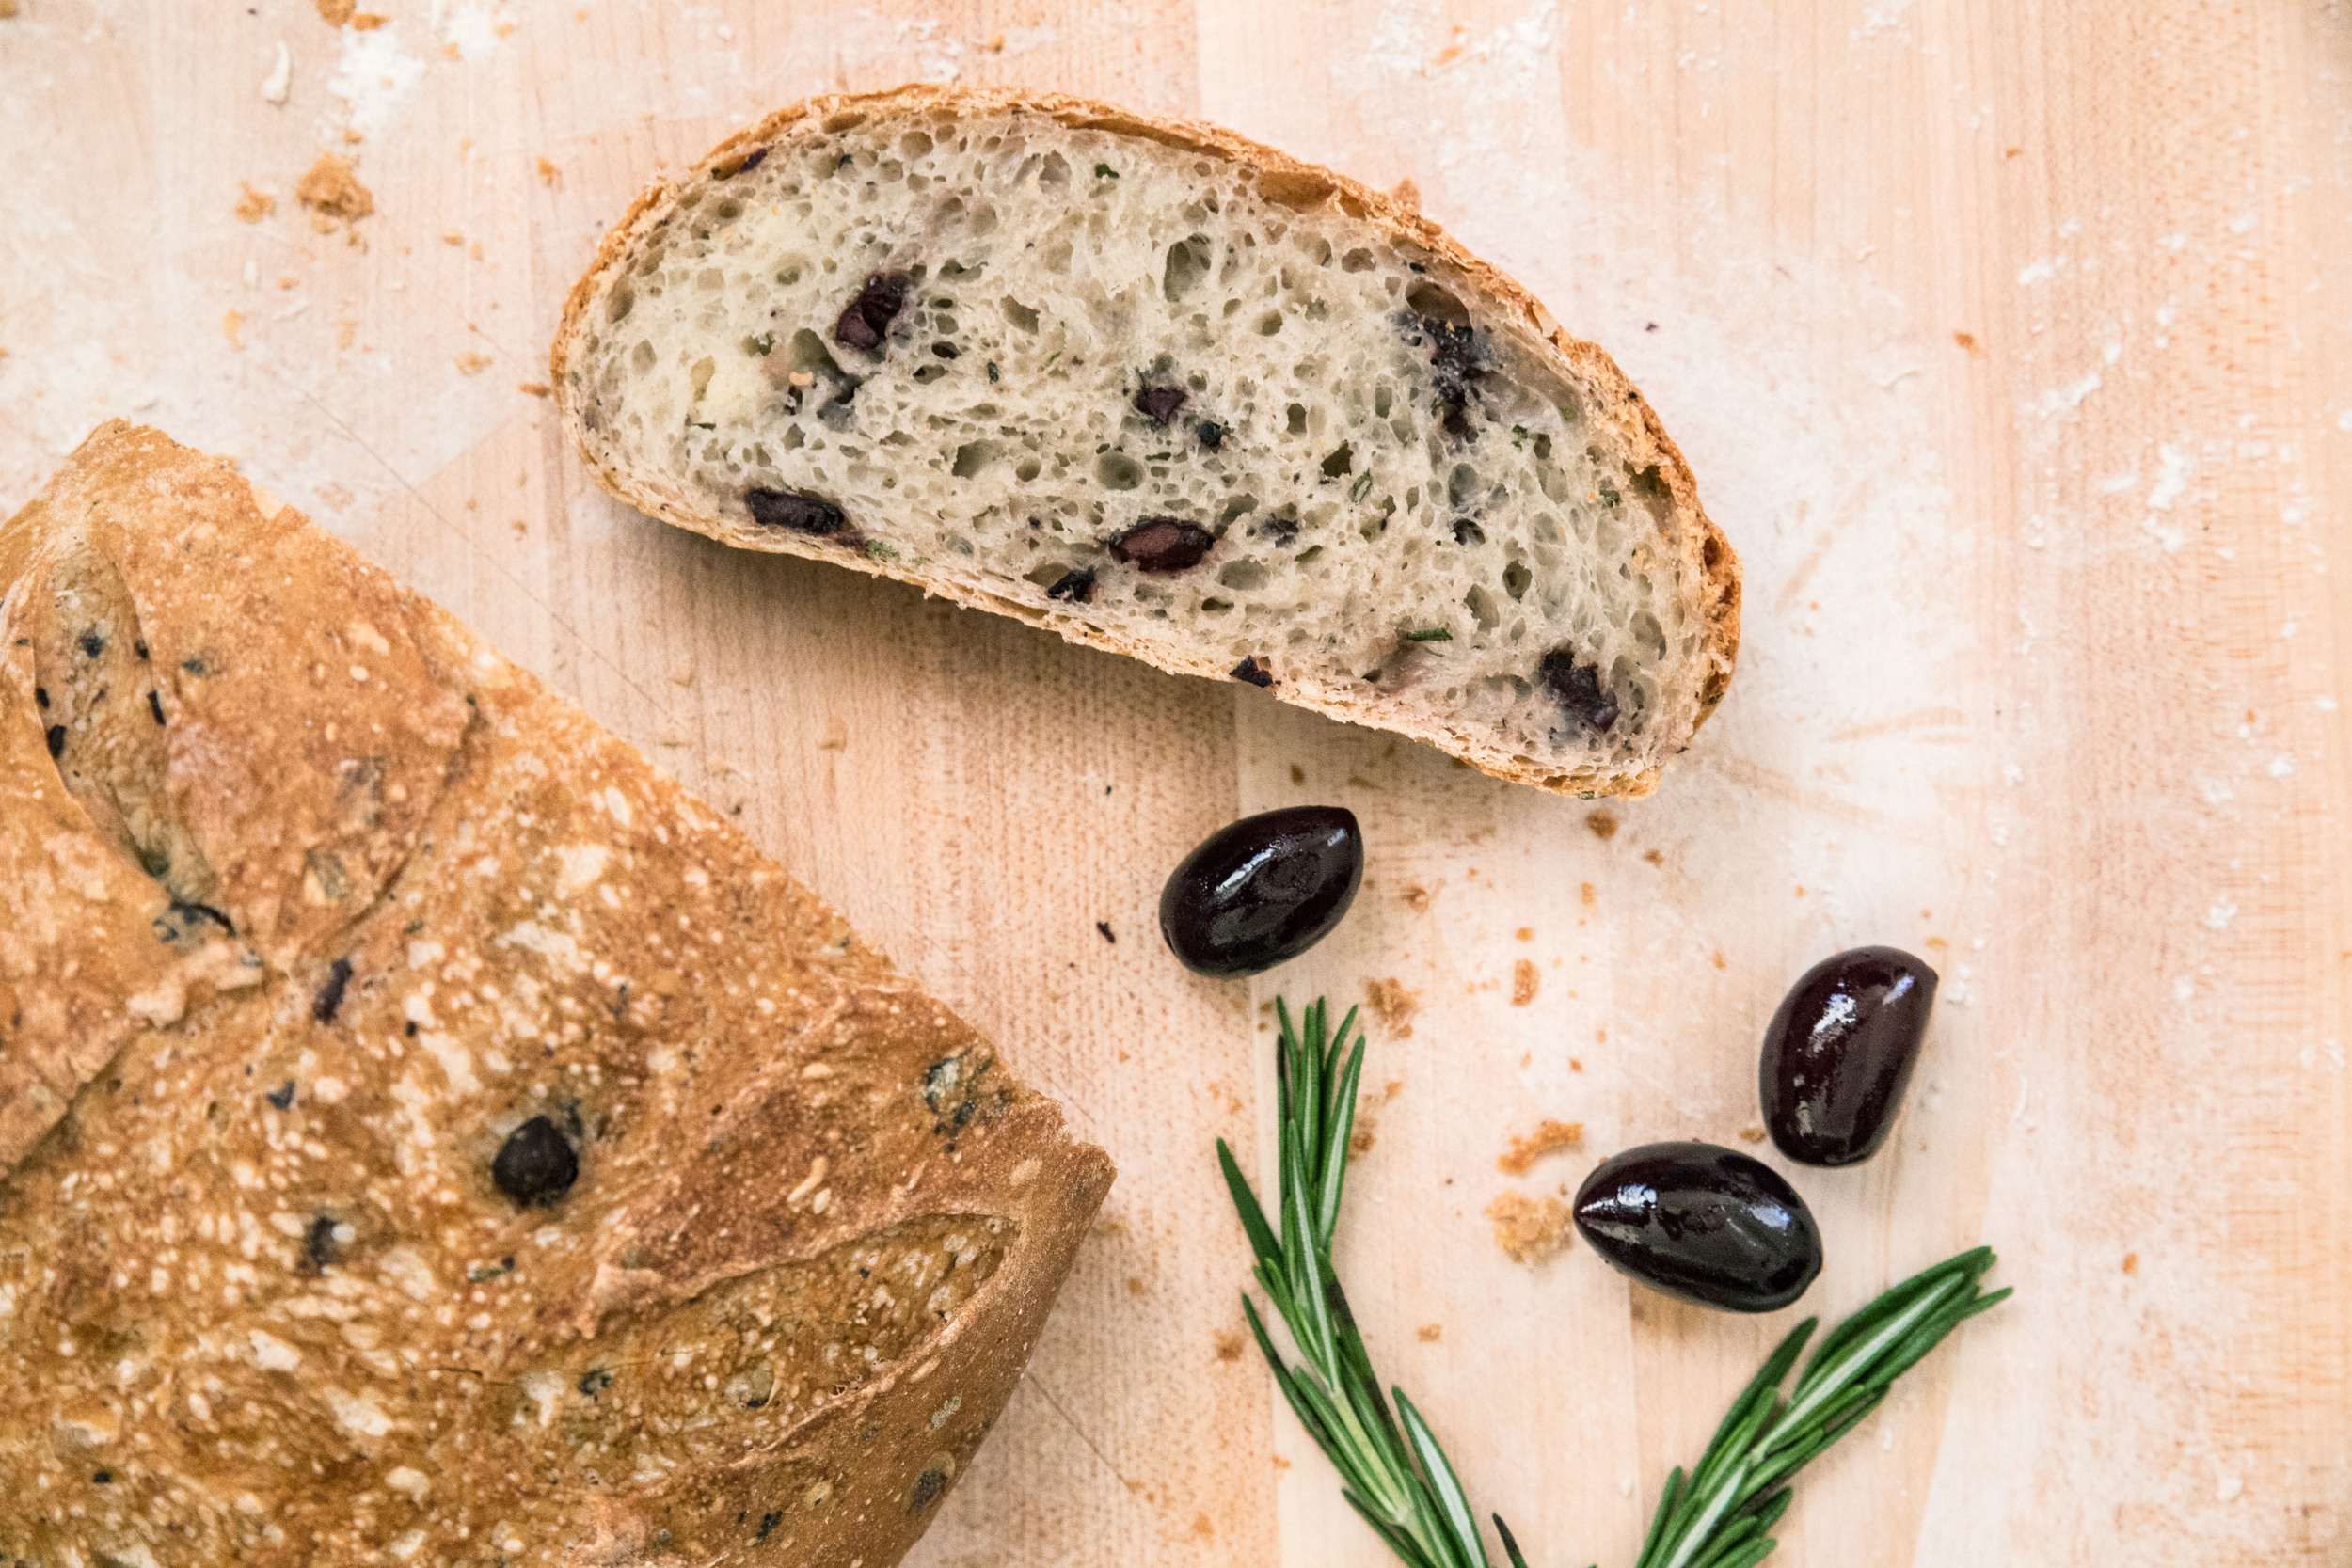
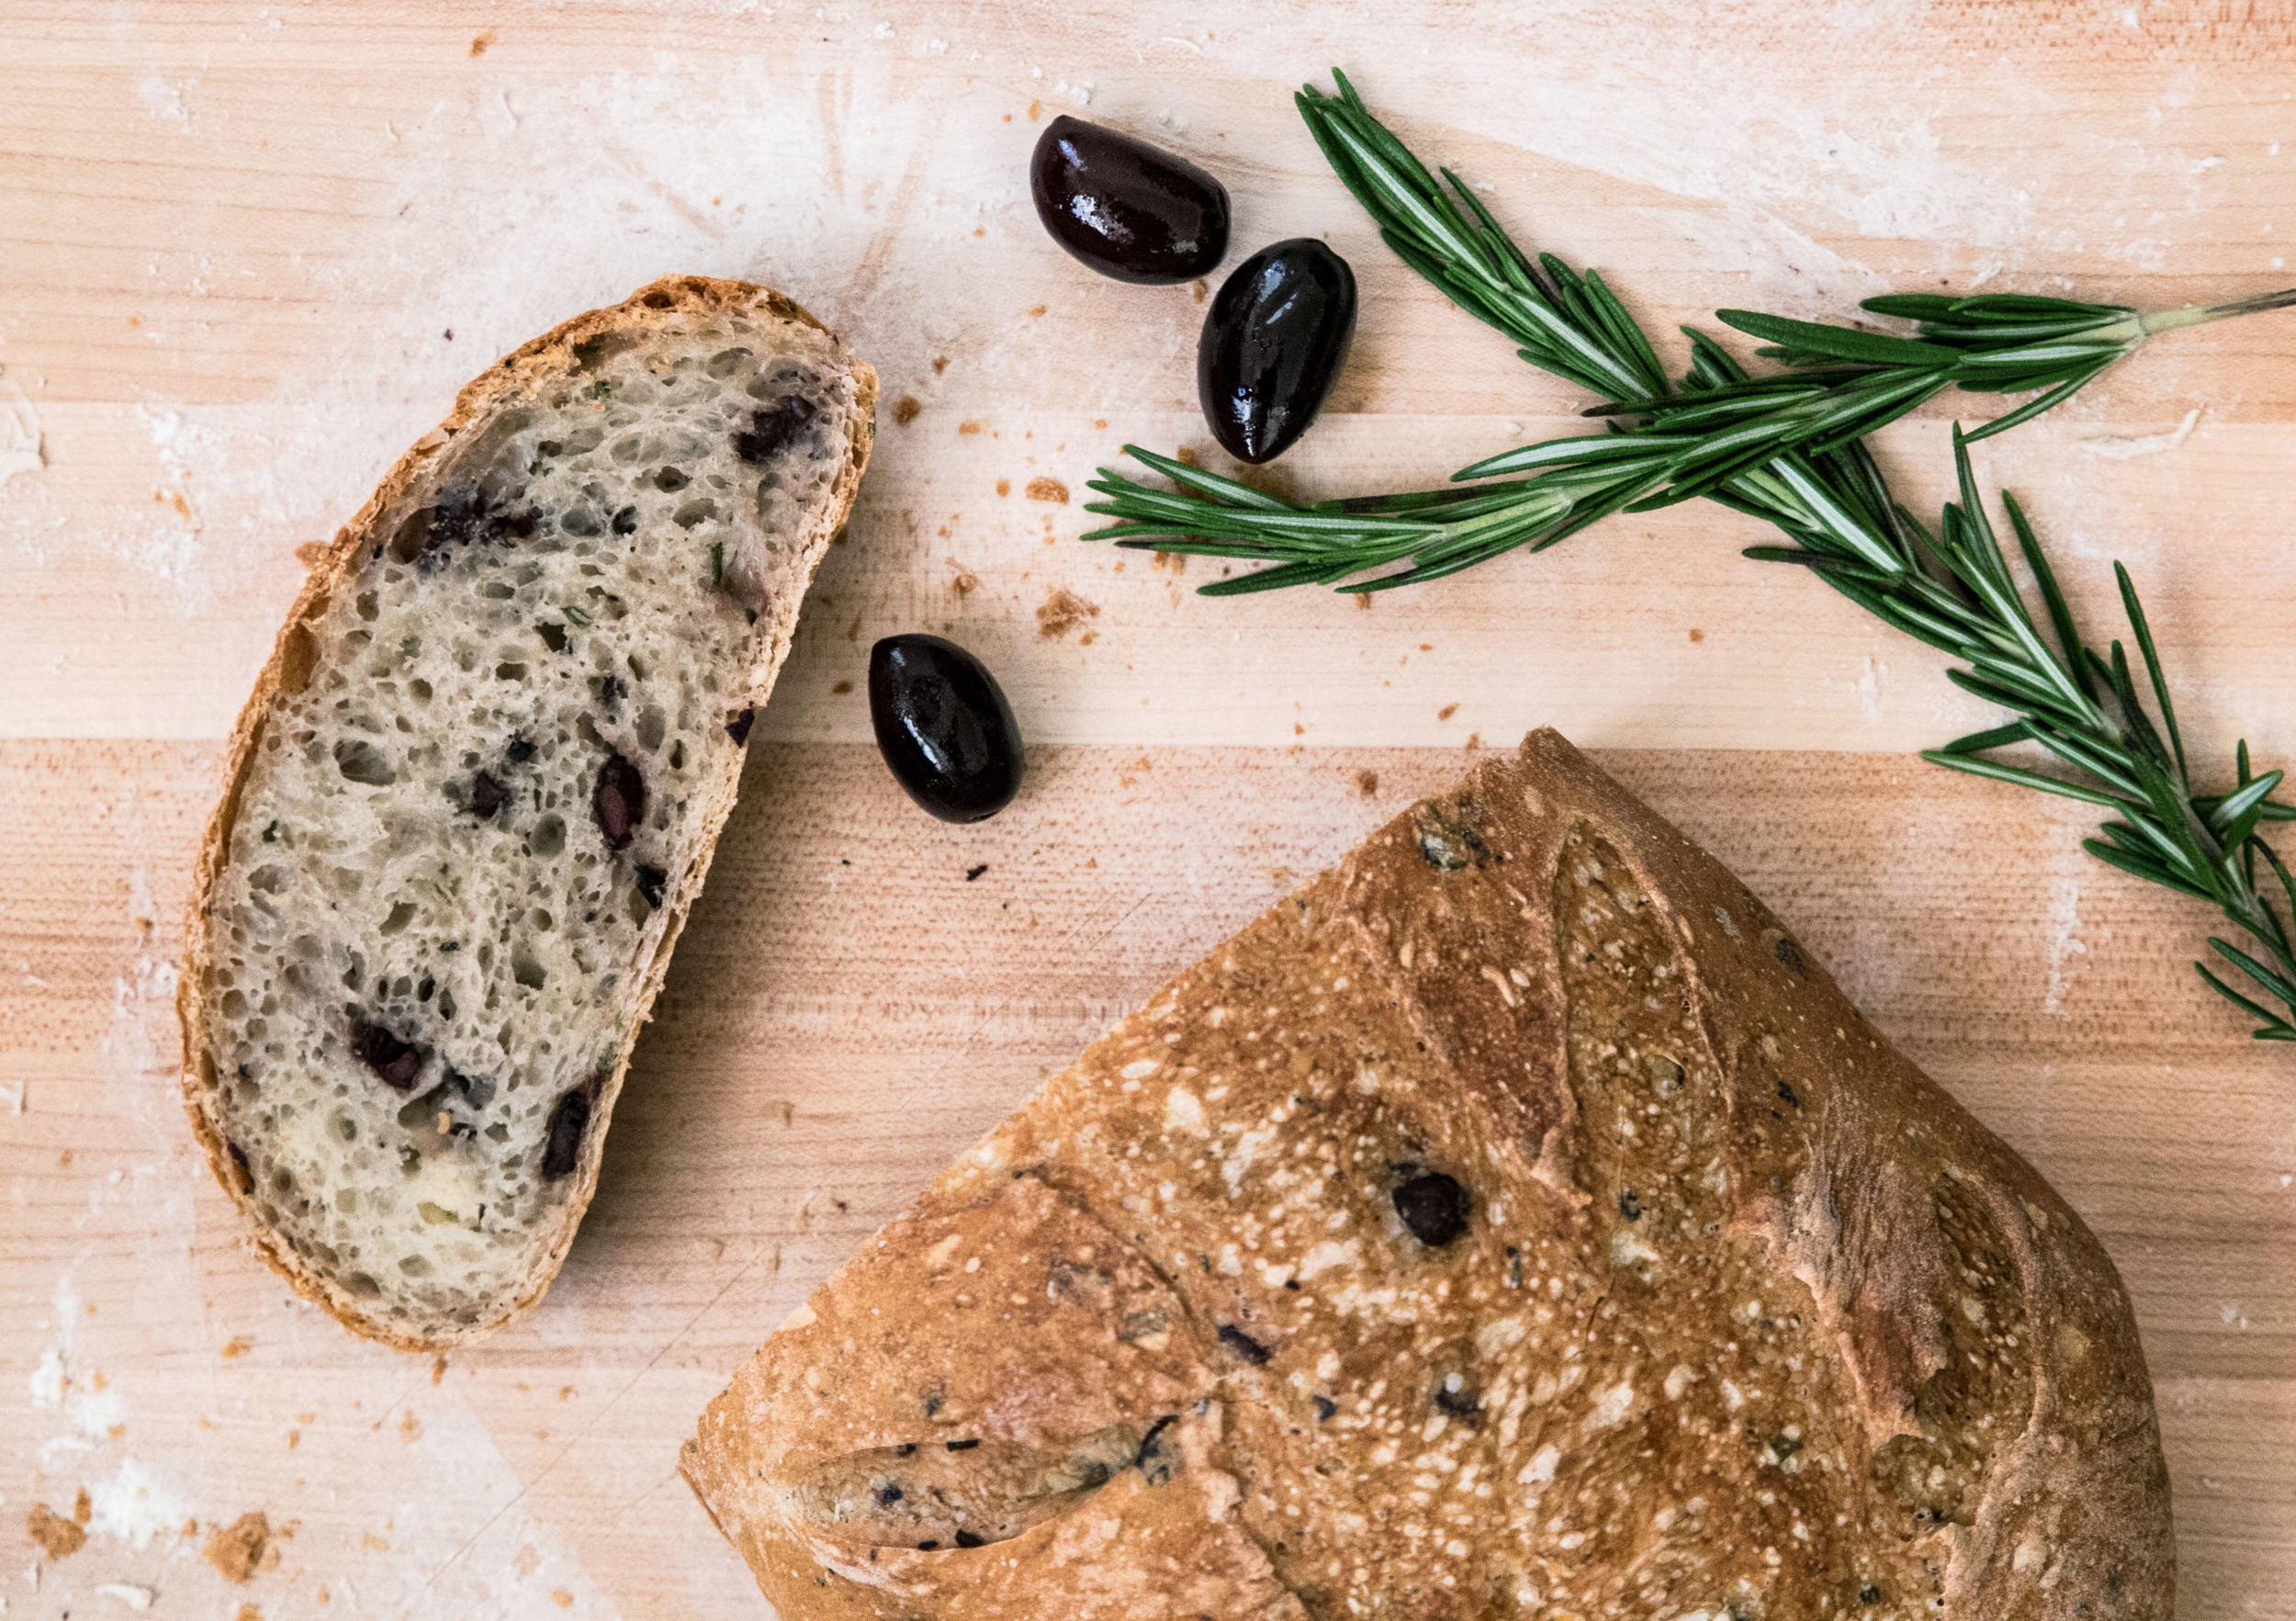
Rosemary Olive Bread is a hearty, full bodied bread to serve with warm dinners and stews. The fresh rosemary lends a subtle flavor, breathed in with each bite; the olives have a pleasant, salty flavor. Even though the olives are pervasive throughout the loaf, only the larger pieces provide strong flavor. These quiet flavors do not overpower, making this a versatile dinner loaf, whether it is served with a spread of butter or used to soak up a hearty stew.  

One Year Ago: Pumpkin Pie (Dairy-Free)
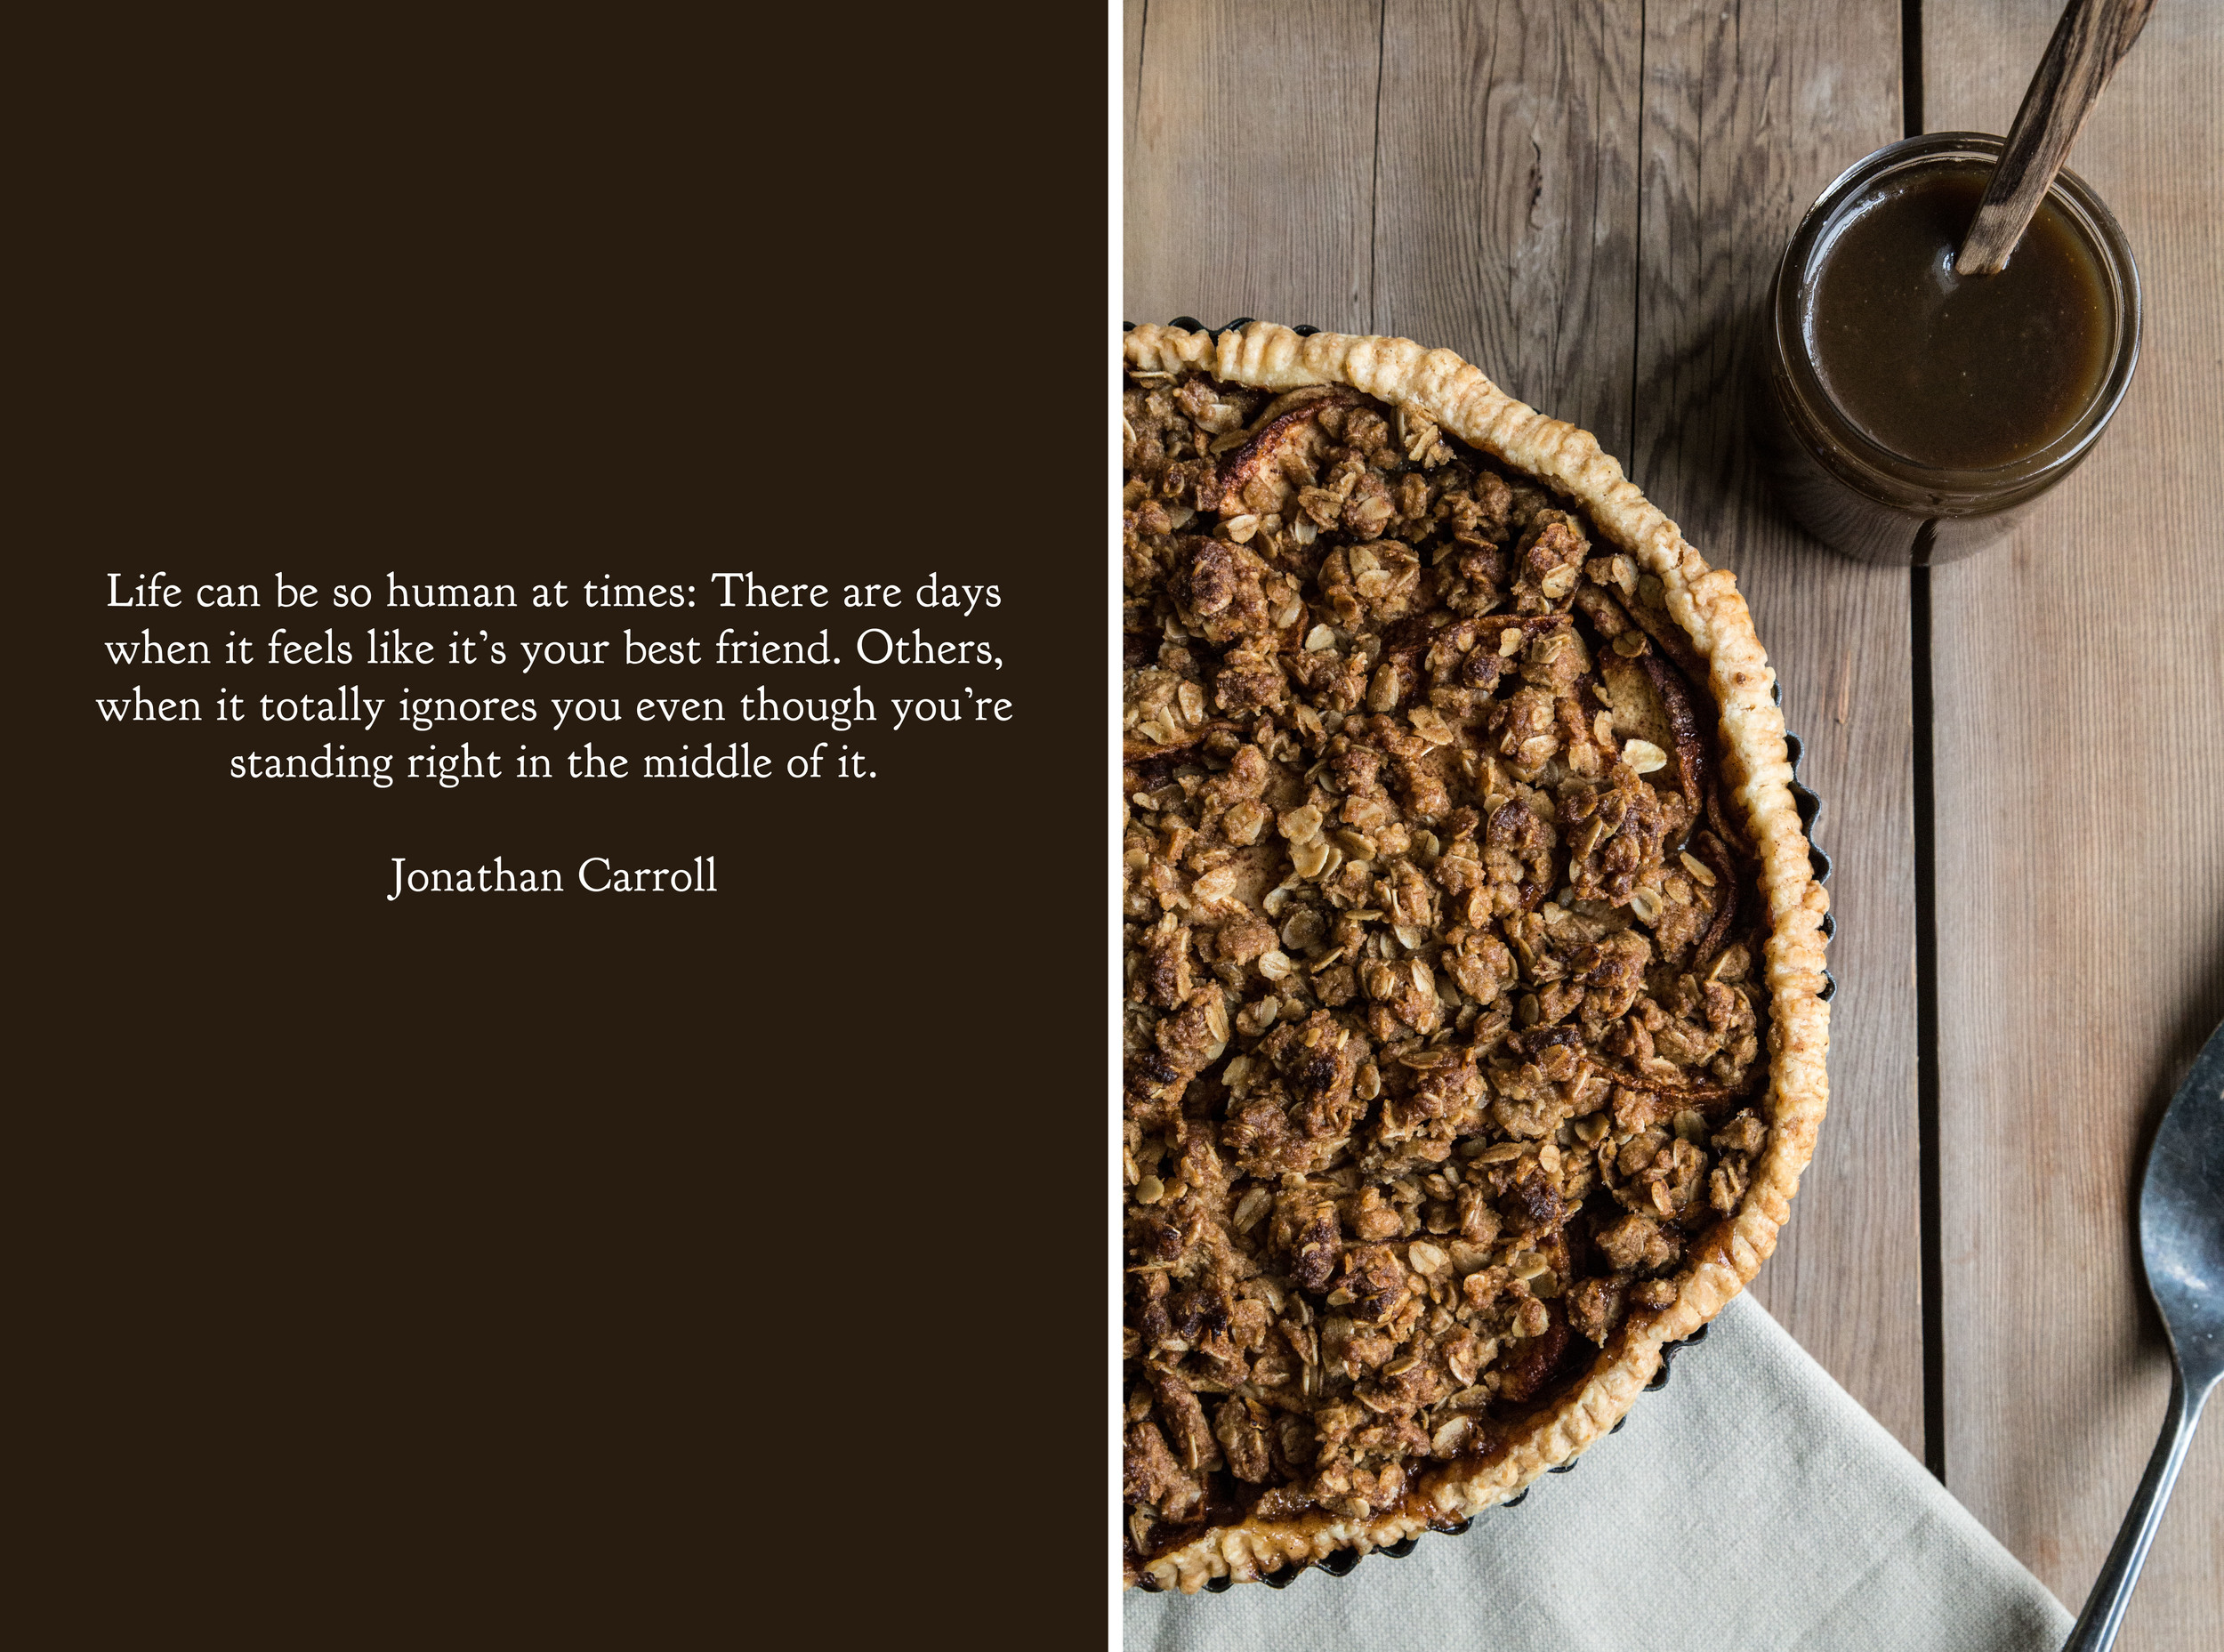
Two Years Ago: Stovetop Popcorn and Gingerbread Bundt Cake with Pear Caramel Glaze
Three Years Ago: Marbled Butternut Squash Bread, Chai Pear Scones, Hot Bourbon Apple Cider, and Pumpkin Pie Espresso Bars
Four Years Ago: Banana Muffins, Cranberry Orange Brioche Rolls, and Cranberry Sauce
Five Years Ago: Cranberry Cocoa Cinnamon Rolls, 30 Second Sangria, and Raspberry Vanilla Creme Brulee

Rosemary Olive Bread

Yields 1 loaf

Poolish
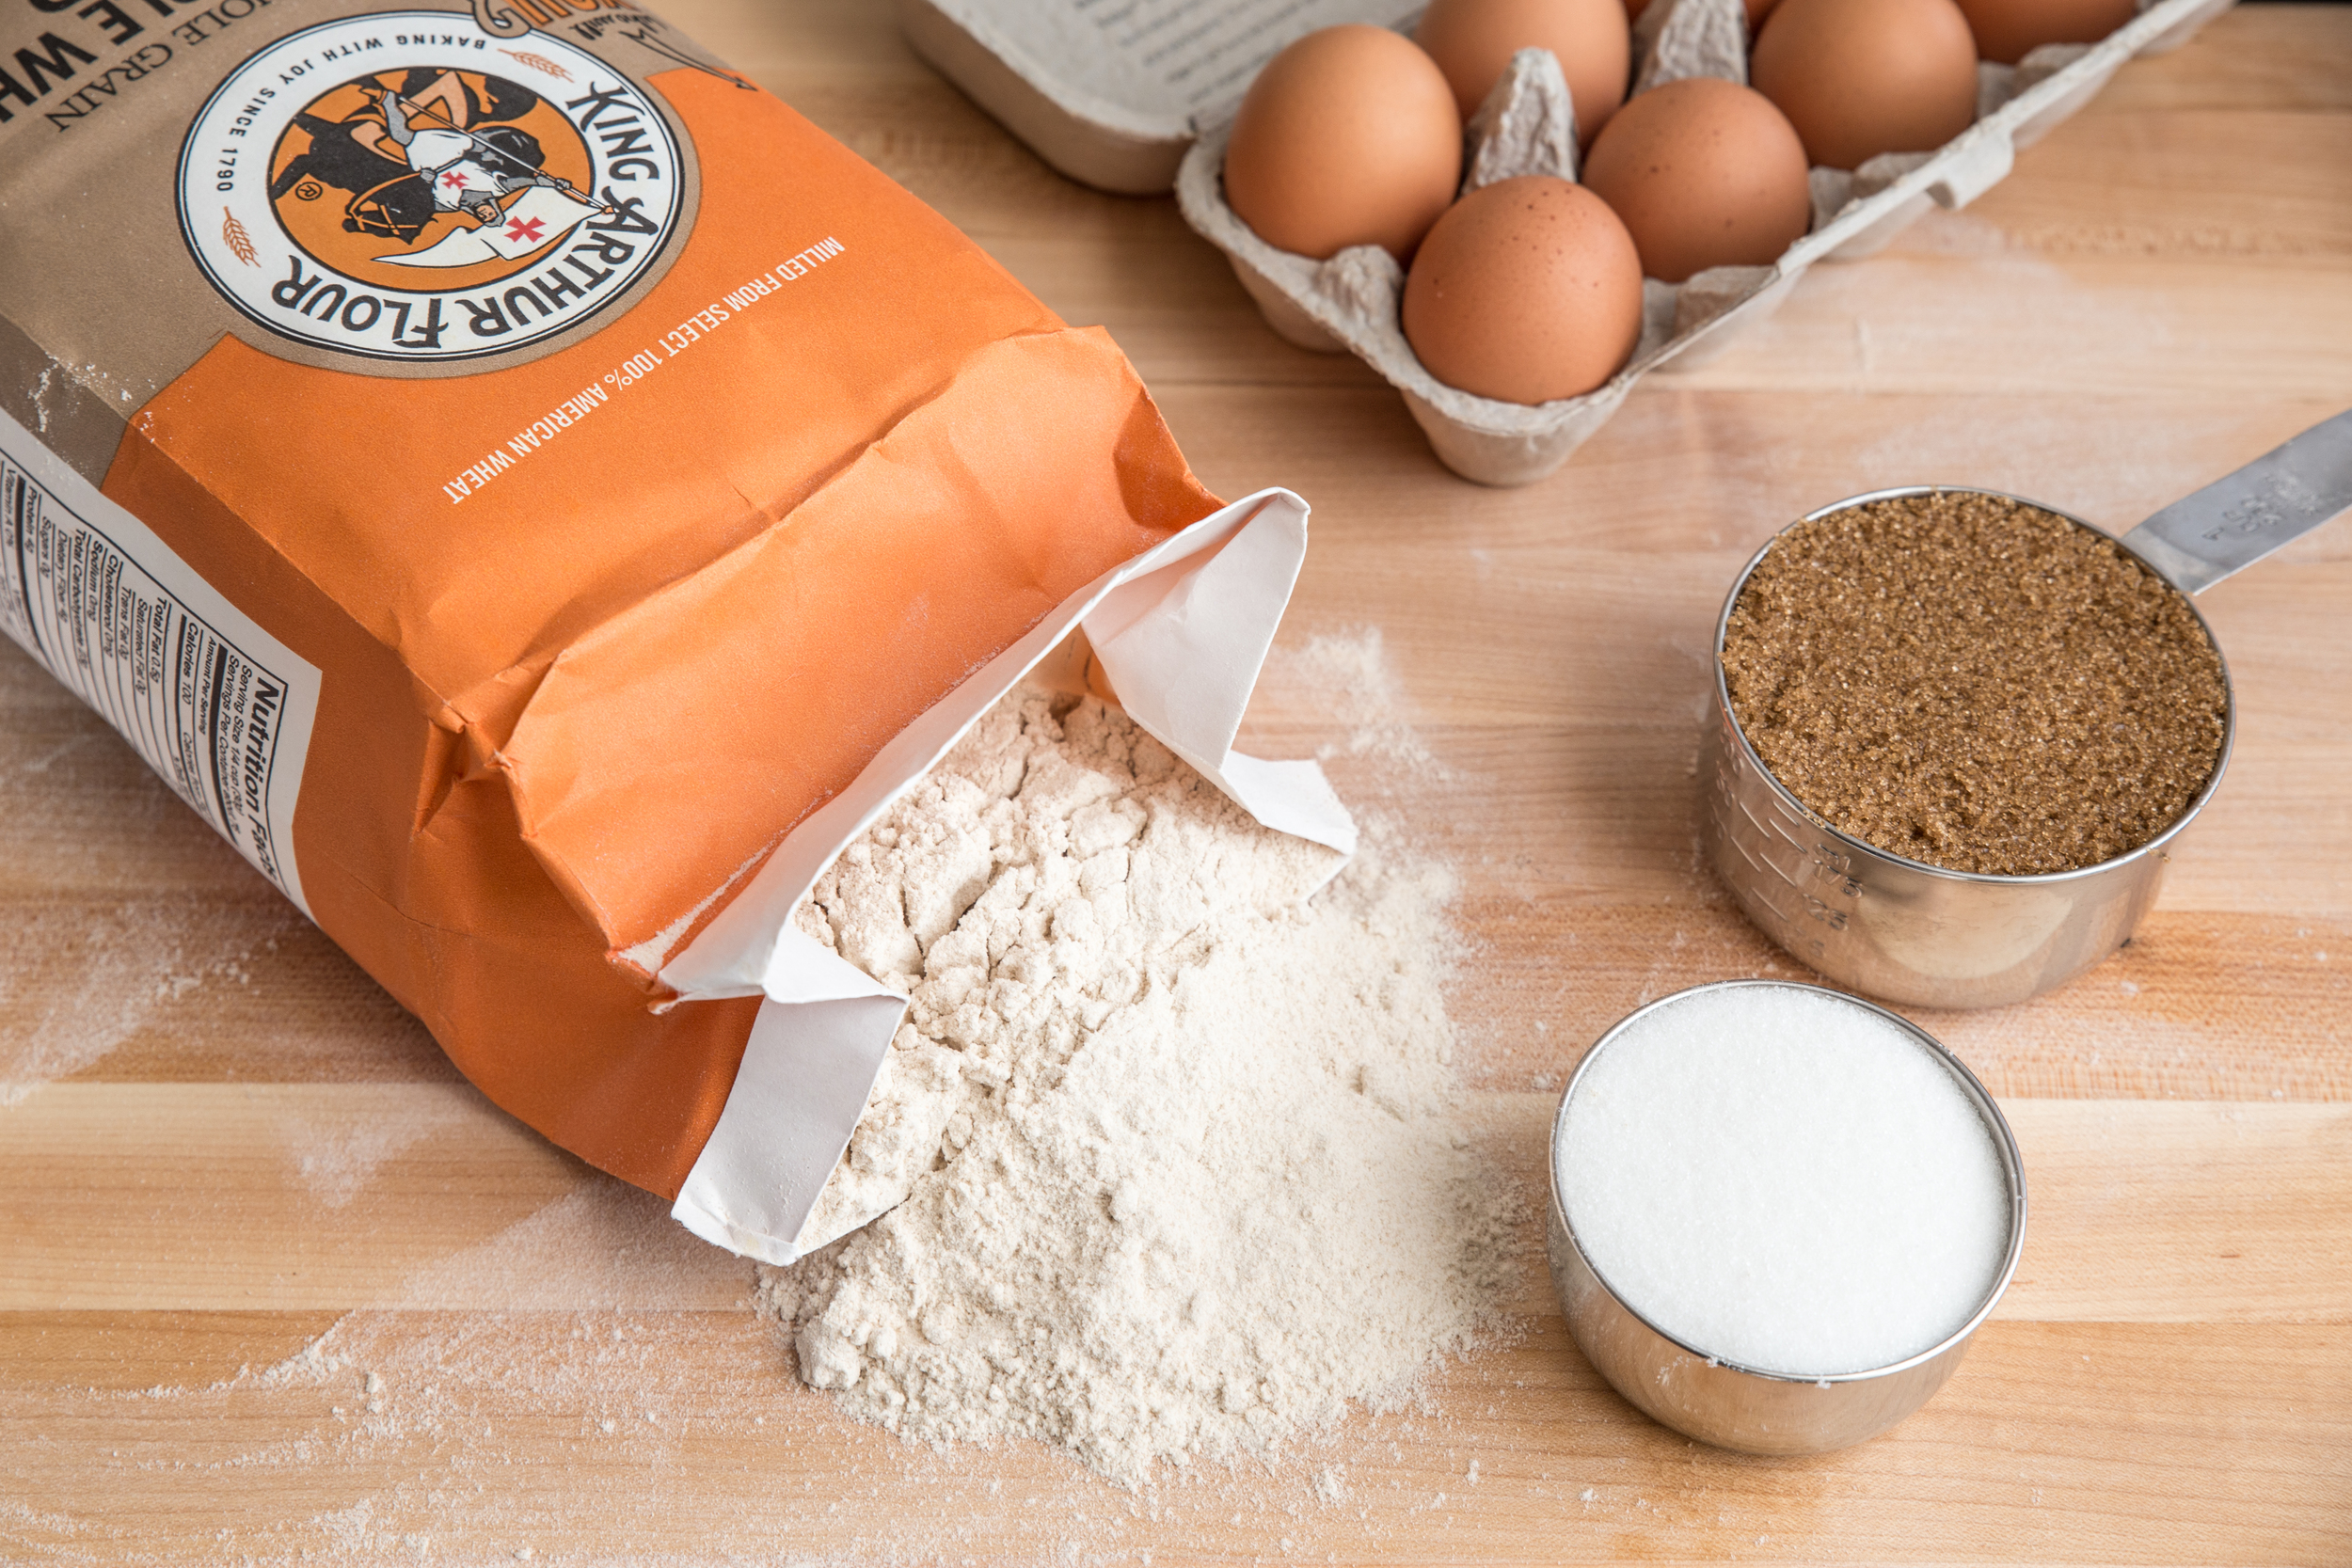
1 cup (120 grams) King Arthur Unbleached Bread Flour
3/4 cup (177 mL) water
1 pinch (approximately 1/16 teaspoon) active dry yeast

Final Dough
2 cups (240 grams)  King Arthur Unbleached Bread Flour*
1/2 cup (118 mL) water
1 tablespoon fresh rosemary, chopped (or 1 teaspoon dried rosemary)
1/3 cup (50 grams) Kalamata black olives, chopped and patted dry
1 teaspoon active dry yeast
1 teaspoon salt

To create the poolish, stir together the flour, water, and a pinch of yeast the evening before baking. Cover tightly with plastic wrap and allow to rest for 12-18 hours at room temperature. The poolish will have a bubbled appearance when ready.

To create the final dough, add the remaining ingredients to the poolish and fold until uniform. The dough will be sticky; resist the temptation to add any additional flour. Turn the dough out onto a clean, flourless surface. To knead the wet dough, form dough into a log and, using a bench knife, cut the dough at an angle into 4-5 slices. Use the bench knife to bring the dough back together into the log shape and repeat the slicing process. Continue kneading for another 3-5 minutes. The dough will gradually change texture as the gluten forms.

When the dough easily holds together, form the log shape and, using your hands, pick up the dough 1/3 from the top of the log. Rotate the dough 90 degrees and "slap" the bottom of the dough onto the surface while pulling the top half of the dough towards you. This will stretch the dough. Fold the dough back onto itself by bringing your hands down over the top of the dough, touching the surface, and pulling your hands out sideways to break free. Repeat the process. This step must be completed quickly or the dough will stick to the surface. Use a dough knife to clean the surface as needed. Continue kneading for another 3-5 minutes. The dough will become easier to work with and have a smooth, elastic appearance when ready.

Place dough into a bowl and cover, allowing it to rise an additional 1-2 hours, or until doubled in size.

Preheat oven and baking stone (or cookie sheet) to 450 degrees F (230 degrees C). Place a cast iron pan (or edged broiler pan) on the bottom rack.

Turn out dough onto a very lightly floured surface and bring all four corners of the dough together until it resembles a rectangular shape. Take the two bottom corners together and fold them in again, creating a triangular shape on the edge. Begin rolling the dough from this end onto itself, placing the roll seam side down to create a loaf shape. Place on parchment paper and cover with a clean dish towel. Allow to rise an additional 30-40 minutes.

Using a lame (or sharp knife), slash a design into the top of the loaf. Slide the parchment paper onto the baking stone in the oven and quickly pour 1/2 cup water into the cast iron pan before closing the oven. This will create steam; do not open the oven door. Bake for 30-35 minutes, or until the loaf is well caramelized and the edges are very firm. Cool for 10-15 minutes before slicing and serving.

To restore the "crustiness" of the crust after the loaf has been stored, reheat in a 350 degree F (180 degree C) oven for 5-10 minutes, or until crusty.

*If using all-purpose flour, use only 1/2 cup water in the poolish instead of 3/4 cup. Bread and all-purpose flour absorb different levels of water and the recipe needs to be adjusted to accommodate this.

This post is sponsored through a partnership with King Arthur Flour. All thoughts and opinions are my own. 

Caramel Apple Crumble Pie

The days have been blurring together, an amalgam of daily commutes, hastily pieced together dinners, and the bright glow of the television screen. Each day feels the same in color and energy as the one that came before it. This routine, exciting once, grows monotonous. While the familiarity may be comfortable, the pattern feels stagnant and tired.

After weeks of this repetition, I needed variety, a fresh feeling and a new experience. So I took it upon myself to make a change. I joined a hot yoga studio. I signed up for glass blowing classes. I announced to my boyfriend that we were going to go for a walk.

Sometimes I forget I have the power to change my everyday. 

Baking is one of the activities I do to keep life interesting. As a recipe developer, I rarely come back to the same recipes once they are complete, trying to invent new takes on old favorites instead. The dessert table becomes an ever evolving area of flavors and textures. This Caramel Apple Crumble Pie was born from a combination of two of my favorite fall desserts: apple crisp and apple pie

While there will be a few failures now and then, when the recipe comes together as easily as this recipe did, it turns out right.

IMG_9890.jpg
IMG_9946.jpg

Caramel Apple Crumble Pie brings together spiced apples, flaky pastry, and a crisp oatmeal crumble. Drizzled in warm caramel, the dessert becomes a play on autumn flavors and textures. Serve with vanilla ice cream and enjoy alongside friends and family.

One Year Ago: Maple Syrup Cake with Toasted Almonds
Two Years Ago: Butternut Squash Biscuits, Apple Crisp, and Pumpkin Spiced Doughnuts
Three Years Ago: Pear Crisp, Pumpkin Rolls, Butternut Squash Cake, and Filled Molasses Cookies
Four Years Ago: Applesauce, Caramel Apple Cider, Honey Cinnamon Chickpeas, and Caramel Apple Tart
Five Years Ago: Apple Chips, Apple Cider, Ginger Pear Cake, Fig & Balsamic Jam, and Pumpkin Oatmeal

Caramel Apple Crumble Pie

Yields 8-10 servings

Apple Pie Filling
Single Pie Crust Recipe, chilled
3 lbs (1.4 kg) apples, peeled, cored, & sliced
1 tablespoon lemon juice
1/2 cup (100 grams) brown sugar, packed
2 tablespoons all-purpose flour
2 teaspoons ground cinnamon
1/4 teaspoon ground nutmeg
1/8 teaspoon ground cloves
1/4 teaspoon salt
1 tablespoon boiled cider (optional)

Crumble Topping
1/4 cup (57 grams) butter, room temperature
1/3 cup (66 grams) brown sugar
2/3 cup (60 grams) old fashioned oats
1/3 cup (40 grams) all-purpose flour
1/2 teaspoon ground cinnamon
1/8 teaspoon ground nutmeg
1/4 teaspoon salt
Milk, for brushing
1/2 cup (280 grams) caramel sauce*

Preheat oven to 375 degrees F (190 degrees C).

For the apple filling, in a medium bowl, coat the apple slices with lemon juice to prevent browning. Add the brown sugar, flour, spices, salt and boiled cider and toss over the apples until they are evenly coated. Set aside.

For the crumble topping, beat together the butter and brown sugar until light. Stir in the oats, flour, spices, and salt until uniform. Set aside.

On a lightly floured surface, roll out the pie dough round into a 12-inch circle. Place the round into a 9-inch pie plate (or tart pan), folding the edges under and pressing into a decorative pattern. Place the prepared apples into the pie round, mounding them in the center. Break off small pieces of the crumble topping and sprinkle uniformly over the top.

Brush the exposed edges of the pie dough with milk to help them brown. Bake for 55-60 minutes, or until the crumble and crust are golden brown. If the edges begin to darken too quickly, cover with aluminum foil to prevent additional browning.

Cool the pie for at least 3 hours before slicing to allow the juices to set. Drizzle each slice with 1-2 tablespoons of warm caramel sauce before serving.

*To create a vegan version of the pie, use a dairy-free margarine for the butter in the crust and crumble (I prefer Earth Balance Vegan Butter), almond or soy milk for brushing, and a recipe for vegan caramel sauce.

Pumpkin Espresso Bundt Cake

The changing of the leaves from green to hues of red and orange marks the arrival of autumn flavors. When the weather grows cold and the coats come out of the closet, turning on the oven feels right. In partnership with King Arthur Flour, each month I will challenge you with a new recipe, filled with step-by-step explanations and techniques, to help you grow and develop as a baker. For October, I aspired to bring together my favorite fall flavors in a recipe that is meant to be shared.

This month is all about cake, as we undertake the respected Bundt cake. Bundt cakes are an American classic. Introduced in the 1950s by pan manufacturer NordicWare, the name Bundt refers to the architecture of the pan the cake is baked in, not the type of cake itself. Bundt cake pans are taller than the traditional cake pan, with a hole in the center. The hole has a dual purpose—it gives the cake a unique ring shape and allows heat to reach the center of the cake so it can bake more evenly. 

The Bundt pan used with this recipe is the NordicWare Party Bundt pan. The look is classic, but I love this particular shape because the portions are exceptionally easy to slice. 

Traditional whole wheat flour is ground from red wheat. This cake is made with white whole wheat flour, which is ground from white wheat—a slightly different type of wheat, lighter in color and milder in flavor. White whole wheat flour is 100% whole grain and mirrors the nutritional attributes found in traditional whole wheat flour. Its milder flavor makes it a great flour to substitute in many classic all-purpose recipes.

White whole wheat flour is a pantry staple in my kitchen. Adding a little extra nutrition to my baked goods, without compromising the flavor, feels like a superhero power.

The pumpkin cake starts with a mixture of pumpkin puree, eggs, and vegetable oil. The eggs act as a binder between the ingredients, but also add moisture to the final product. The main fat is vegetable oil instead of butter. This makes it dairy free(!), but the neutral flavor of the oil also allows the pumpkin and spice flavors to become more pronounced.

Both granulated and brown sugar is added, for sweetness and a greater depth of flavor, before the dry ingredients are folded in. In this recipe (and most traditional cake recipes), it is important to make sure that there are no lumps in the batter after the final beating. This is especially true for butter cake recipes. Small clumps of butter and sugar left in the batter, often hidden in beaters and the tops of spatulas, will melt in the oven and create holes in the finished cake. 

A well greased Bundt pan is necessary in order to remove the cake in one piece. I find it sufficient to use a heavy layer of cooking spray. When finished spraying, hold the pan up to the light and tilt it, making sure that every crevice is fully covered. Do any touch-ups with the cooking spray now, if necessary.

To create a swirled effect between the pumpkin cake and espresso filling, the ingredients are layered in the pan, alternating between cake batter and a thin layer of brown sugar mixed with cinnamon and espresso powder. Before putting the cake in the oven, tap the pan on the counter to release any bubbles that may have developed when layering.

Though it may be tempting, do not open the oven door while the cake is baking. The rush of cool air into the oven can cause the cake to collapsethis is especially true during the first 20 minutes, when the fragile cake is gaining the most height. When finished baking, cool the cake for fifteen minutes before unmolding.

Unmolding the cake may feel like the most difficult part of this recipe, but it just takes a bit of bravery. Avoid using an off-set spatula to release the cake from the edge of the pan. The spatula can scratch the pan (making it more difficult to remove cakes later) or slice directly into the cake if you slip. Because Bundt pans tend to have ornate designs and curved edges, off-set spatulas can cause more harm than good.

Instead, tap the pan firmly against your work surface to loosen the cake from the edges of the pan. Cover the top of the Bundt pan with a cooling rack, flip it over, and carefully lift the pan off the cake. 

While still warm, use a pastry brush to apply a coffee rum glaze to the cake. Using a pastry brush instead of pouring the glaze over the cake lets the glaze be applied evenly, allowing the cake to absorb it more effectively. The glaze not only adds another layer of flavor to the cake, but it helps to seal in the cake's moisture, keeping it fresher for a longer period of time. Once the glaze is set and the cake is no longer wet in appearance, it can be cut and served.

IMG_9809.jpg

Pumpkin Espresso Bundt Cake is spiced with the classic flavors of autumn and layered with a sweet espresso filling. The cake is glazed with a mixture of strong coffee and rum to bring out the flavors in the filling and seal in the cake's moisture. When served alongside a cup of hot coffee, the cake truly shines. Share with family and friends.

One Year Ago: Vegan Caramel and Rustic Apple Tart
Two Years Ago: Apple Cinnamon Pancakes and Classic Apple Pie
Three Years Ago: Peanut Butter Cup Cookies, Pumpkin Waffles, Spider Cupcakes, and Apple Scones
Four Years Ago: Red Wine Chocolate Cake, Pear Spice CakePumpkin Latte Cheesecake, and Apple Cake
Five Years Ago: Butternut Squash Custard, Pumpkin Bread Pudding, Banana Nut Bread, and Apple Tart

Pumpkin Espresso Bundt Cake

Yields 8-10 servings

Pumpkin Cake
1 1/2 cups (370 grams) pumpkin puree
4 large eggs
3/4 cup (177 mL) vegetable oil
1 cup (200 grams) brown sugar, packed
3/4 cup (150 grams) granulated sugar
1 teaspoon vanilla extract
2 cups (250 grams) King Arthur White Whole Wheat Flour
2 teaspoons baking powder
1 teaspoon baking soda
1 1/2 teaspoons pumpkin pie spice
1 teaspoon ground cinnamon
1 teaspoon salt

Espresso Filling
1/3 cup (66 grams) brown sugar, packed
1 tablespoon espresso powder
1/2 teaspoon ground cinnamon

Coffee Rum Glaze
1/3 cup (78 mL) strong coffee
1 1/2 tablespoons dark rum
1/3 cup (66 grams) granulated sugar

Preheat oven to 350 degrees F (180 degrees C). Heavily grease a 10-cup Bundt pan. Set aside.

For the pumpkin cake, beat together the pumpkin, eggs, oil, brown sugar, granulated sugar, and vanilla extract in a large mixing bowl until well blended. Stir in the flour, baking powder, baking soda, pumpkin pie spice, cinnamon, and salt until smooth and uniform in appearance. Set aside.

For the espresso filling, whisk together the brown sugar, cinnamon, and espresso powder in a small mixing bowl. Set aside.

In the prepared baking pan, spoon in 1/3 of the pumpkin cake batter evenly into the bottom of the pan. Sprinkle 1/2 of the espresso filling over the top. Spoon another 1/3 of the pumpkin cake batter into the pan and sprinkle with the remaining espresso filling. Layer the remaining cake batter on top and smooth with an off-set spatula.

Bake for 50-60 minutes, or until a toothpick inserted into the center comes out clean. Allow cake to cool in pan for 15 minutes before transferring to a cooling rack.

While the cake is baking, make the coffee rum glaze by whisking together the strong coffee, rum, and granulated sugar. Brush all of the glaze evenly over the cake with a pastry brush while it is still warm. Serve after the glaze has fully set. 

Bake with me! Show off your finished Pumpkin Bundt Cakes by tagging them with #kingarthurflour.

This post is sponsored through a partnership with King Arthur Flour. All thoughts and opinions are my own.