Traditional Challah

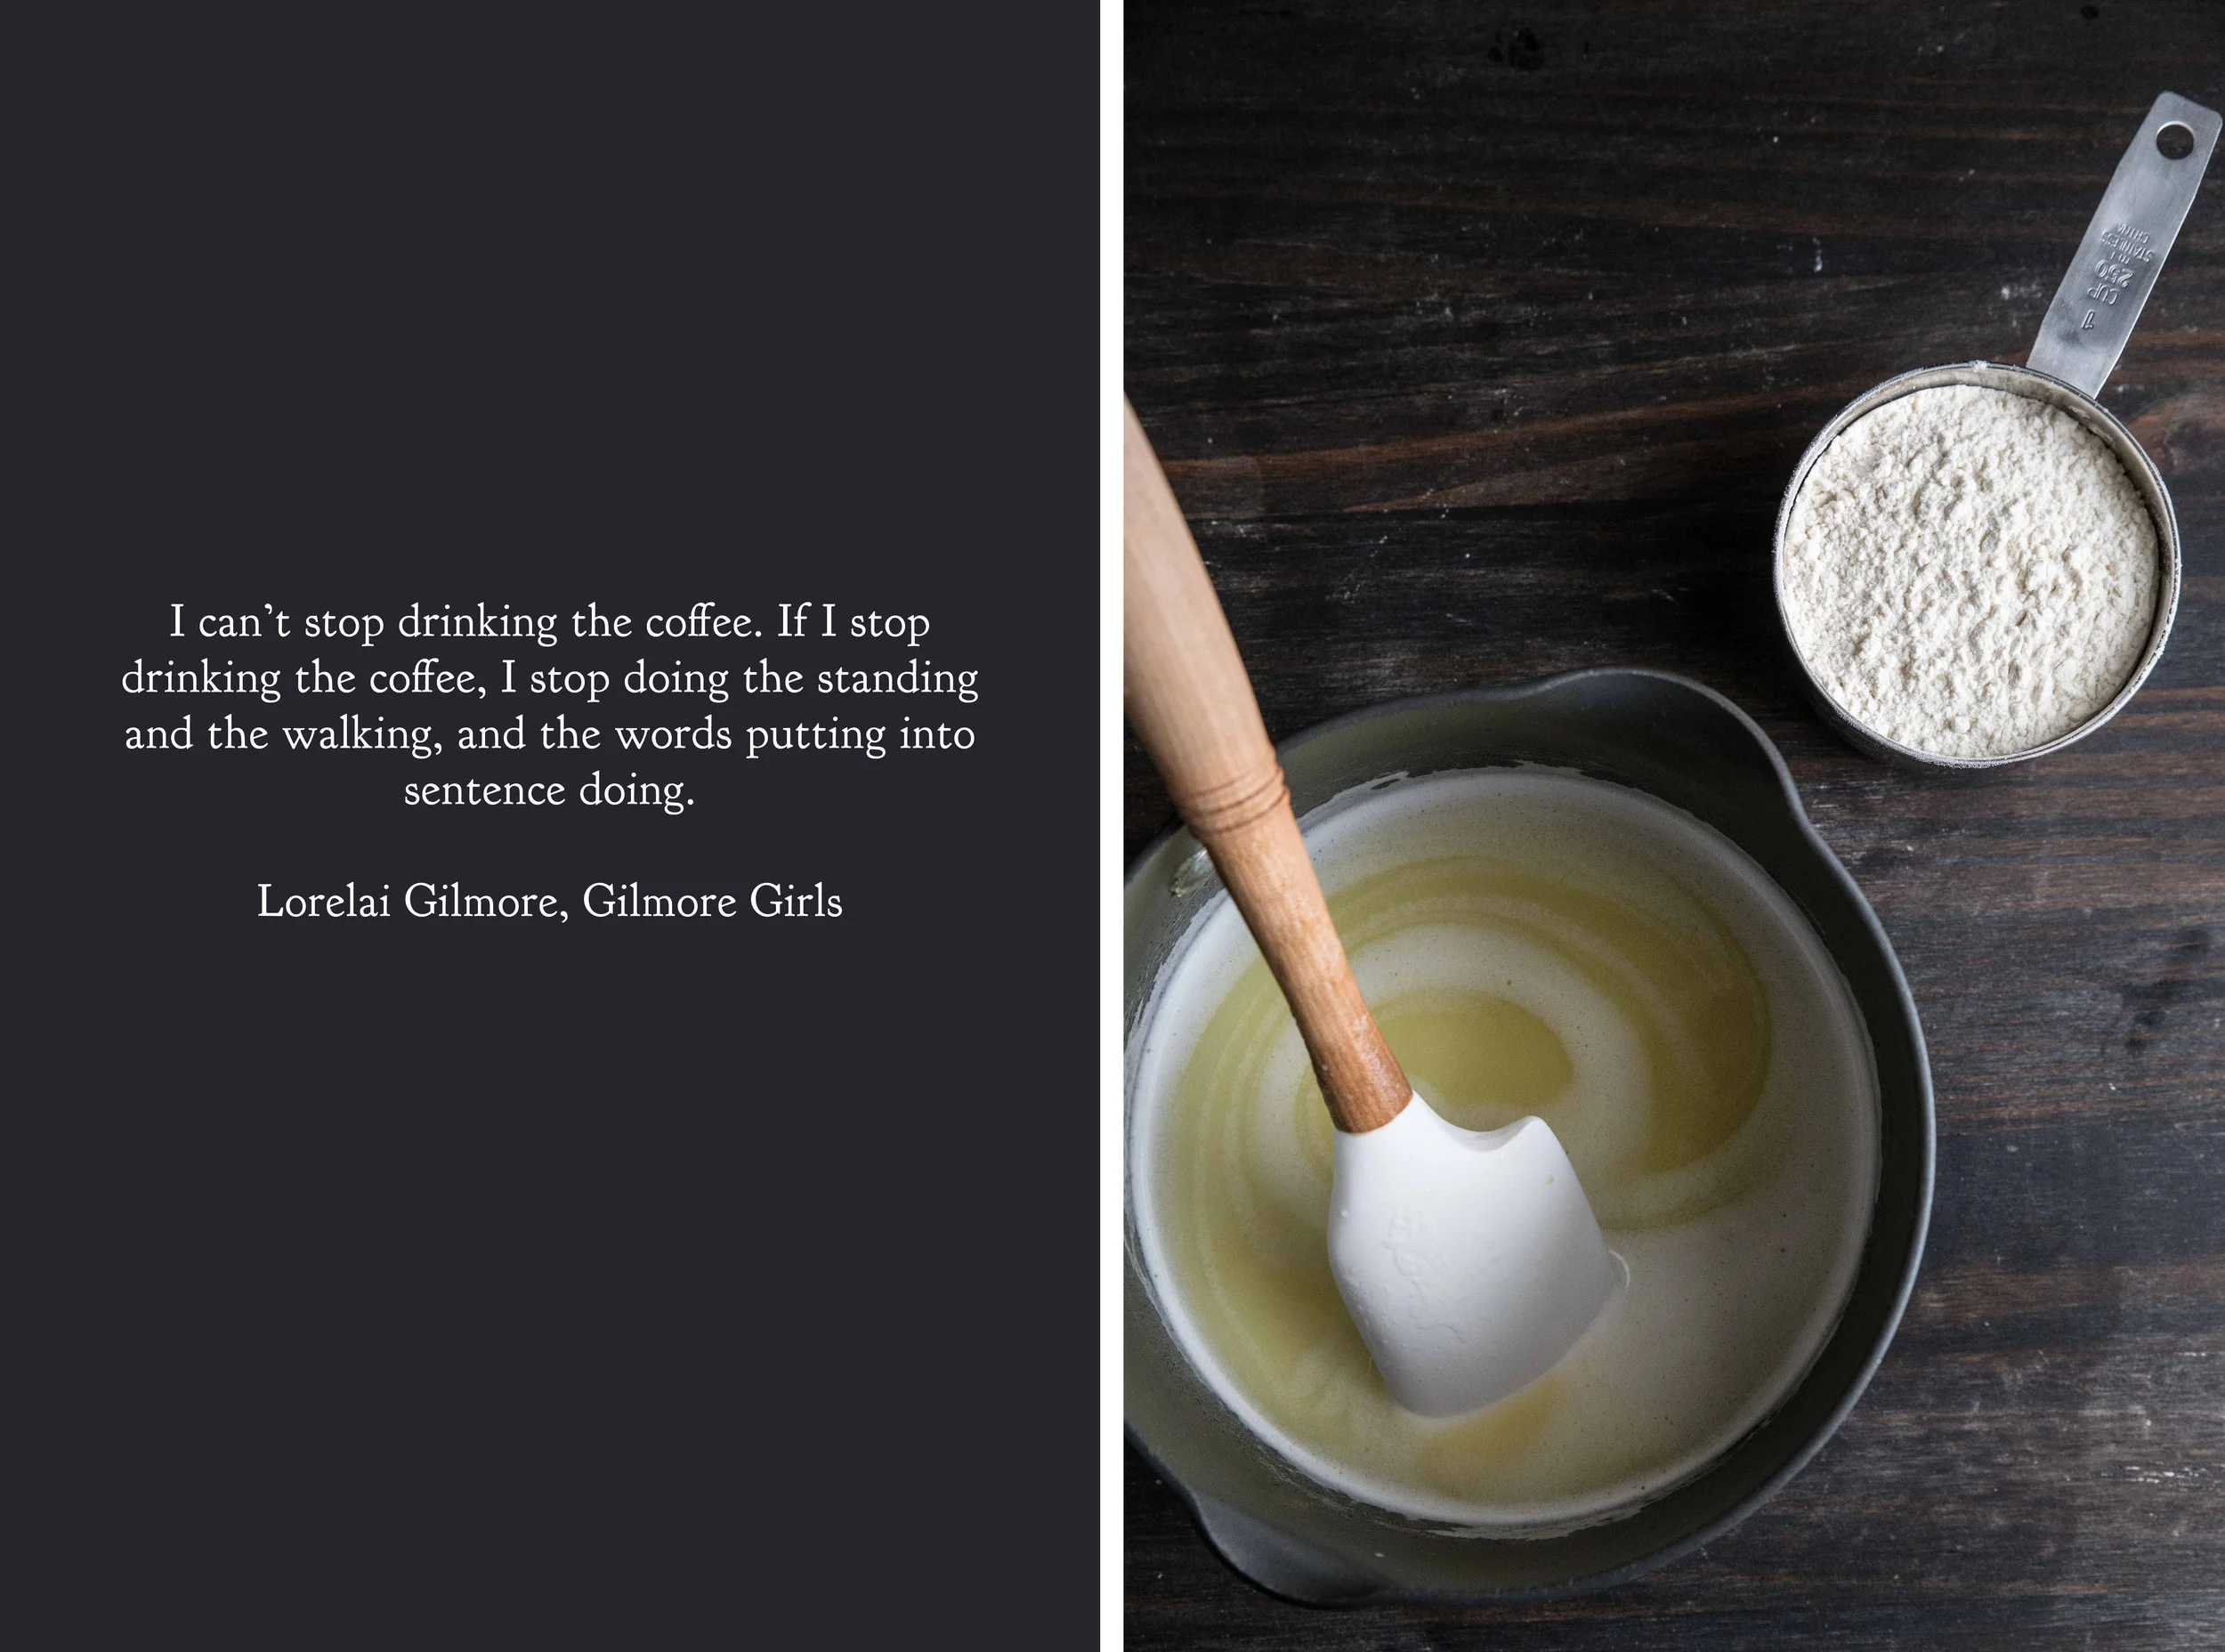
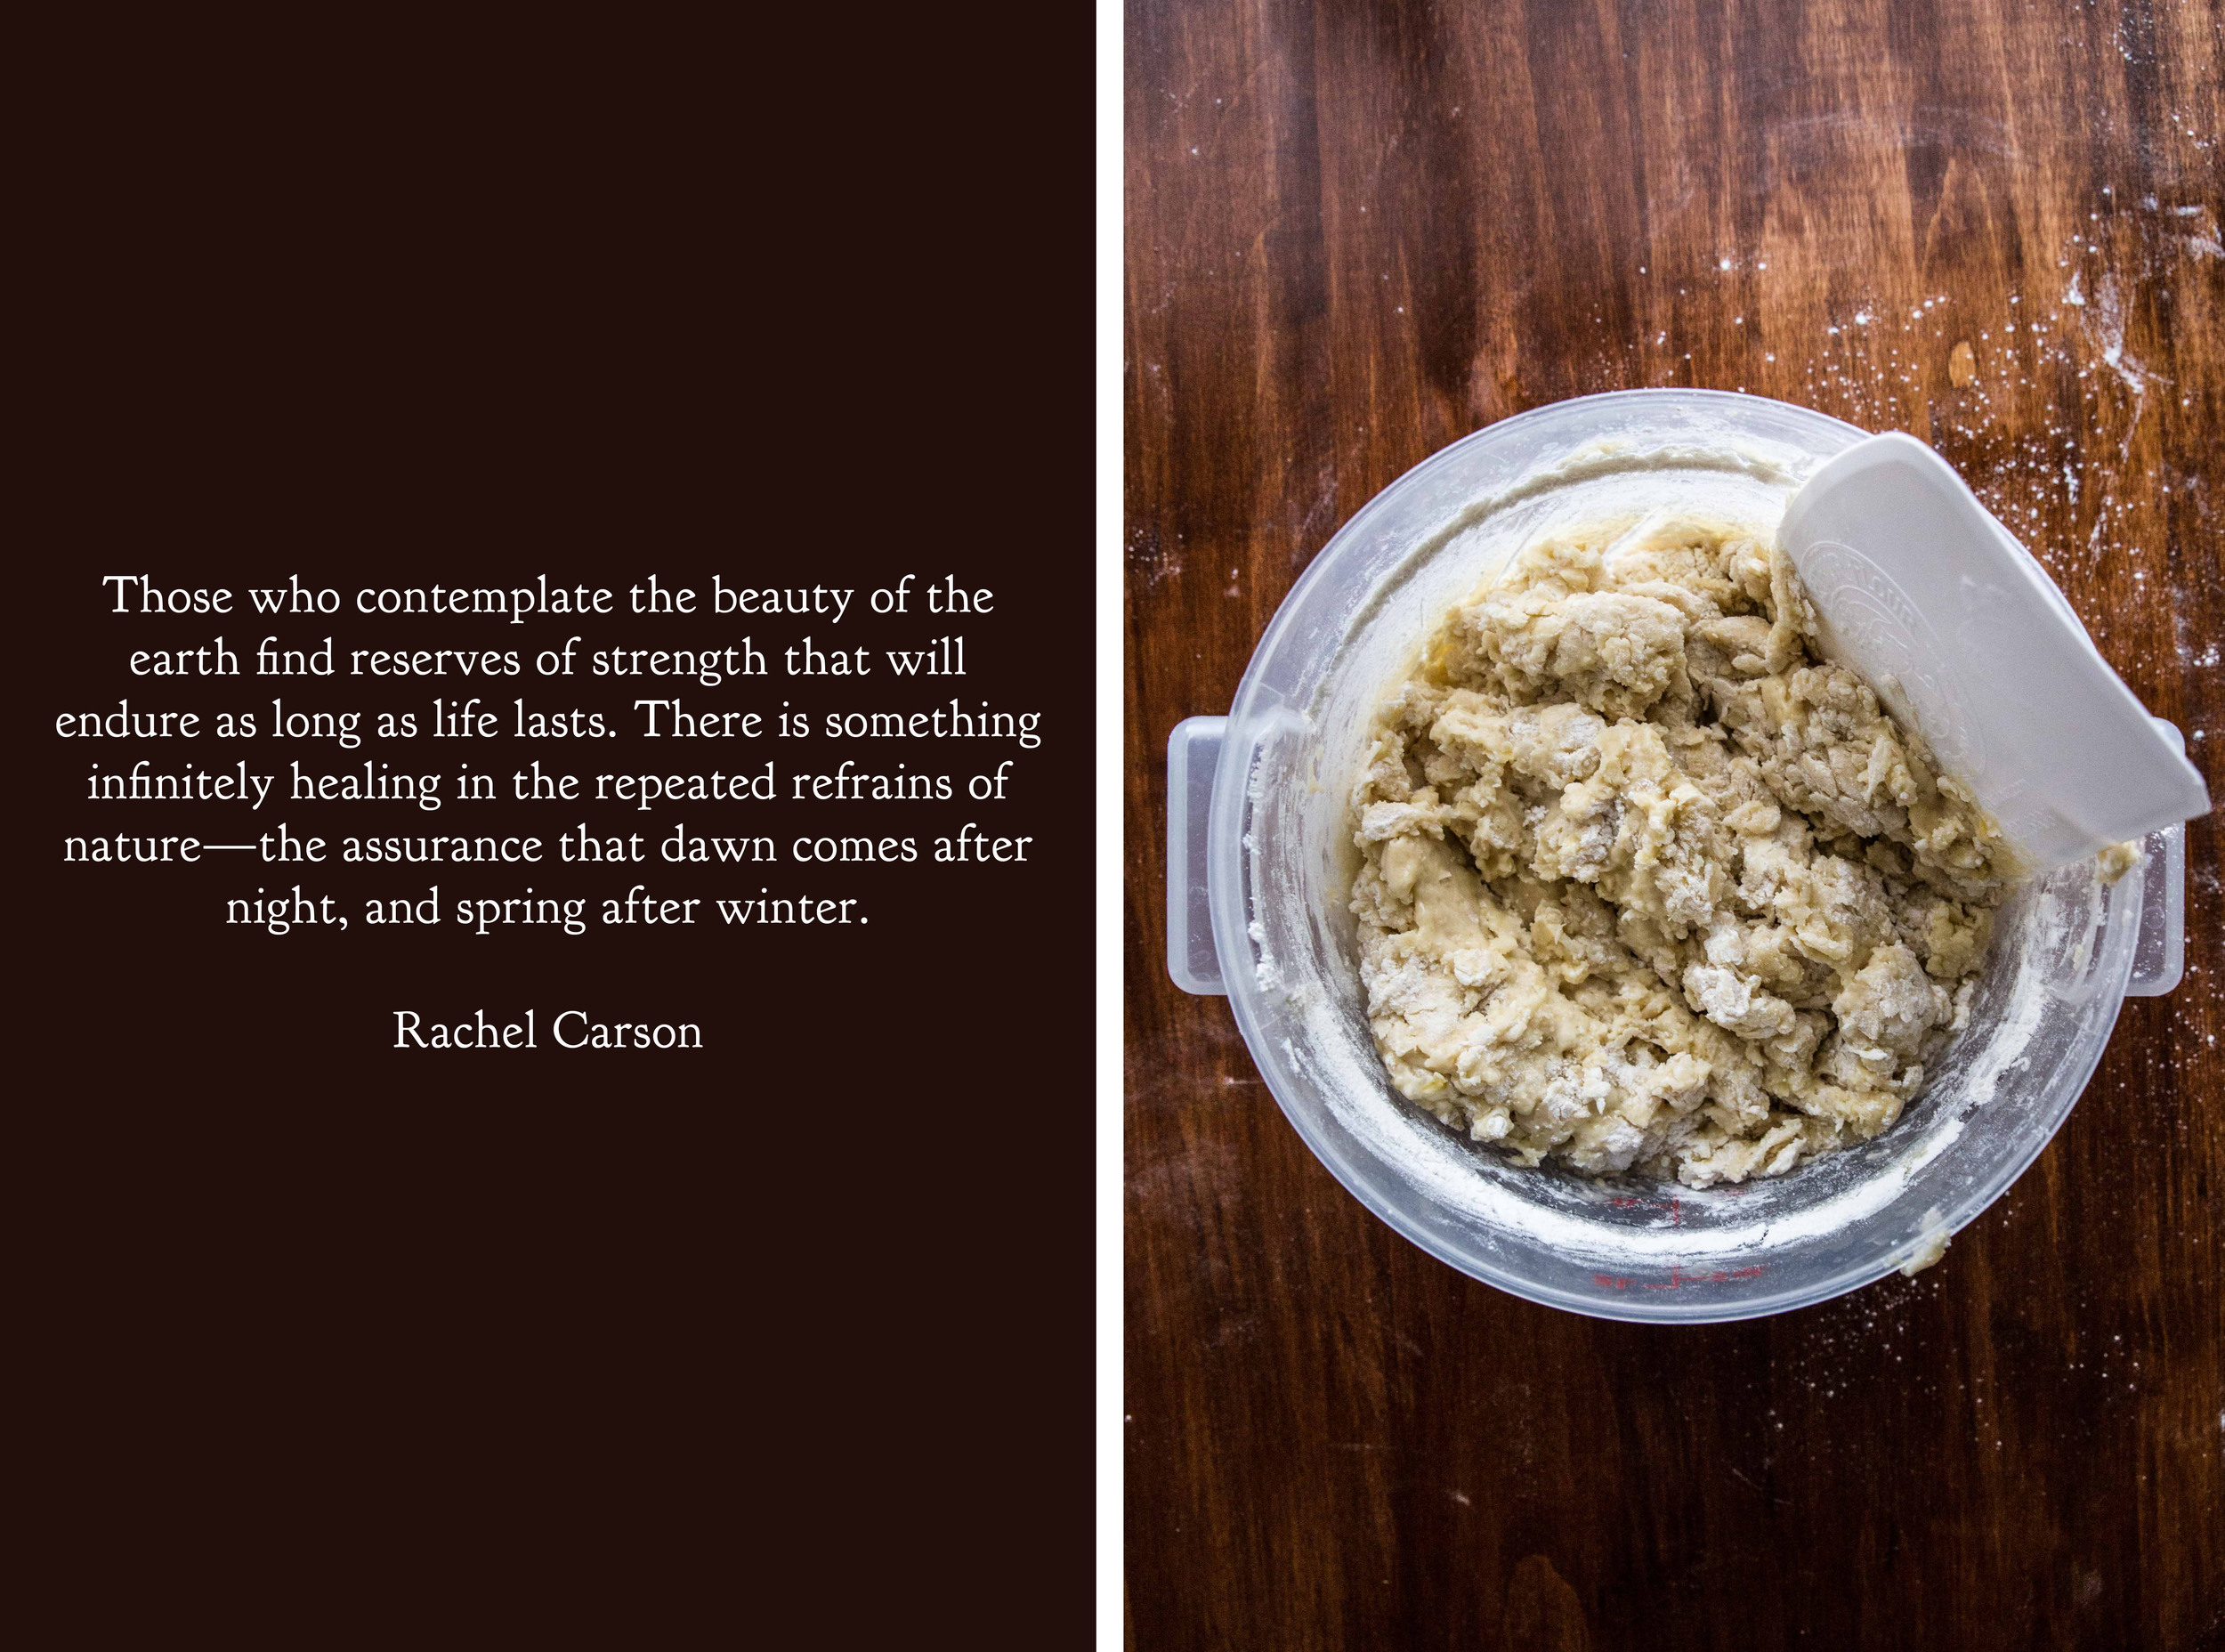
March 20 marks the first day of spring. Though, as Henry Van Dyke said, the first day of spring and the first spring day often have different timing. I hope that today is the latter for you. The first spring day came nearly a month ago, which is unprecedented in the upper Midwest. To celebrate these fortuitous weather patterns, I am baking foods that remind me of the spring season. 

In partnership with King Arthur Flour, each month I want to challenge you with a new recipe to help you grow and develop as a baker. This month we're exploring challah. Challah is a Jewish bread that is served on the Sabbath and other Jewish holidays. The soft bread is enriched with eggs and olive oil to bring color and flavor. It is reminiscent of brioche, which uses fewer eggs and butter instead of oil. With a hint of honey for sweetness, challah is a mildly decadent breadgreat for soaking up gravy and even better for making French toast.
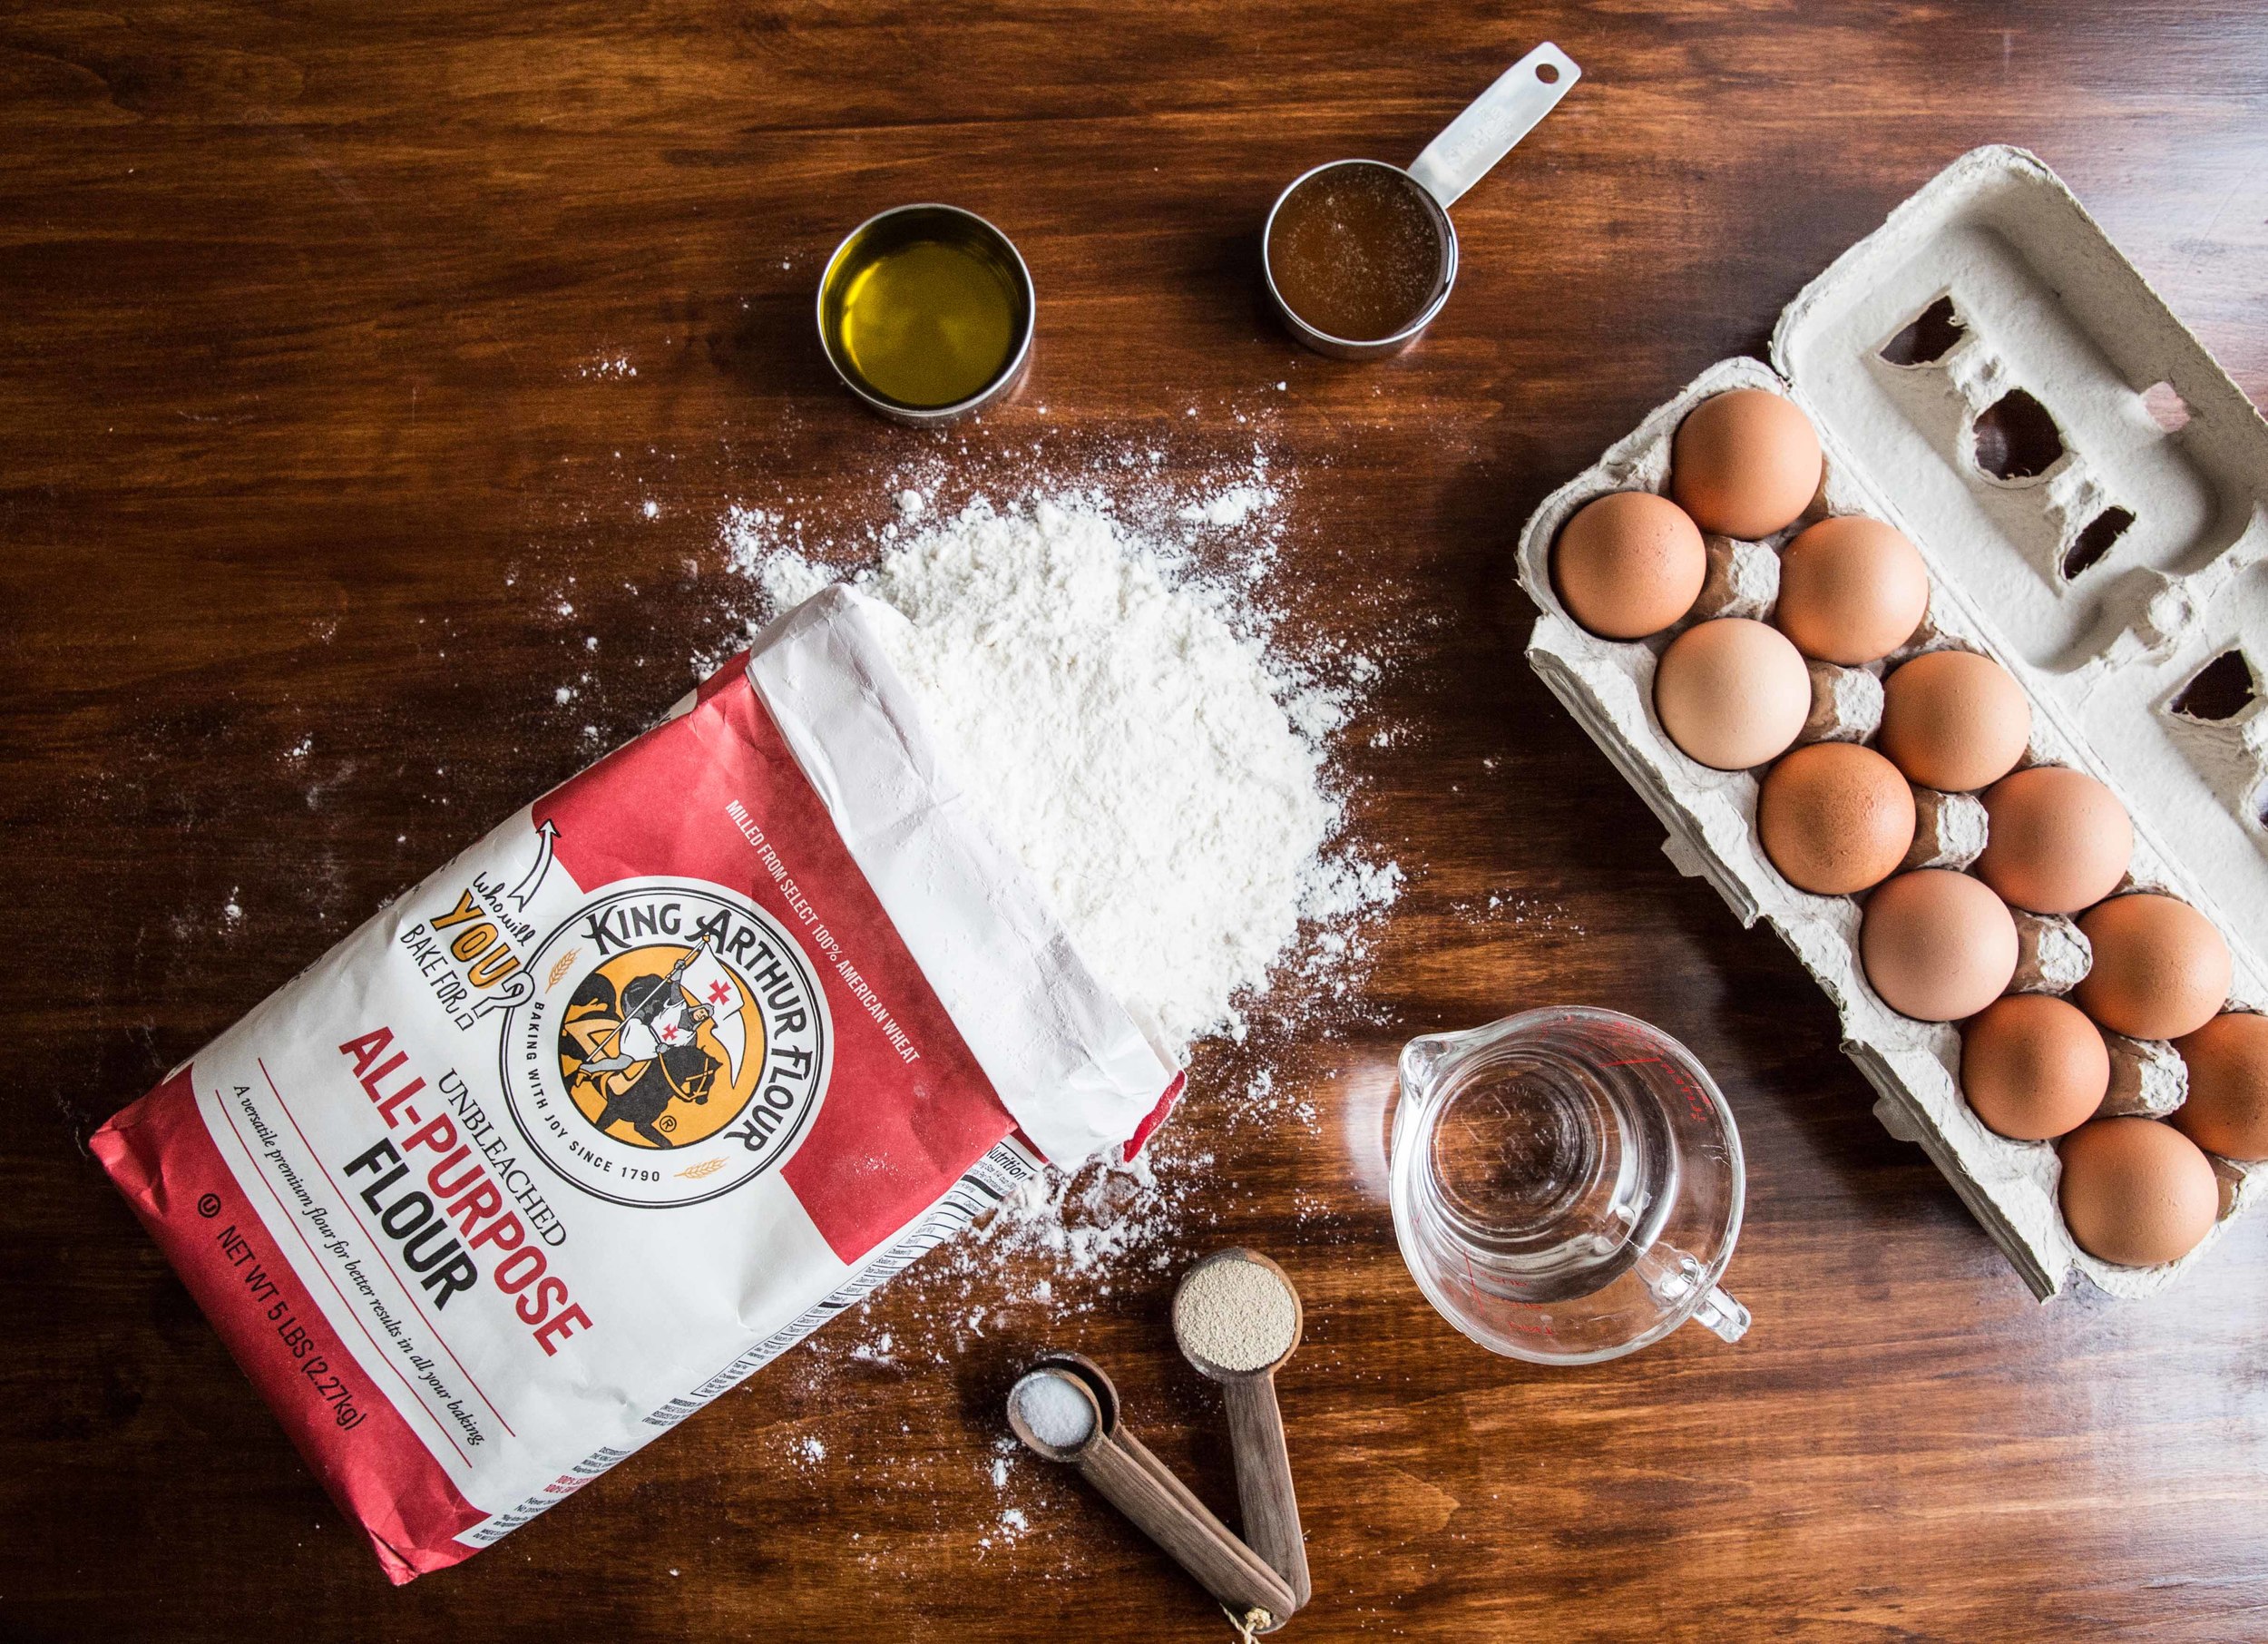
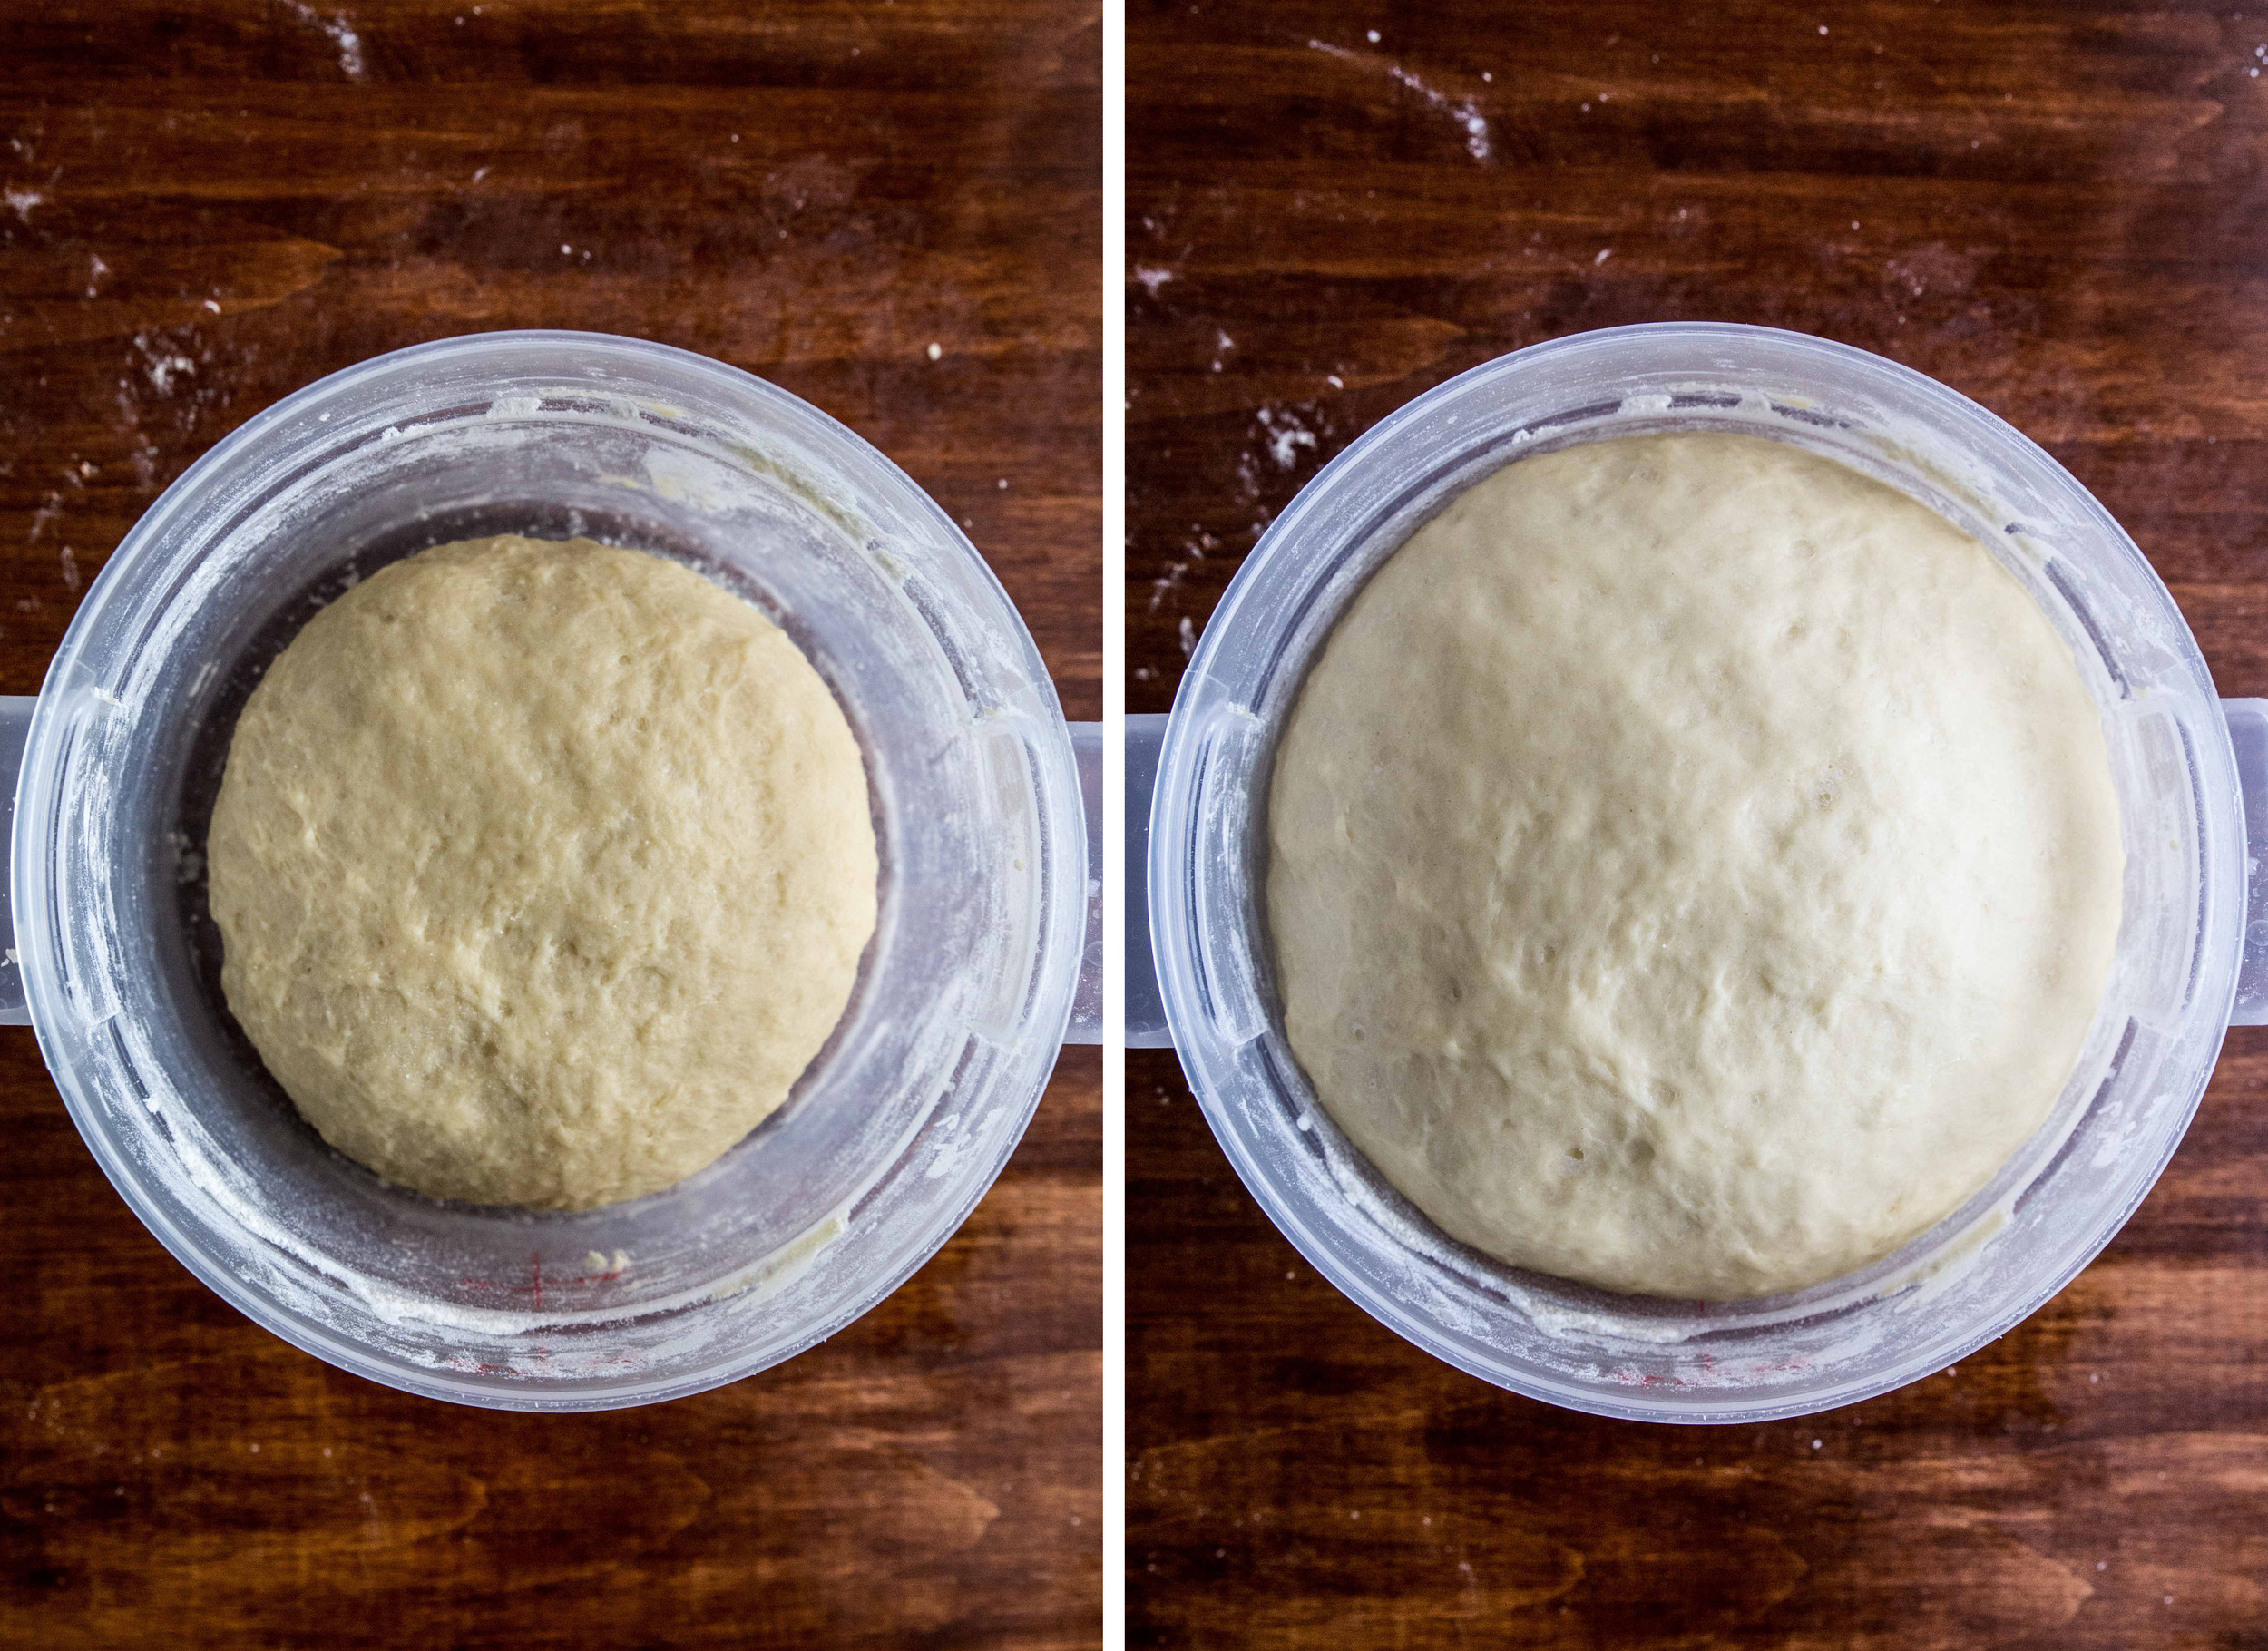
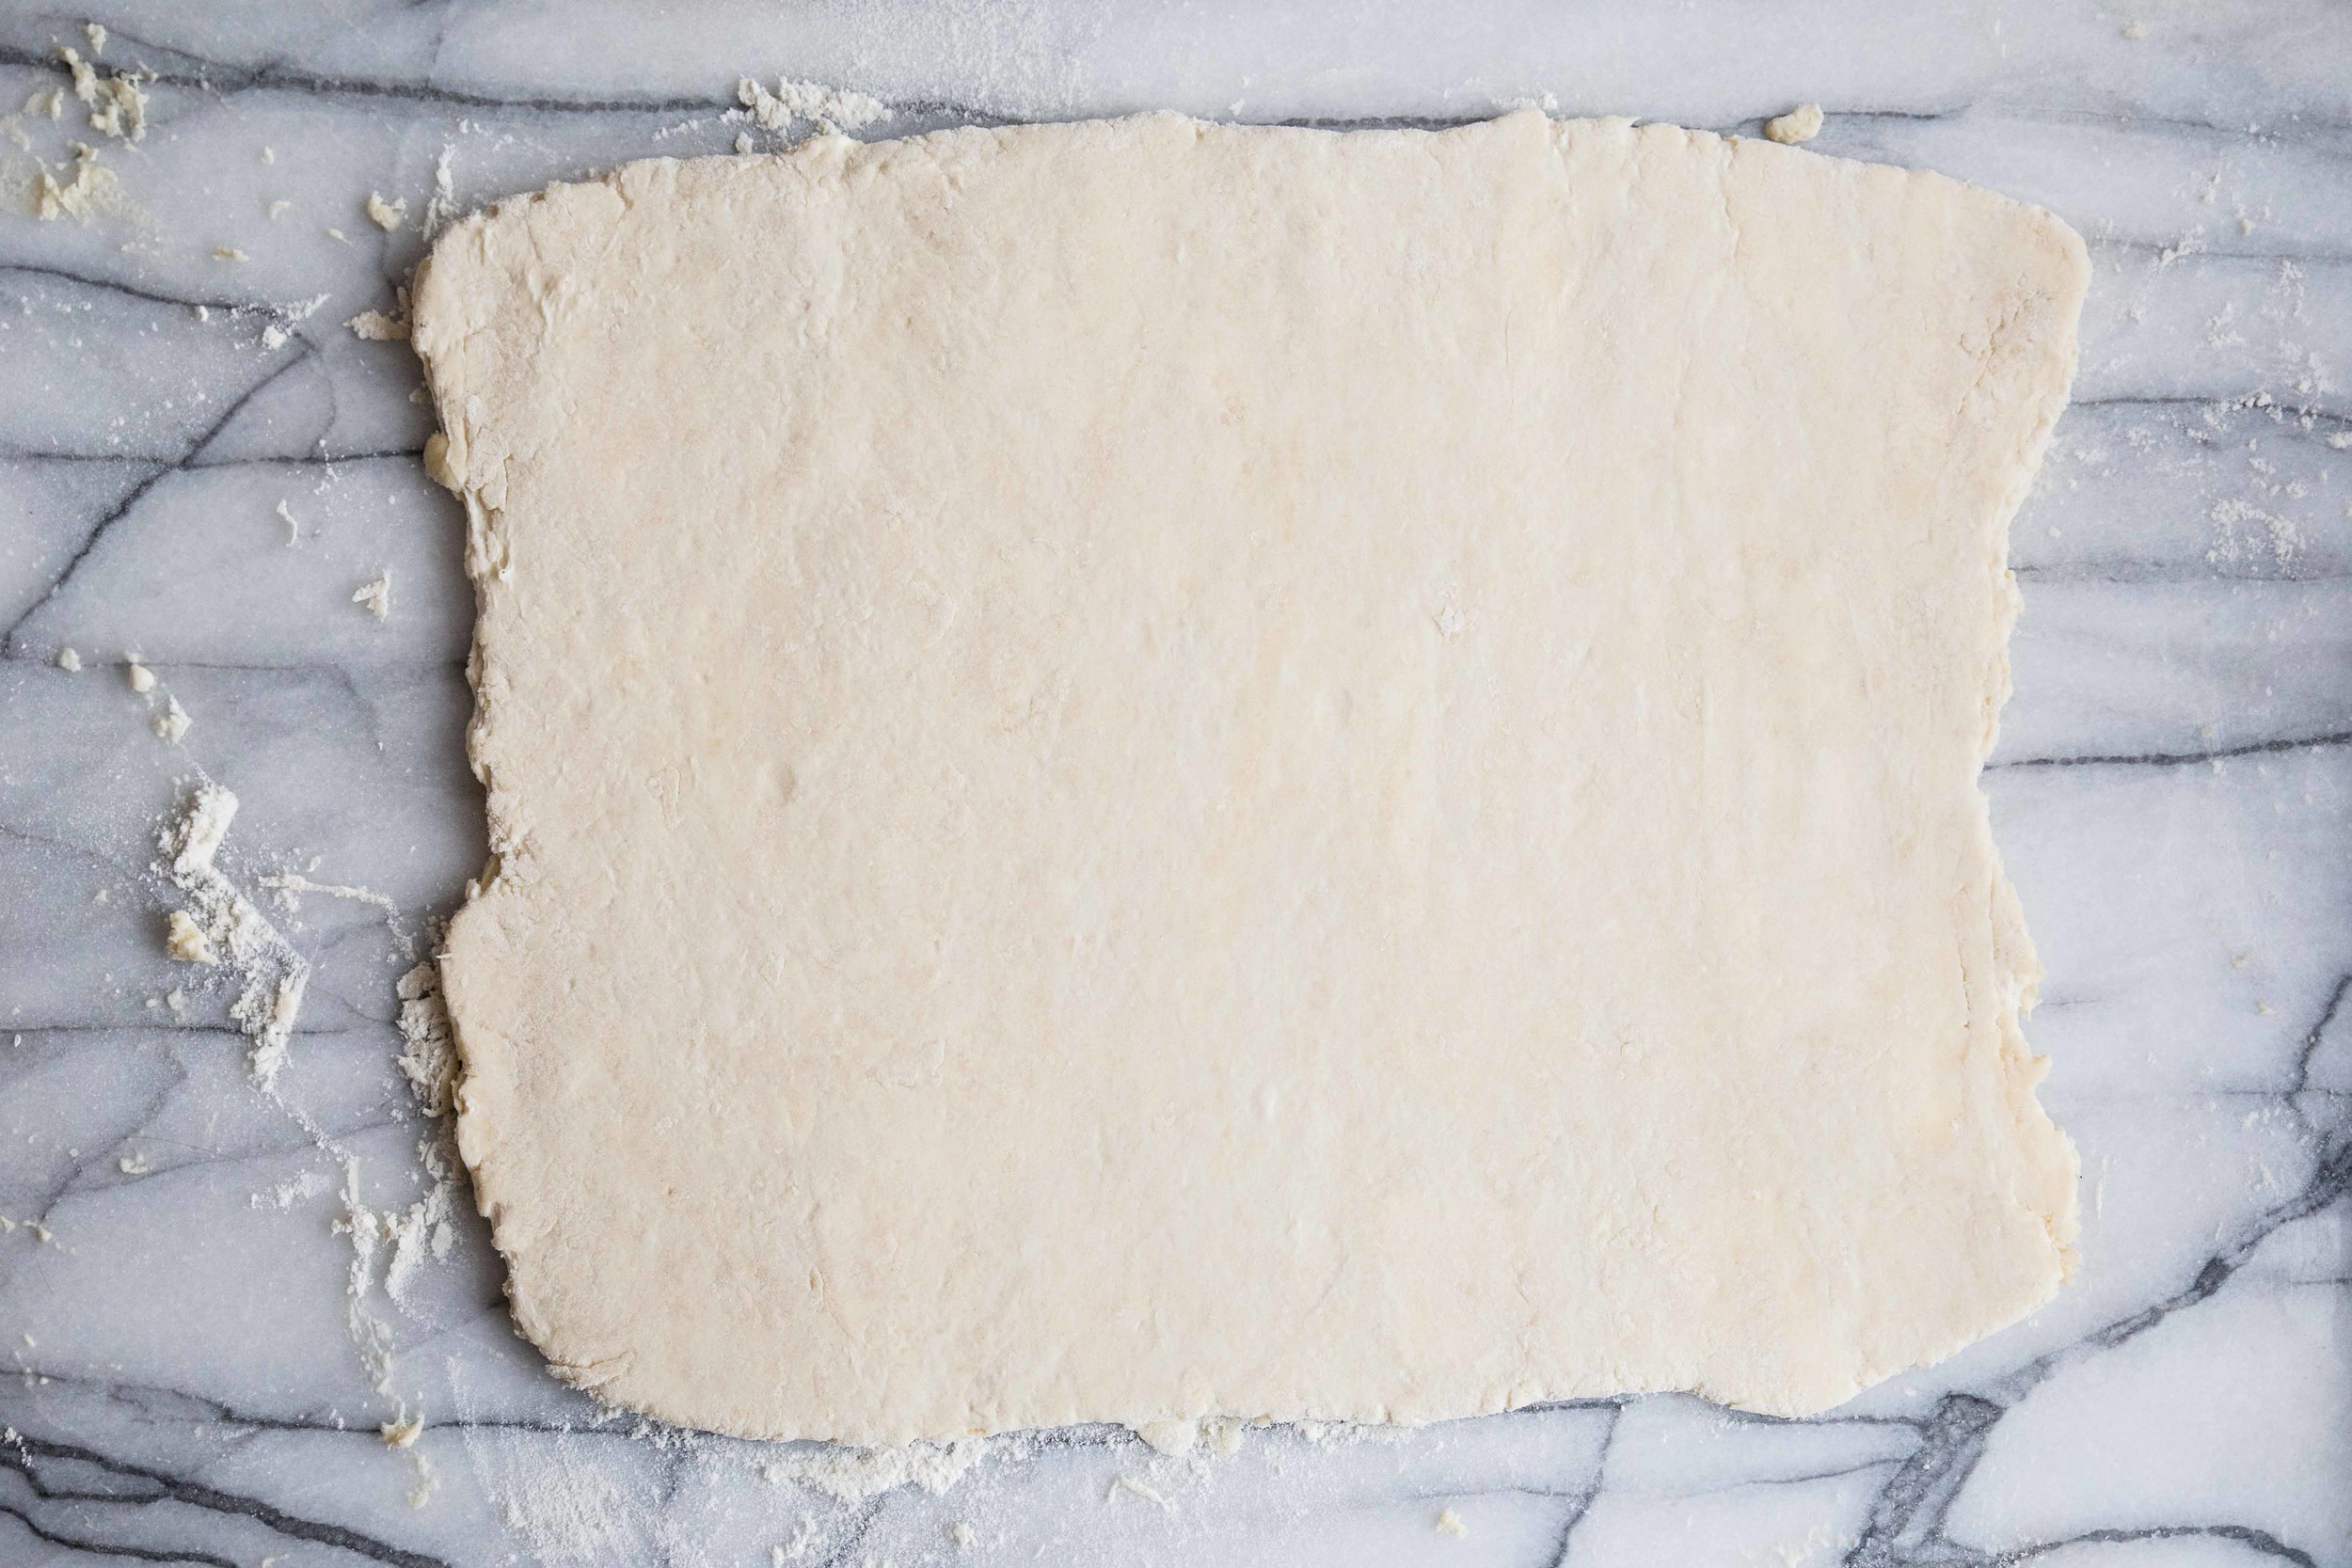
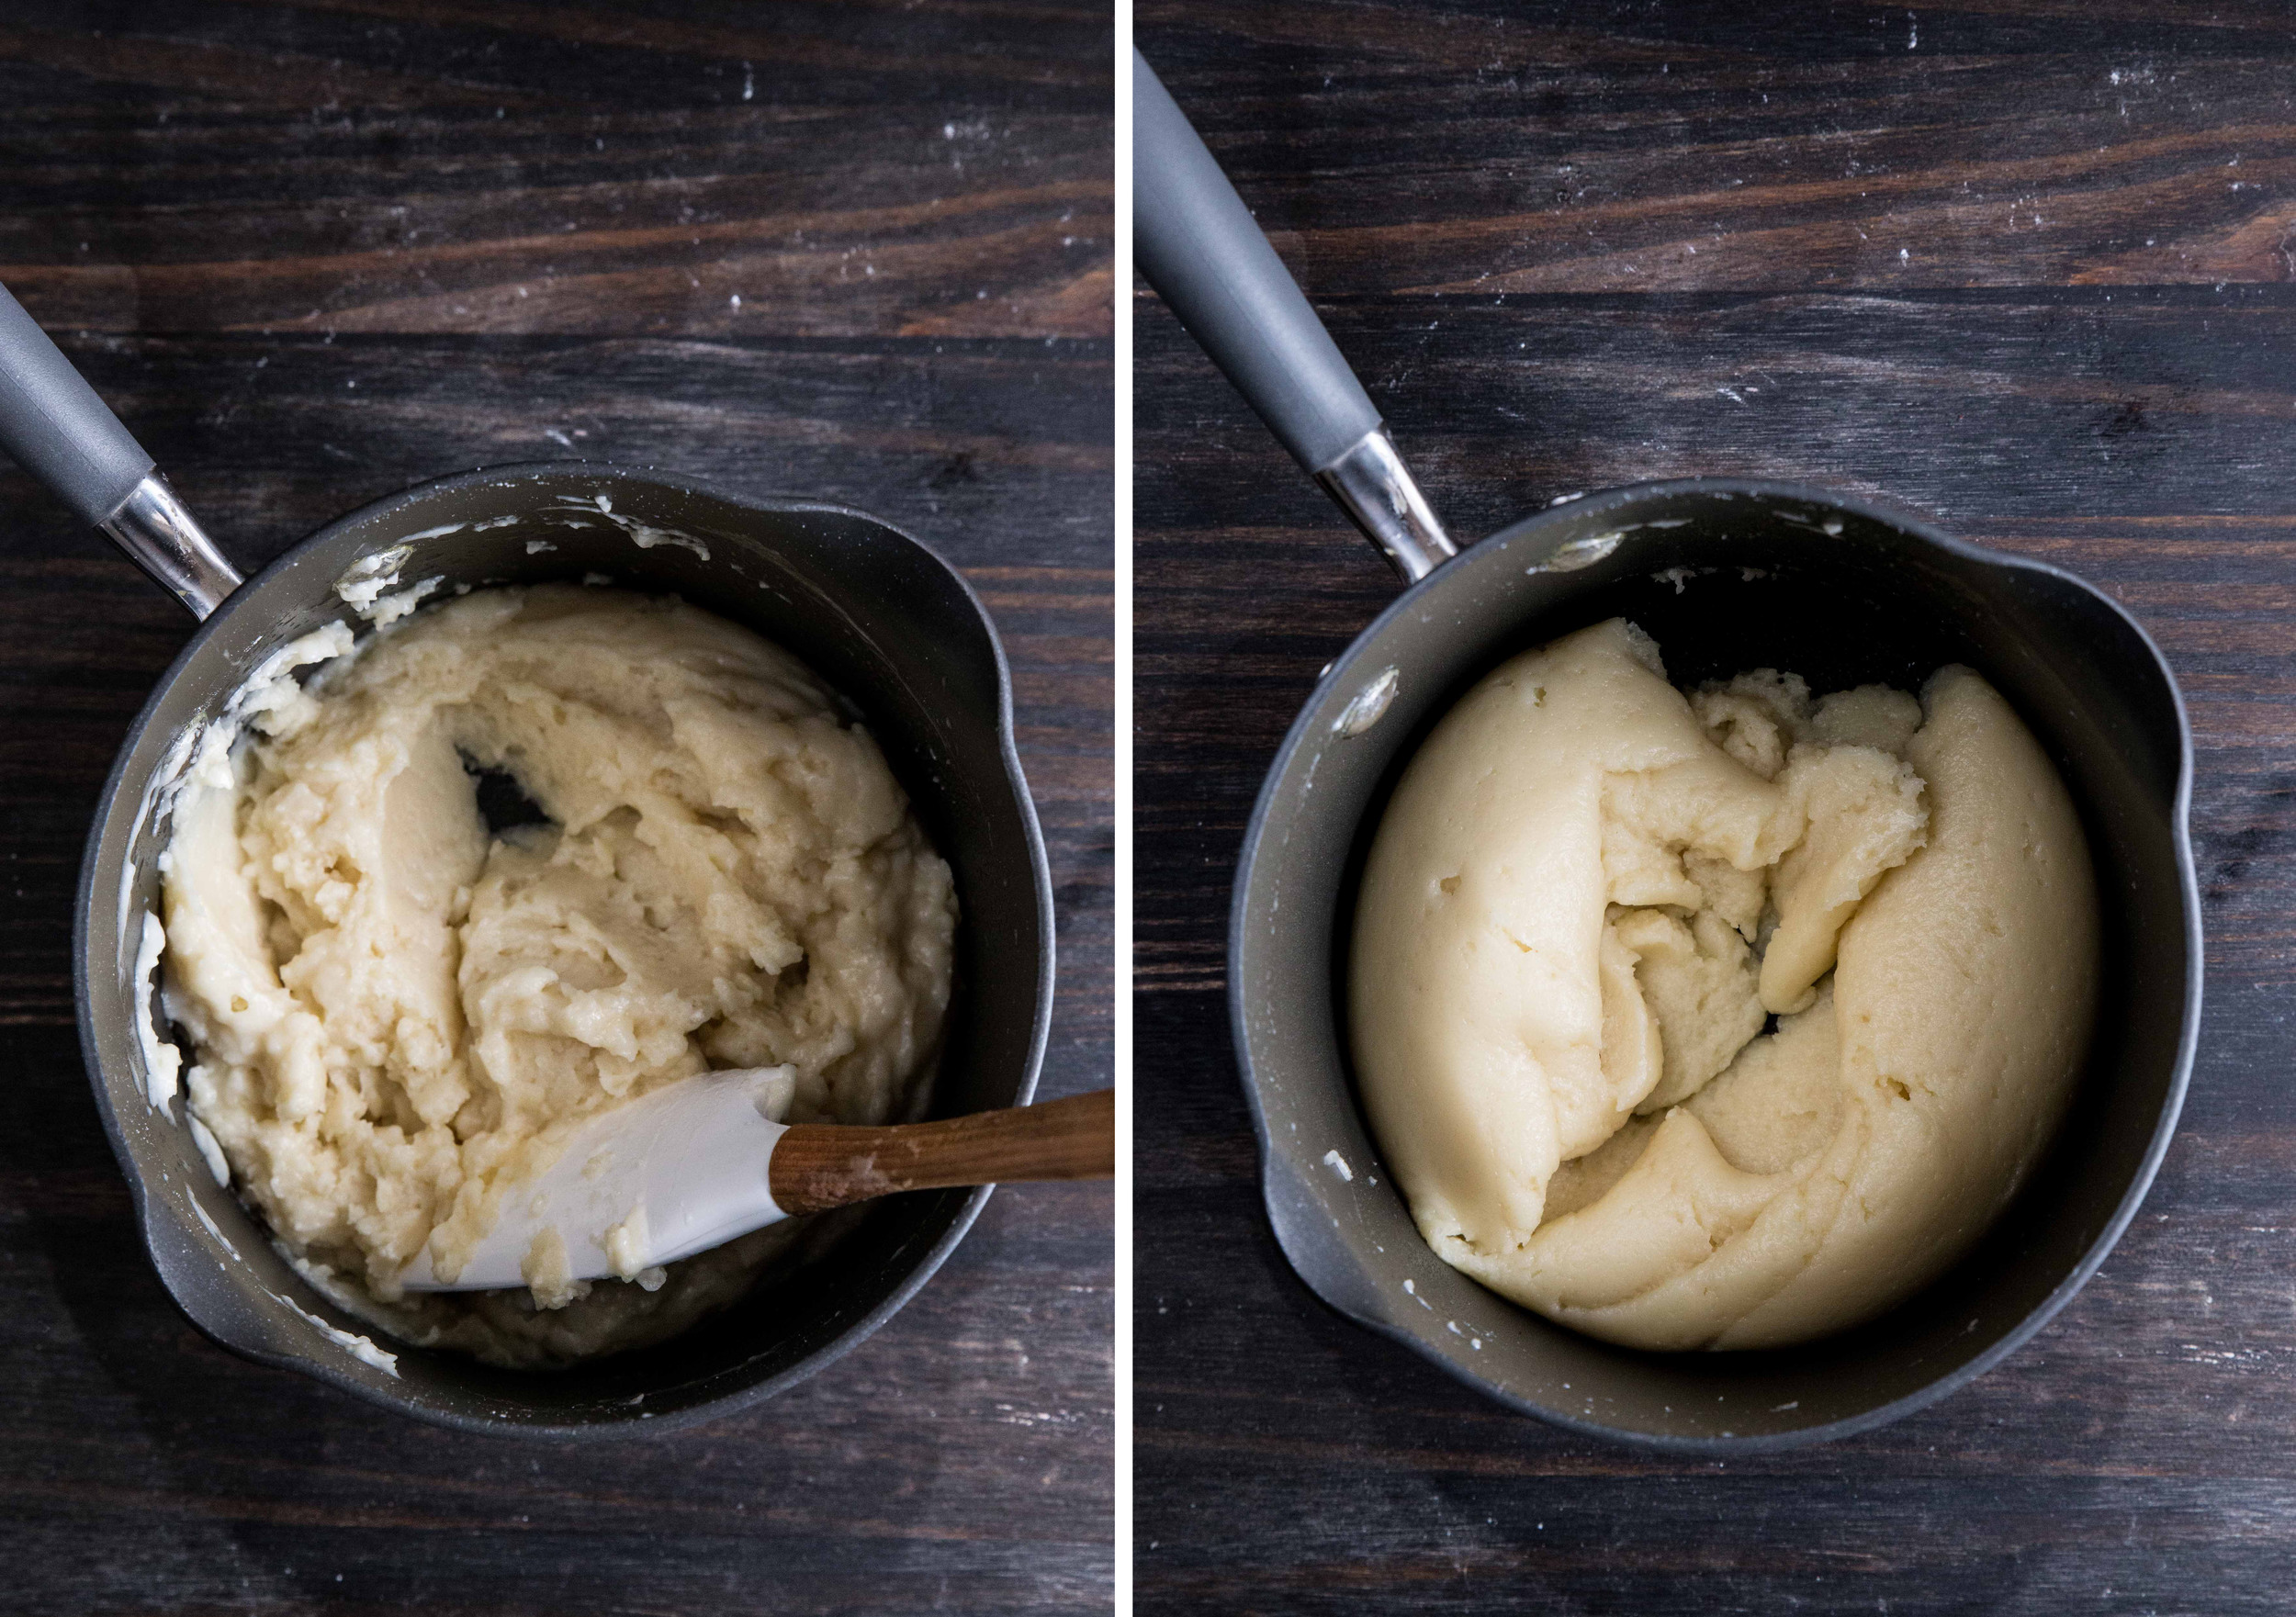
To start, the liquid ingredientswater, yeast, olive oil, honey, eggswhisked together. The flour and salt are gradually added and stirred in with a bowl scraper. I prefer to use all-purpose flour because it creates a loaf with a soft and tender interior. When the dough looks shaggy, turn the dough out onto a lightly floured surface and bring it into a ball.

To knead, use the heel of your hand to push the dough downwards at an angle to stretch it away from you. Rotate the dough 90 degrees, fold it in half, and repeat the process. As the dough is kneaded, you will be able to feel the dough firm up as the gluten forms. After 5-10 minutes of kneading by hand, the dough will begin to feel elastic and spring back under your touch. When it has the appearance of the dough shown in the photograph in the top left, it is ready for the first rise.

I prefer to knead by hand to feel the texture of the dough change, but the dough can also be kneaded using a stand mixer on low speed with a dough hook attachment. Place in a bowl, cover, and allow to rise for 1 1/2 to 2 hours, or until doubled in size.

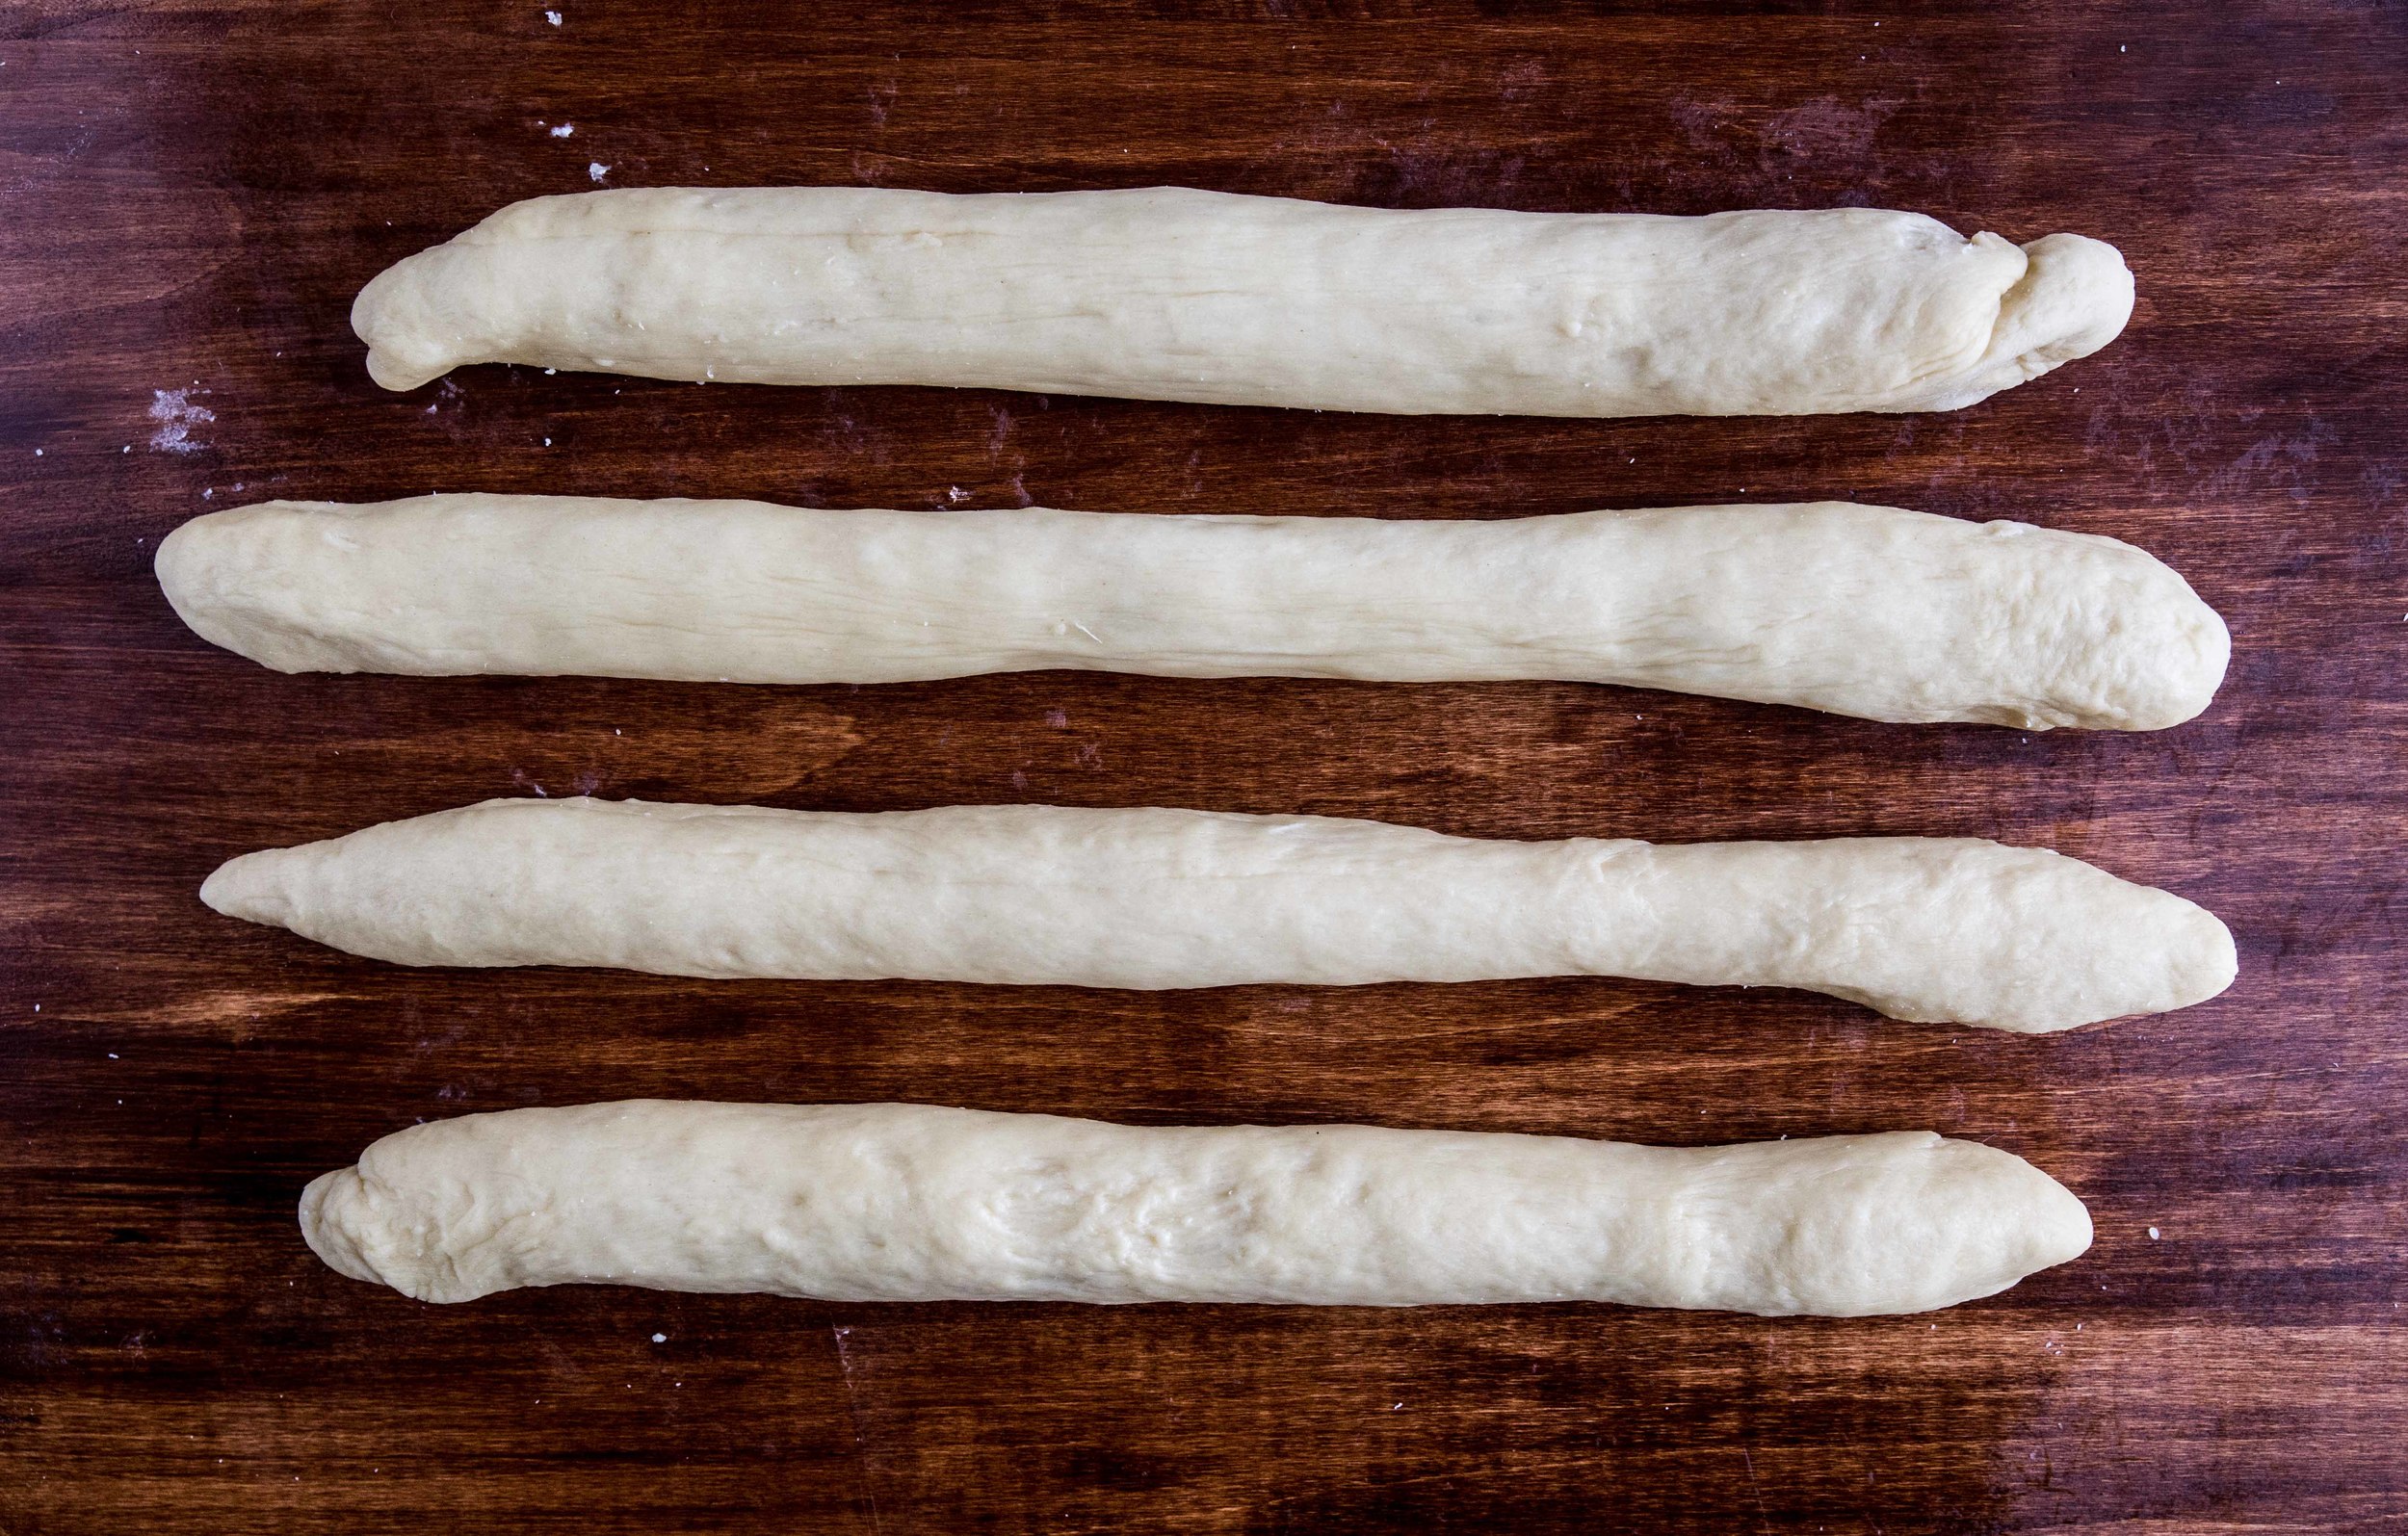
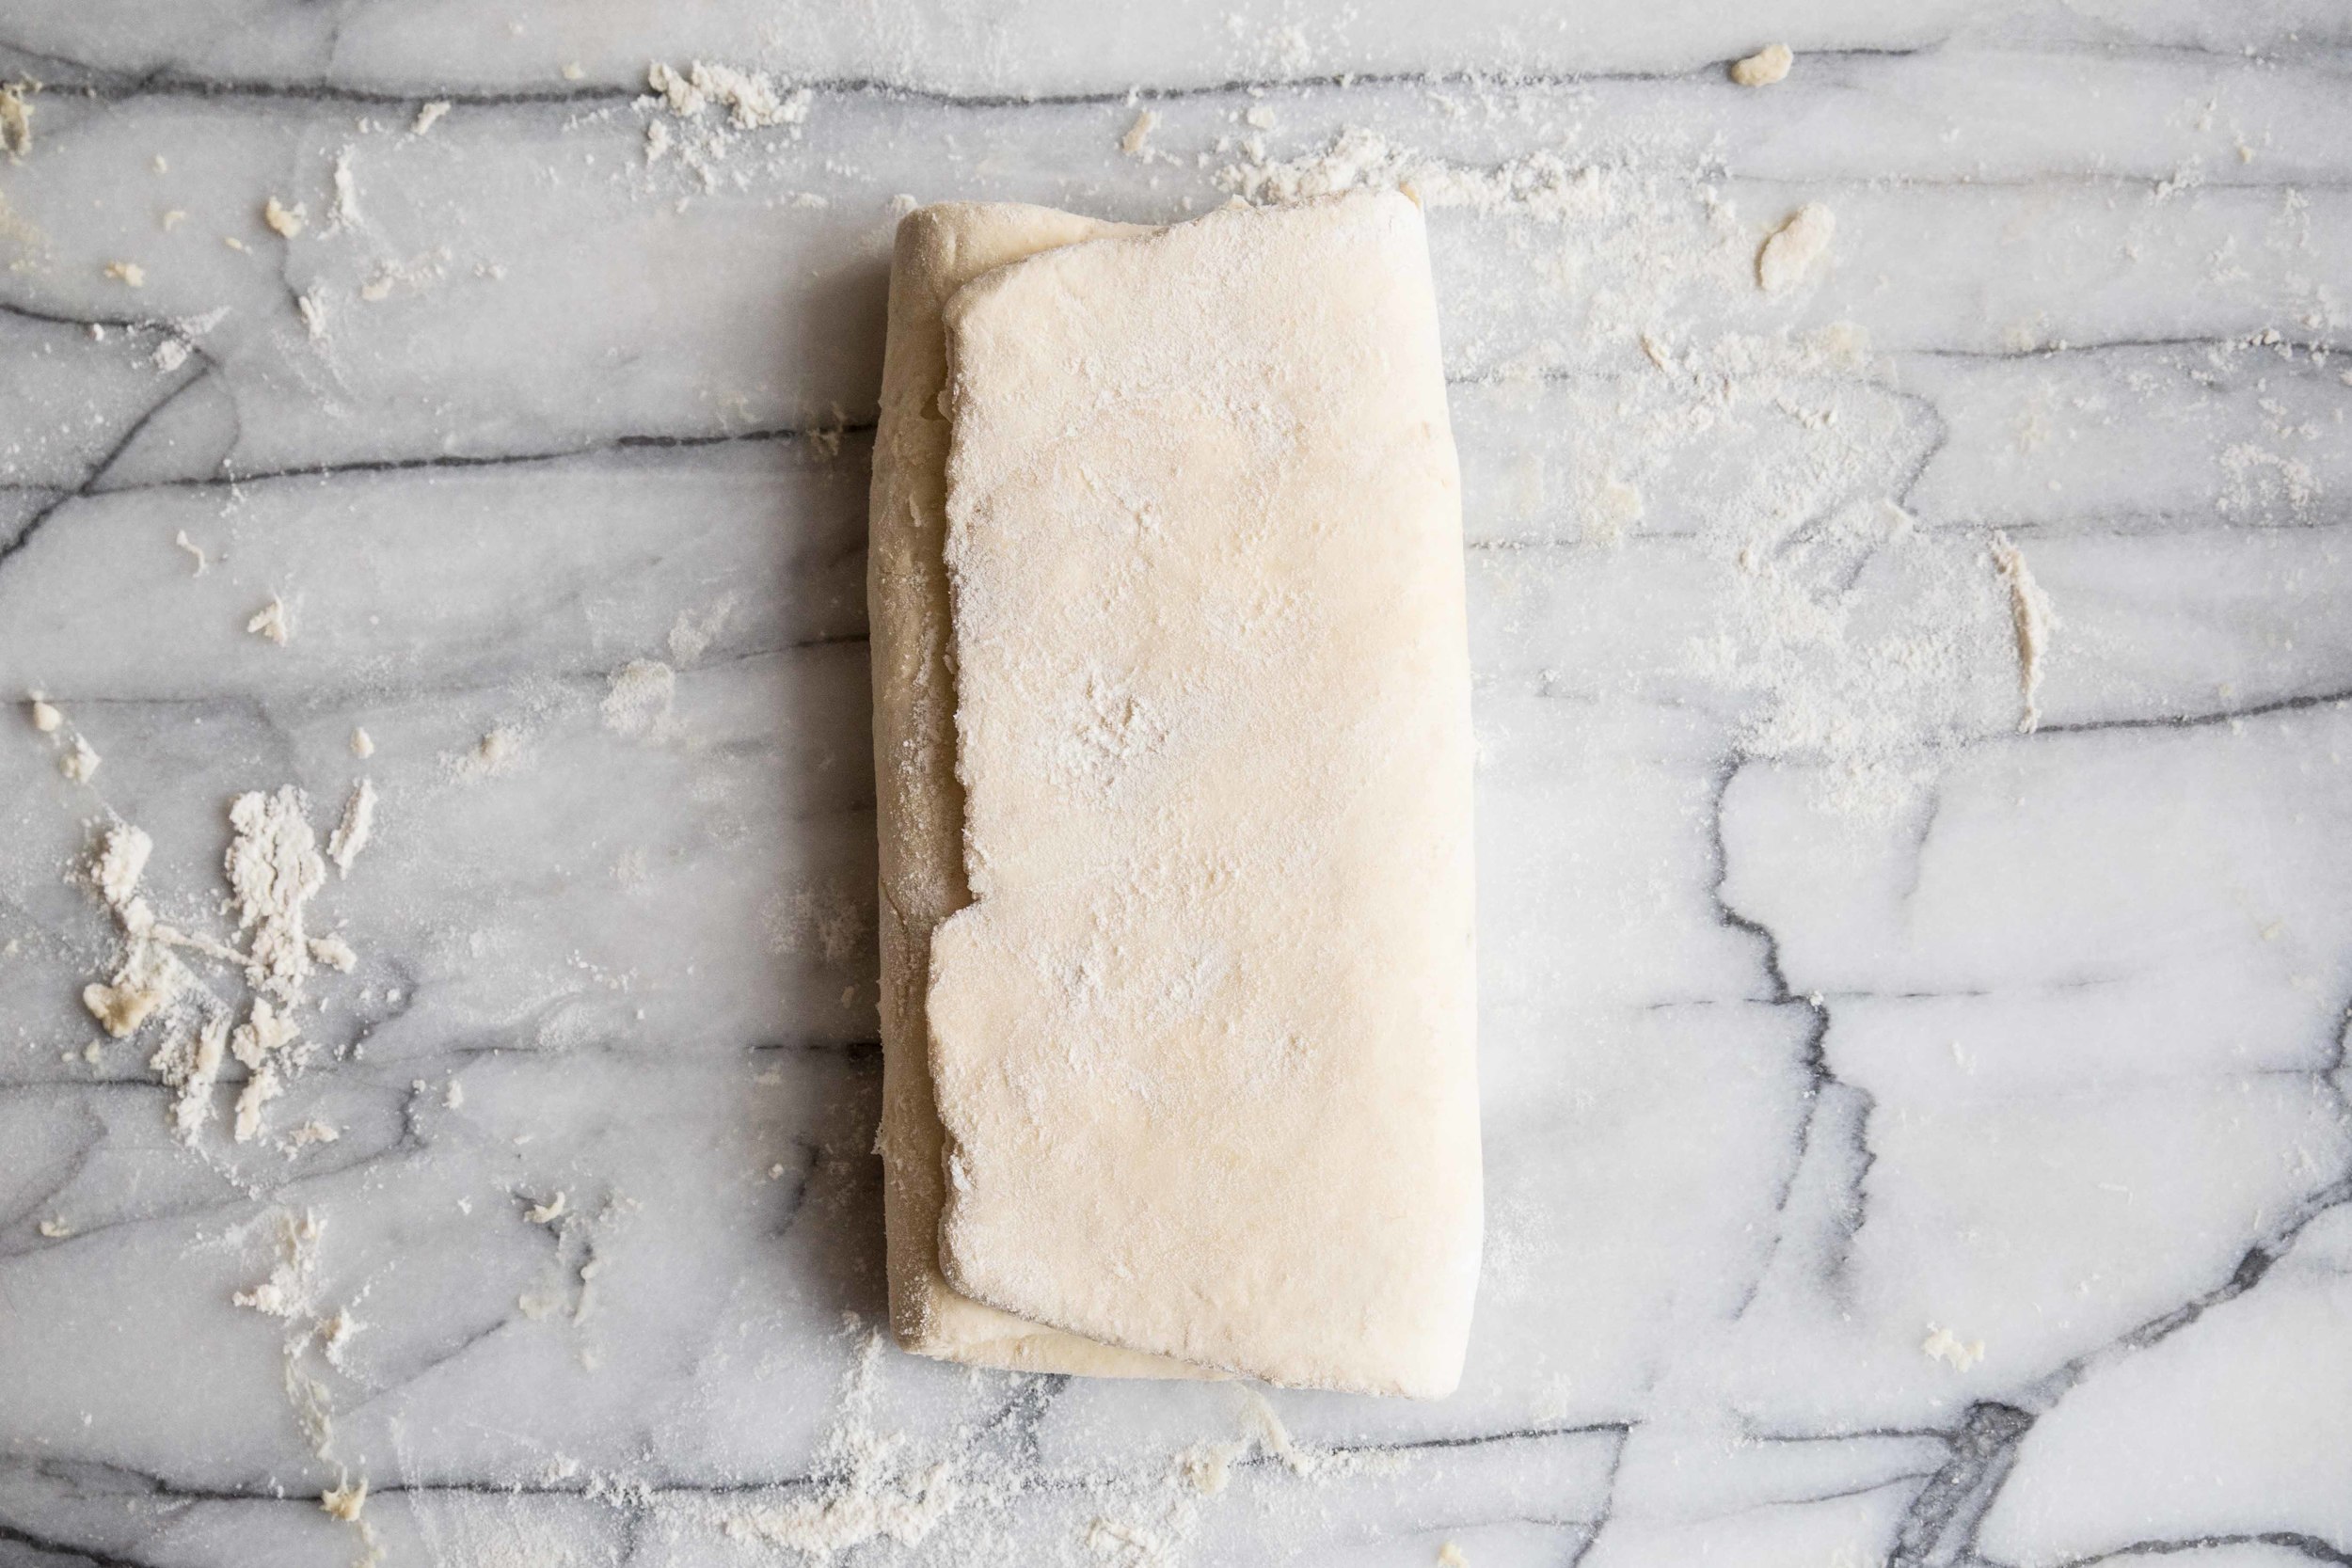
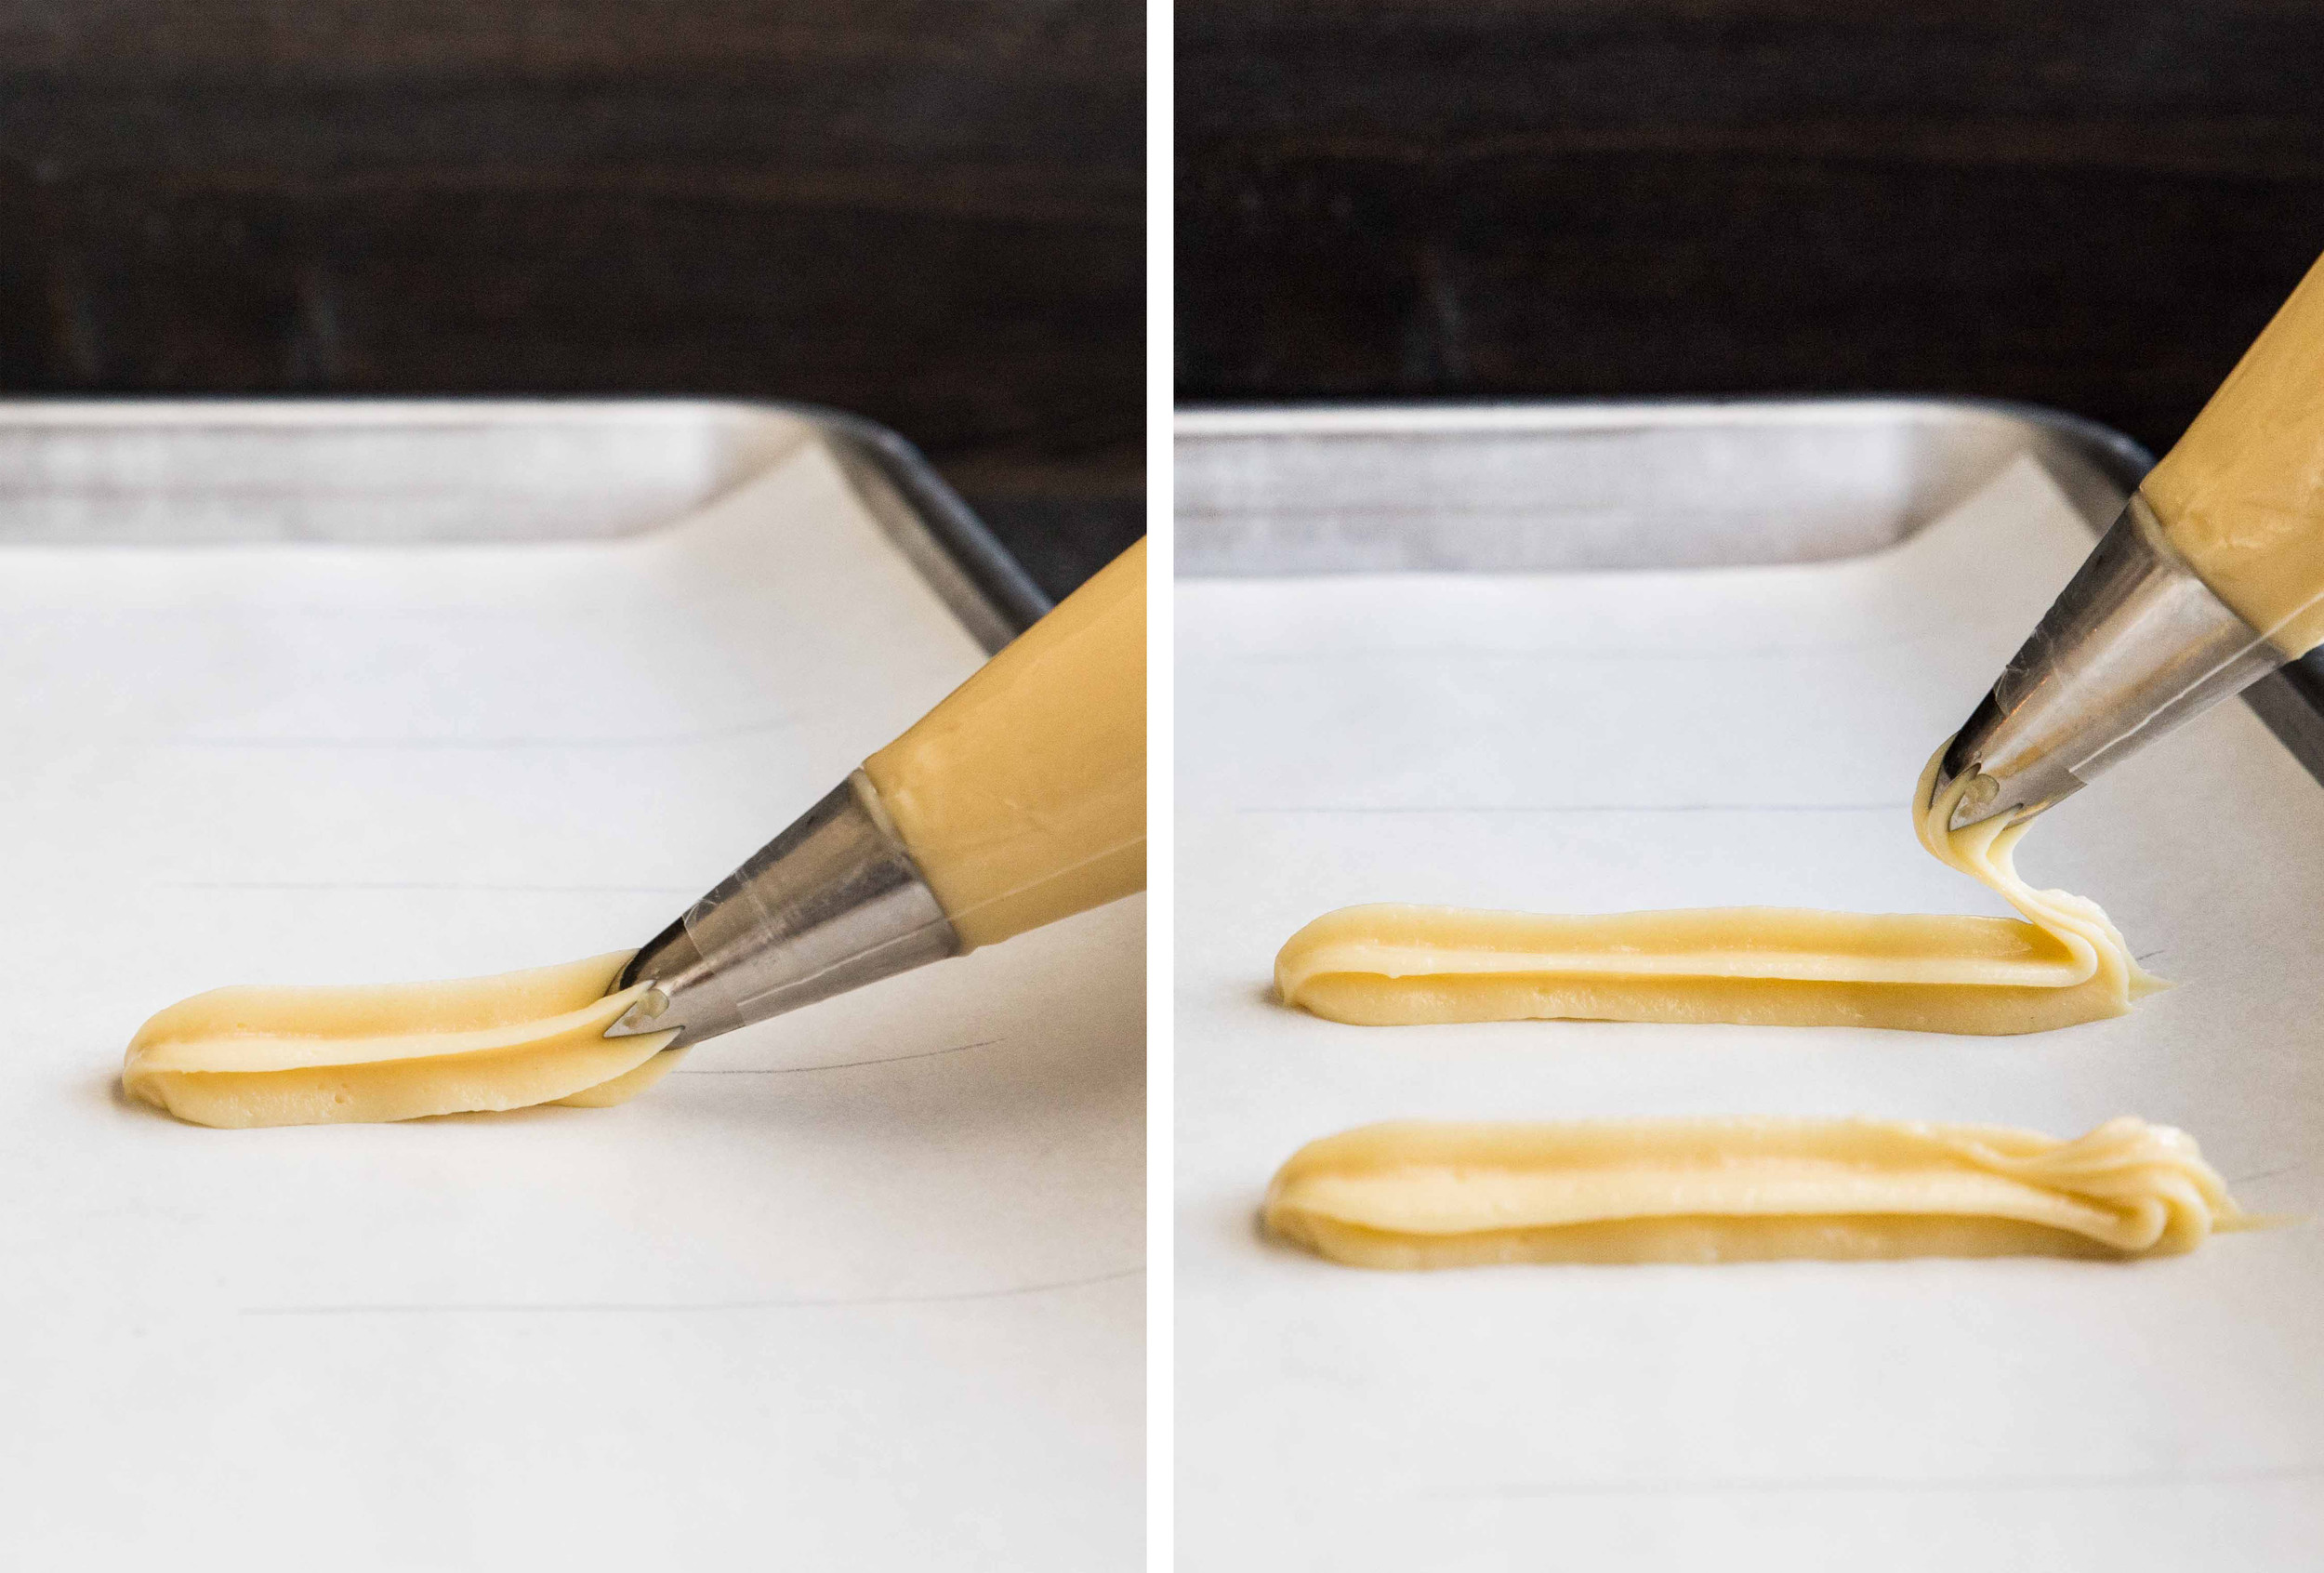
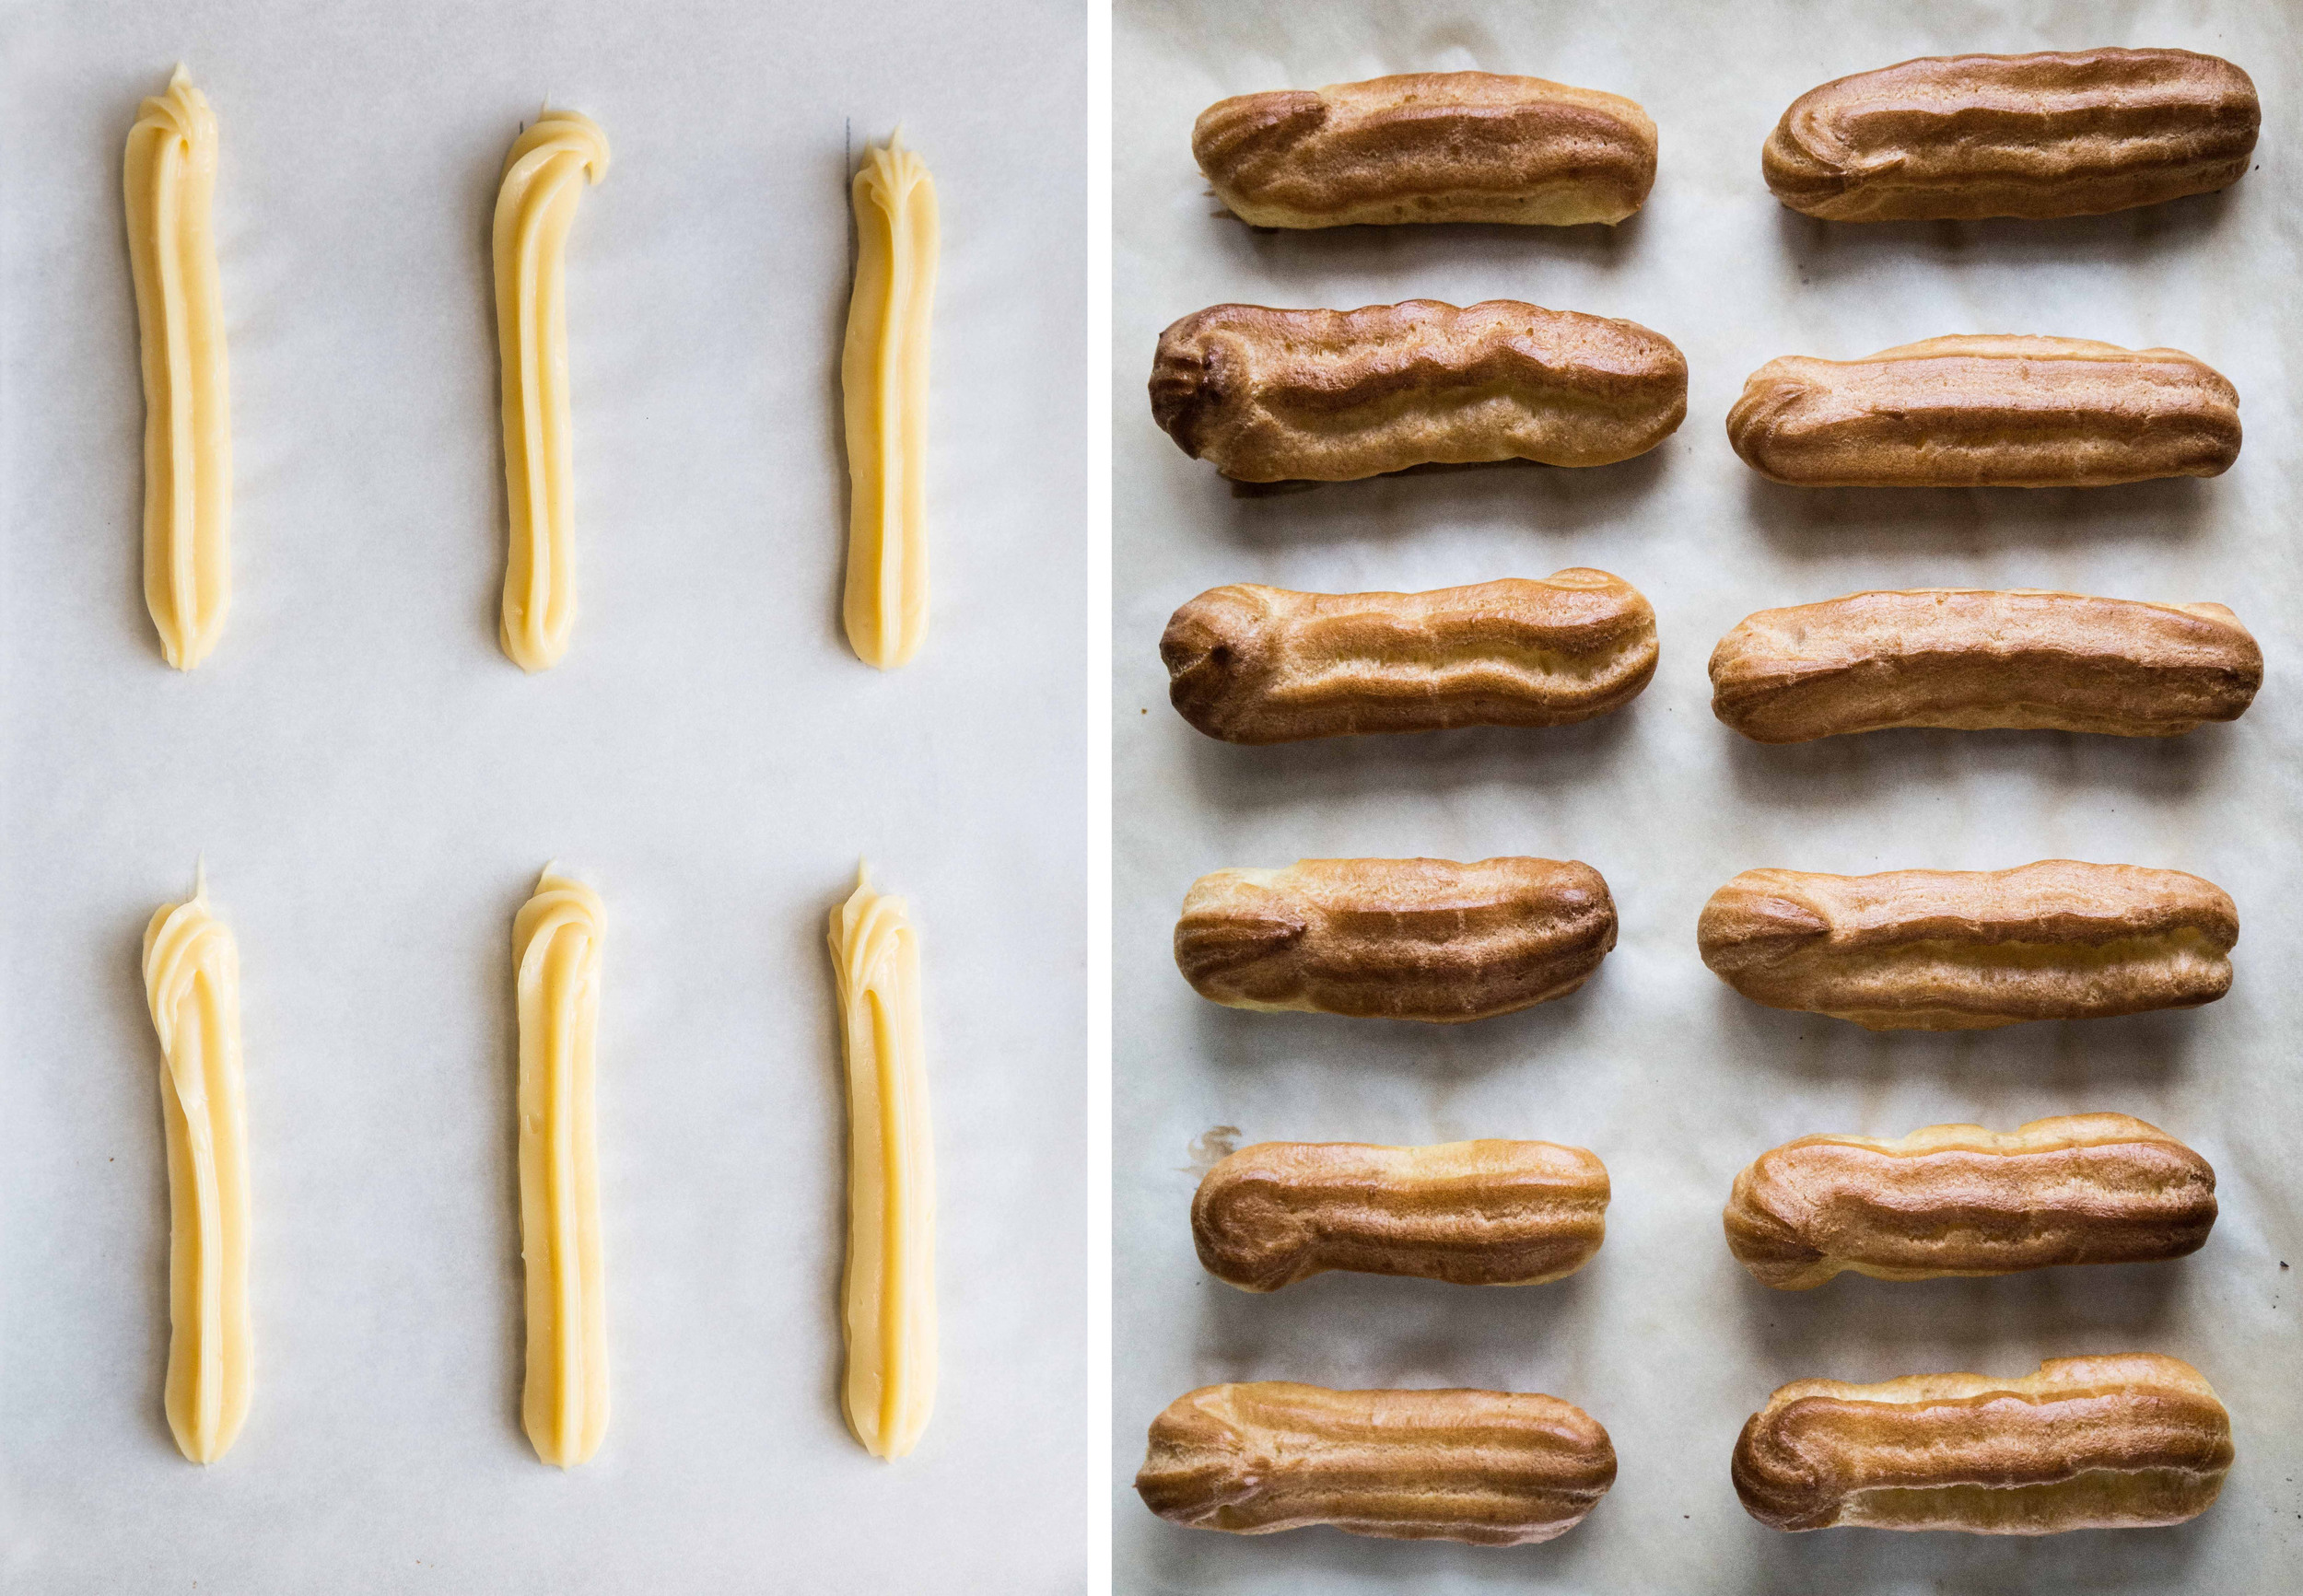
When the dough has risen, divide it into four equal pieces. Shape these pieces into logs. Then, using your hands, start in the middle of each log and apply pressure with the heels of your hands, rolling the dough back and forth. Gradually move your hands towards the ends of the log to stretch out the shape. The process should be repeated until each log is 16 inches in length and approximately 1 inch wide. Take the ends of the strands and pinch them together to start forming the loaf.

While challah can be braided into 3-, 4-, 5-, or 6-strand braids, I will be showing you the 4-strand braid. The extra strand gives the loaf a unique, braided appearance I enjoy. However, if you are interested in other strand braids, there are many tutorials available online

To help illustrate the process, the dough strands will be labeled 1 through 4, where 1 is always located on the far left. The numbers indicate the position of the strands; it will not be necessary to remember which number originally applied to each strand. Once the tops of each strand have been firmly pinched together, take strand 1 (far left) and place it between strands 3 and 4. Please note that all strands will cross over the top of the others; they will never cross underneath.

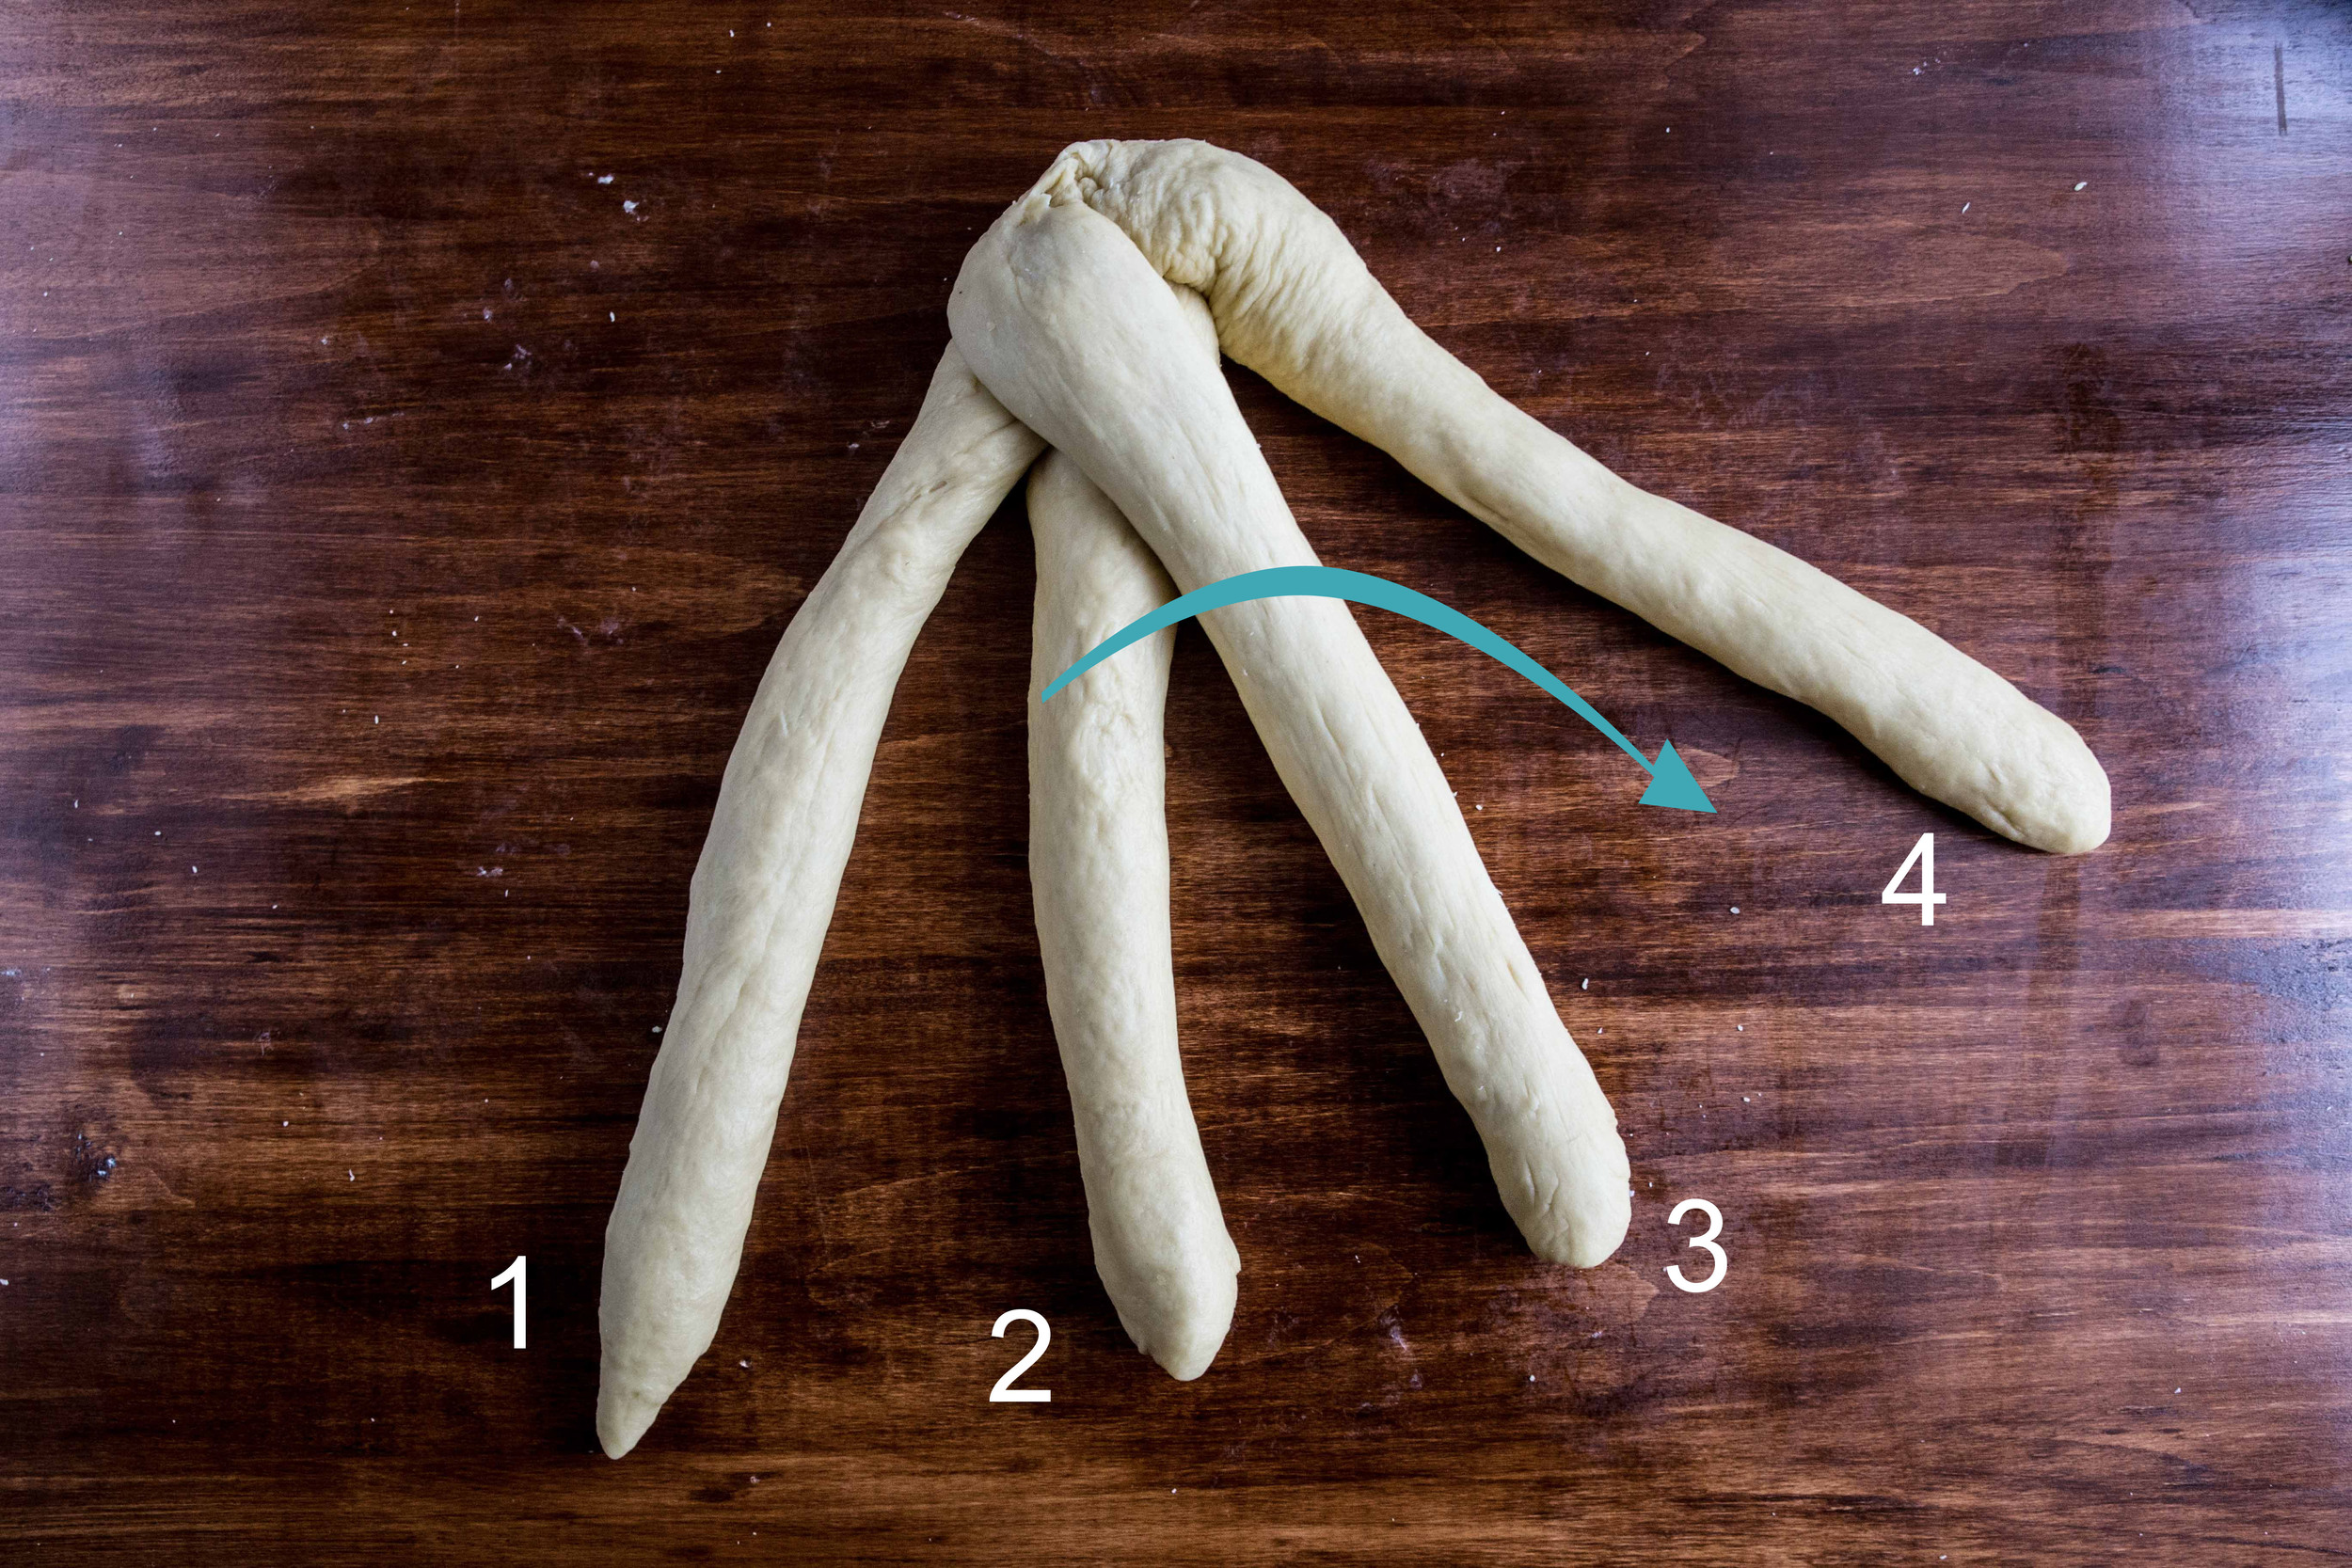
Strand 2 is placed between strands 3 and 4.

Strand 4 is placed between strands 1 and 2.

The process is then repeated. Strand 1 is placed between strands 3 and 4 again.

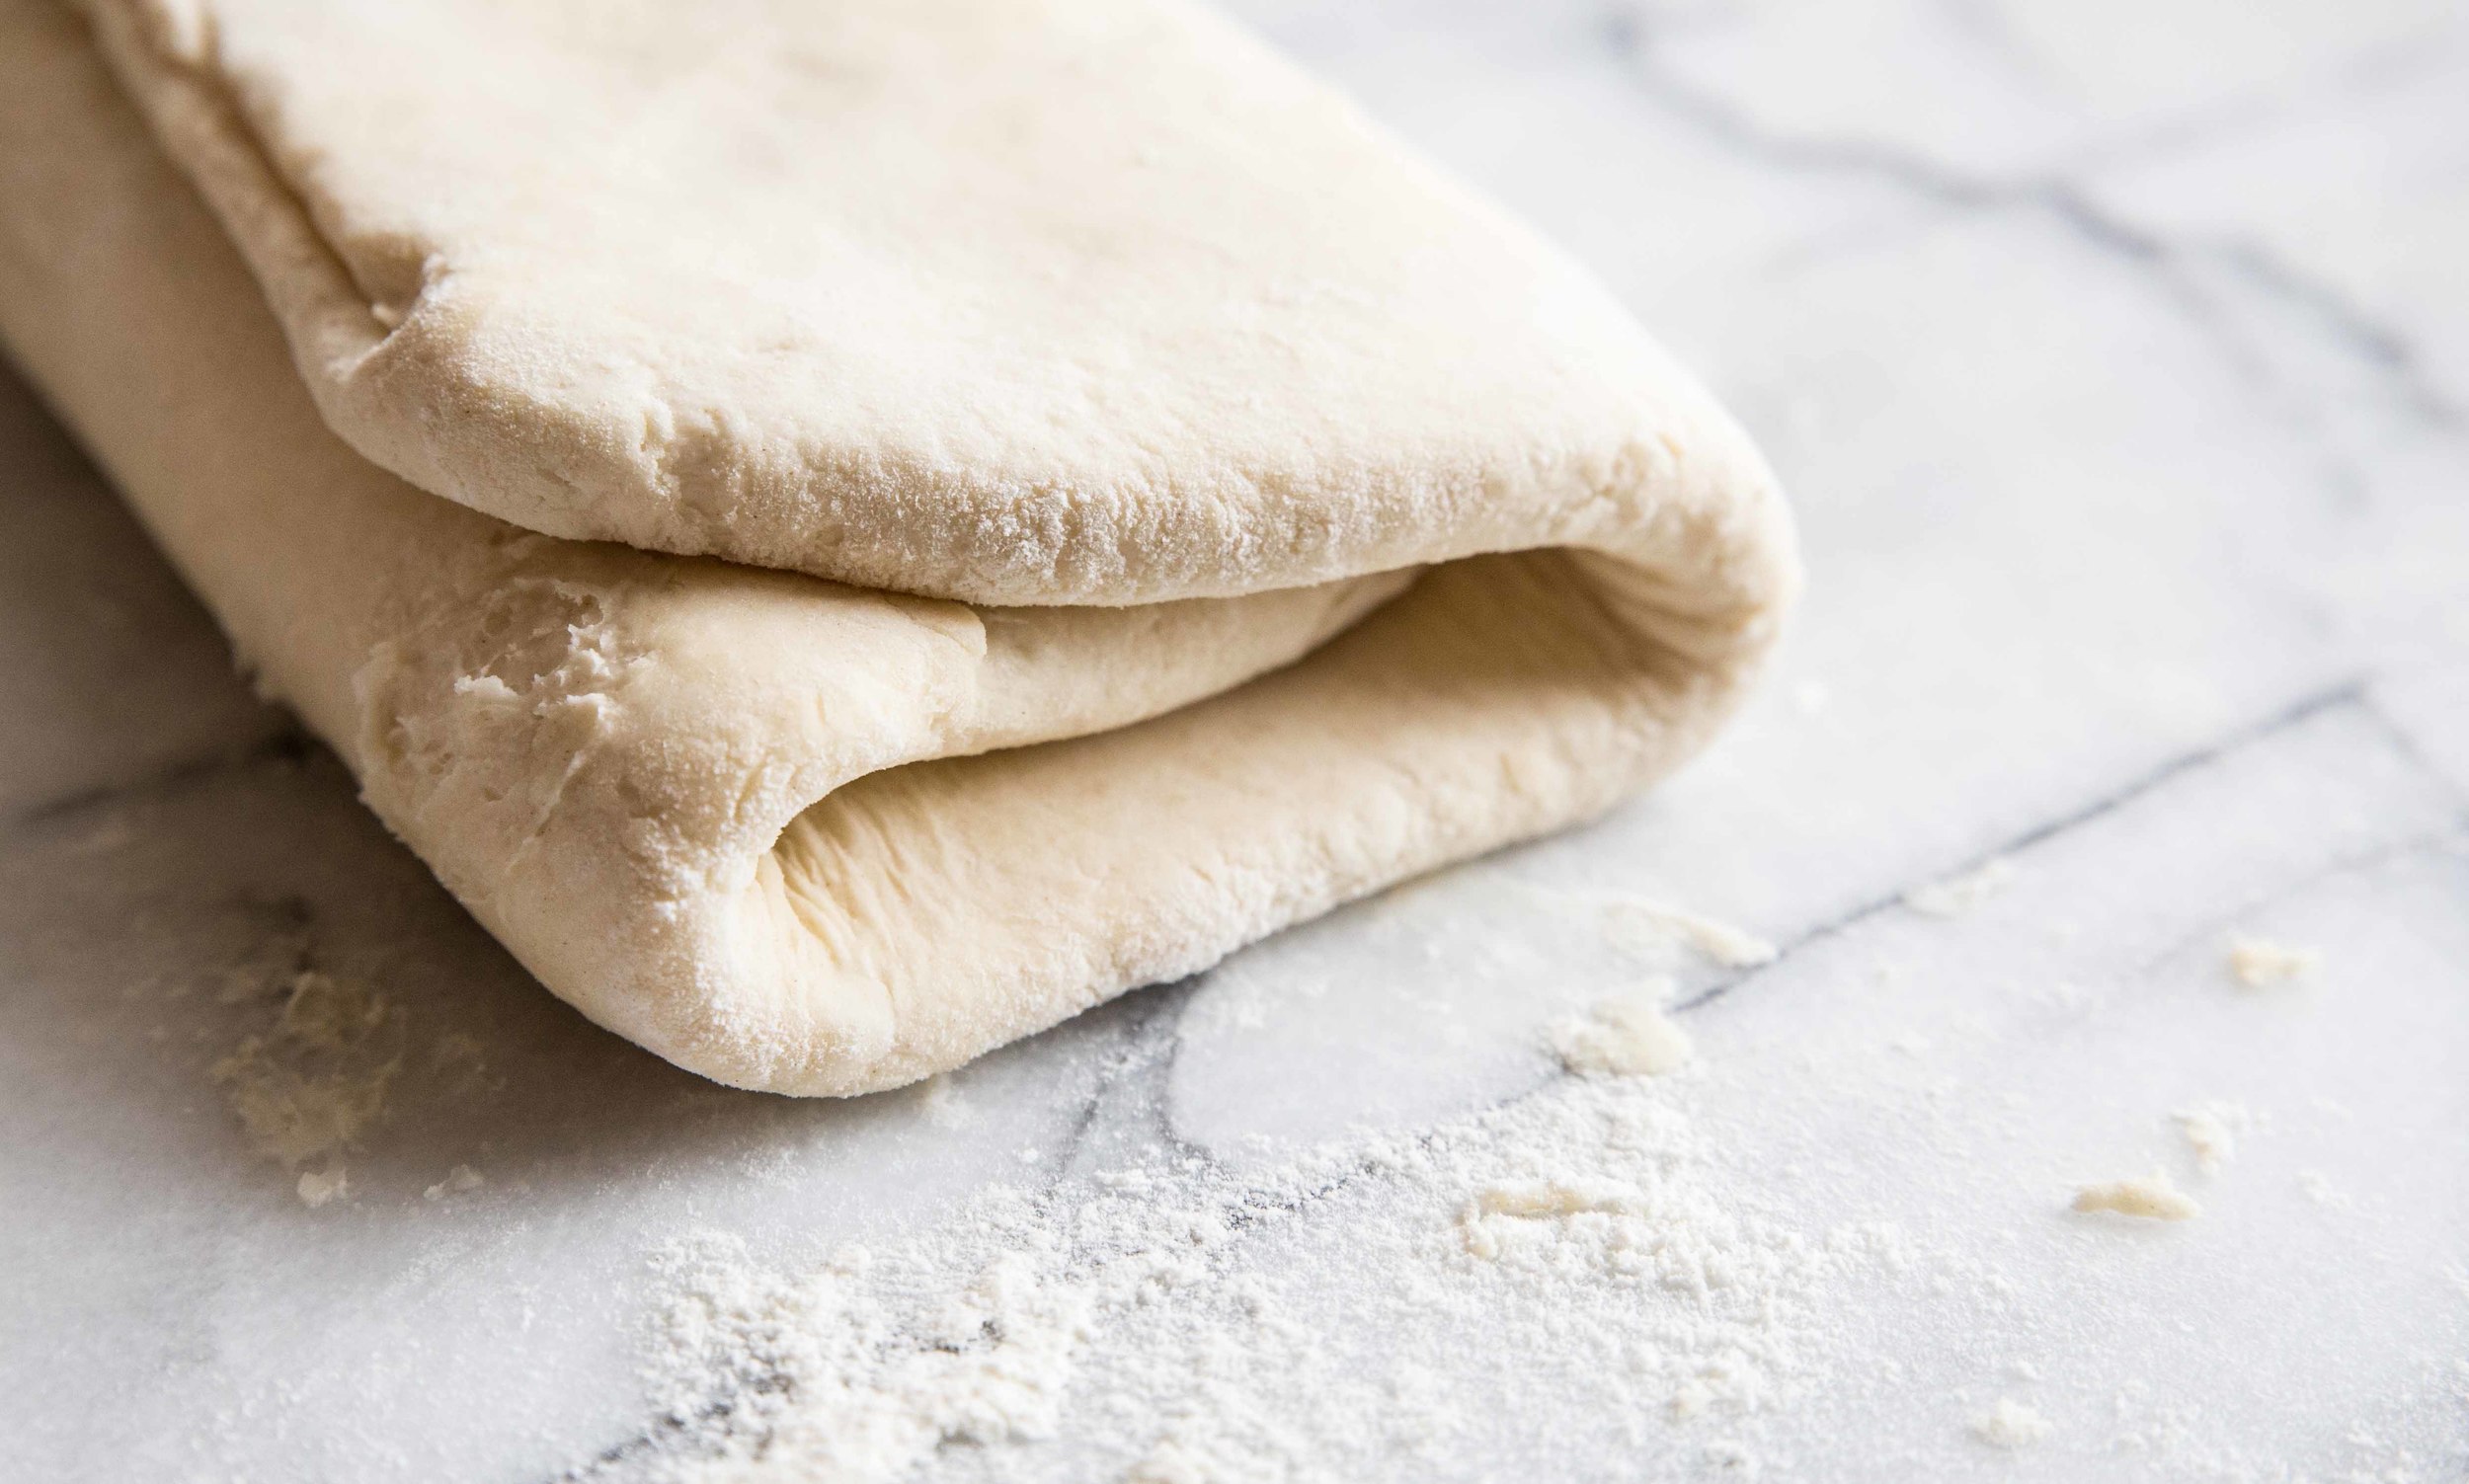
Keep following this pattern until the strands have been braided. Pinch the remaining ends of the strands together and tuck under the loaf.

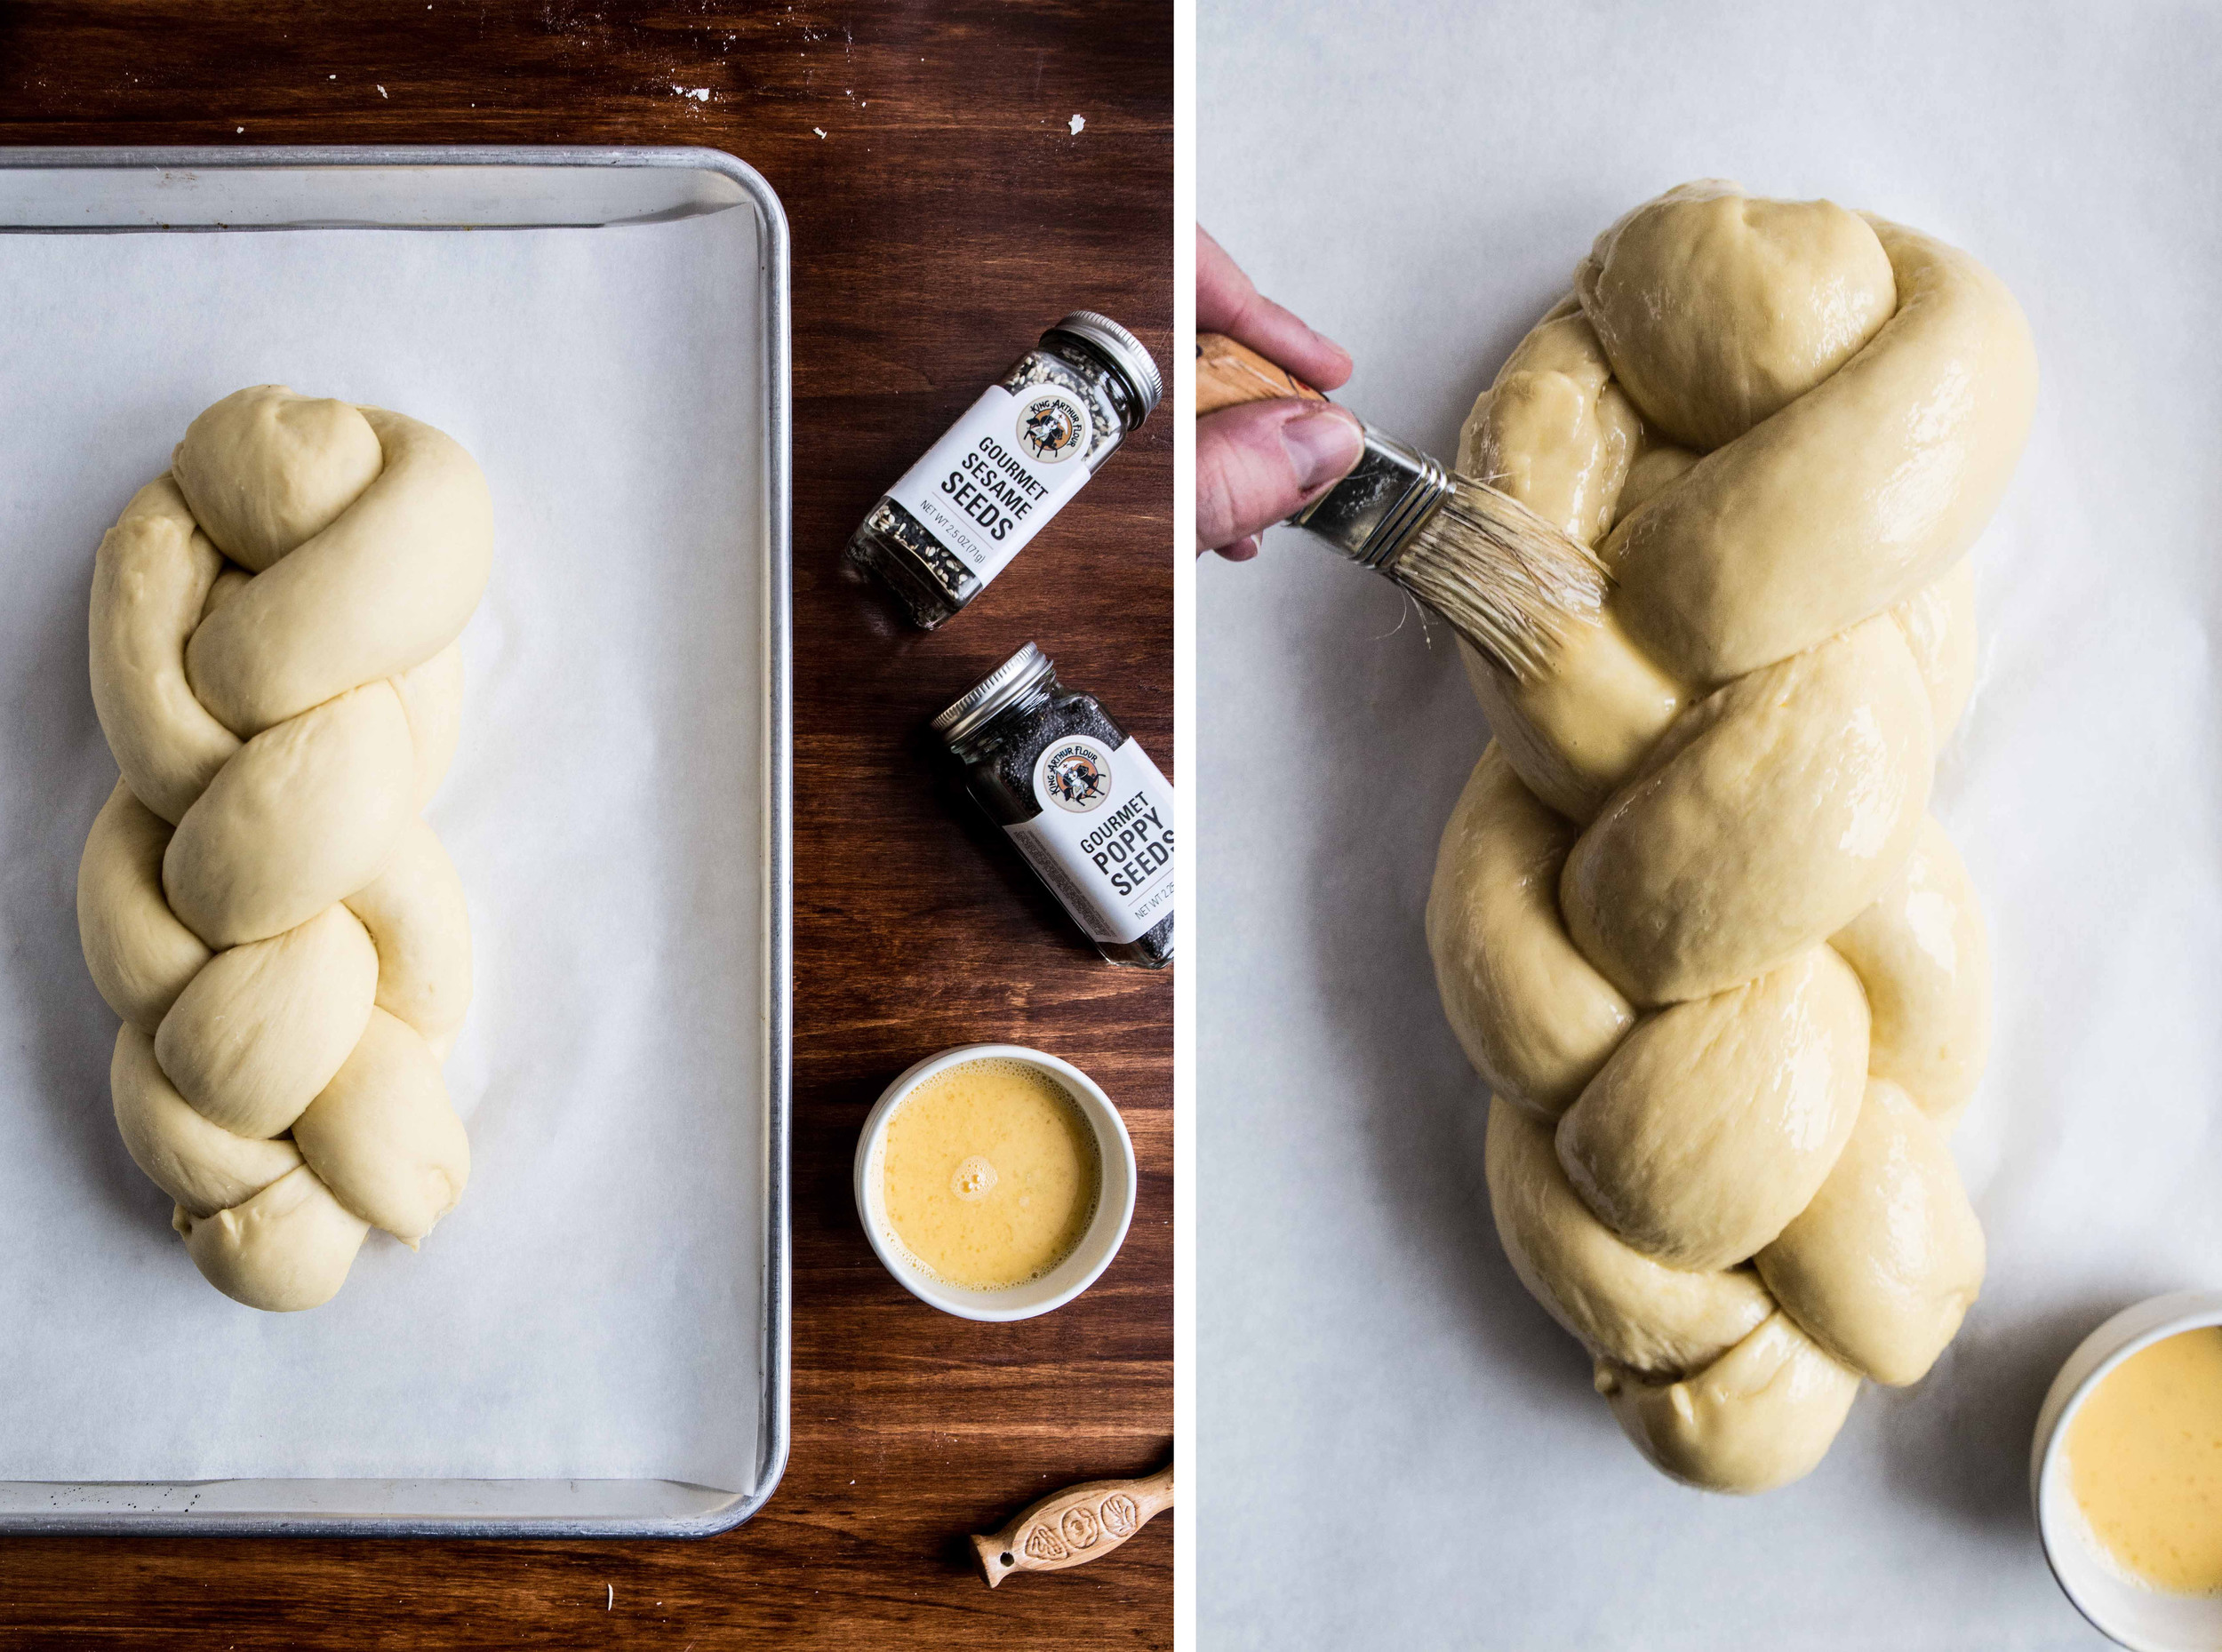
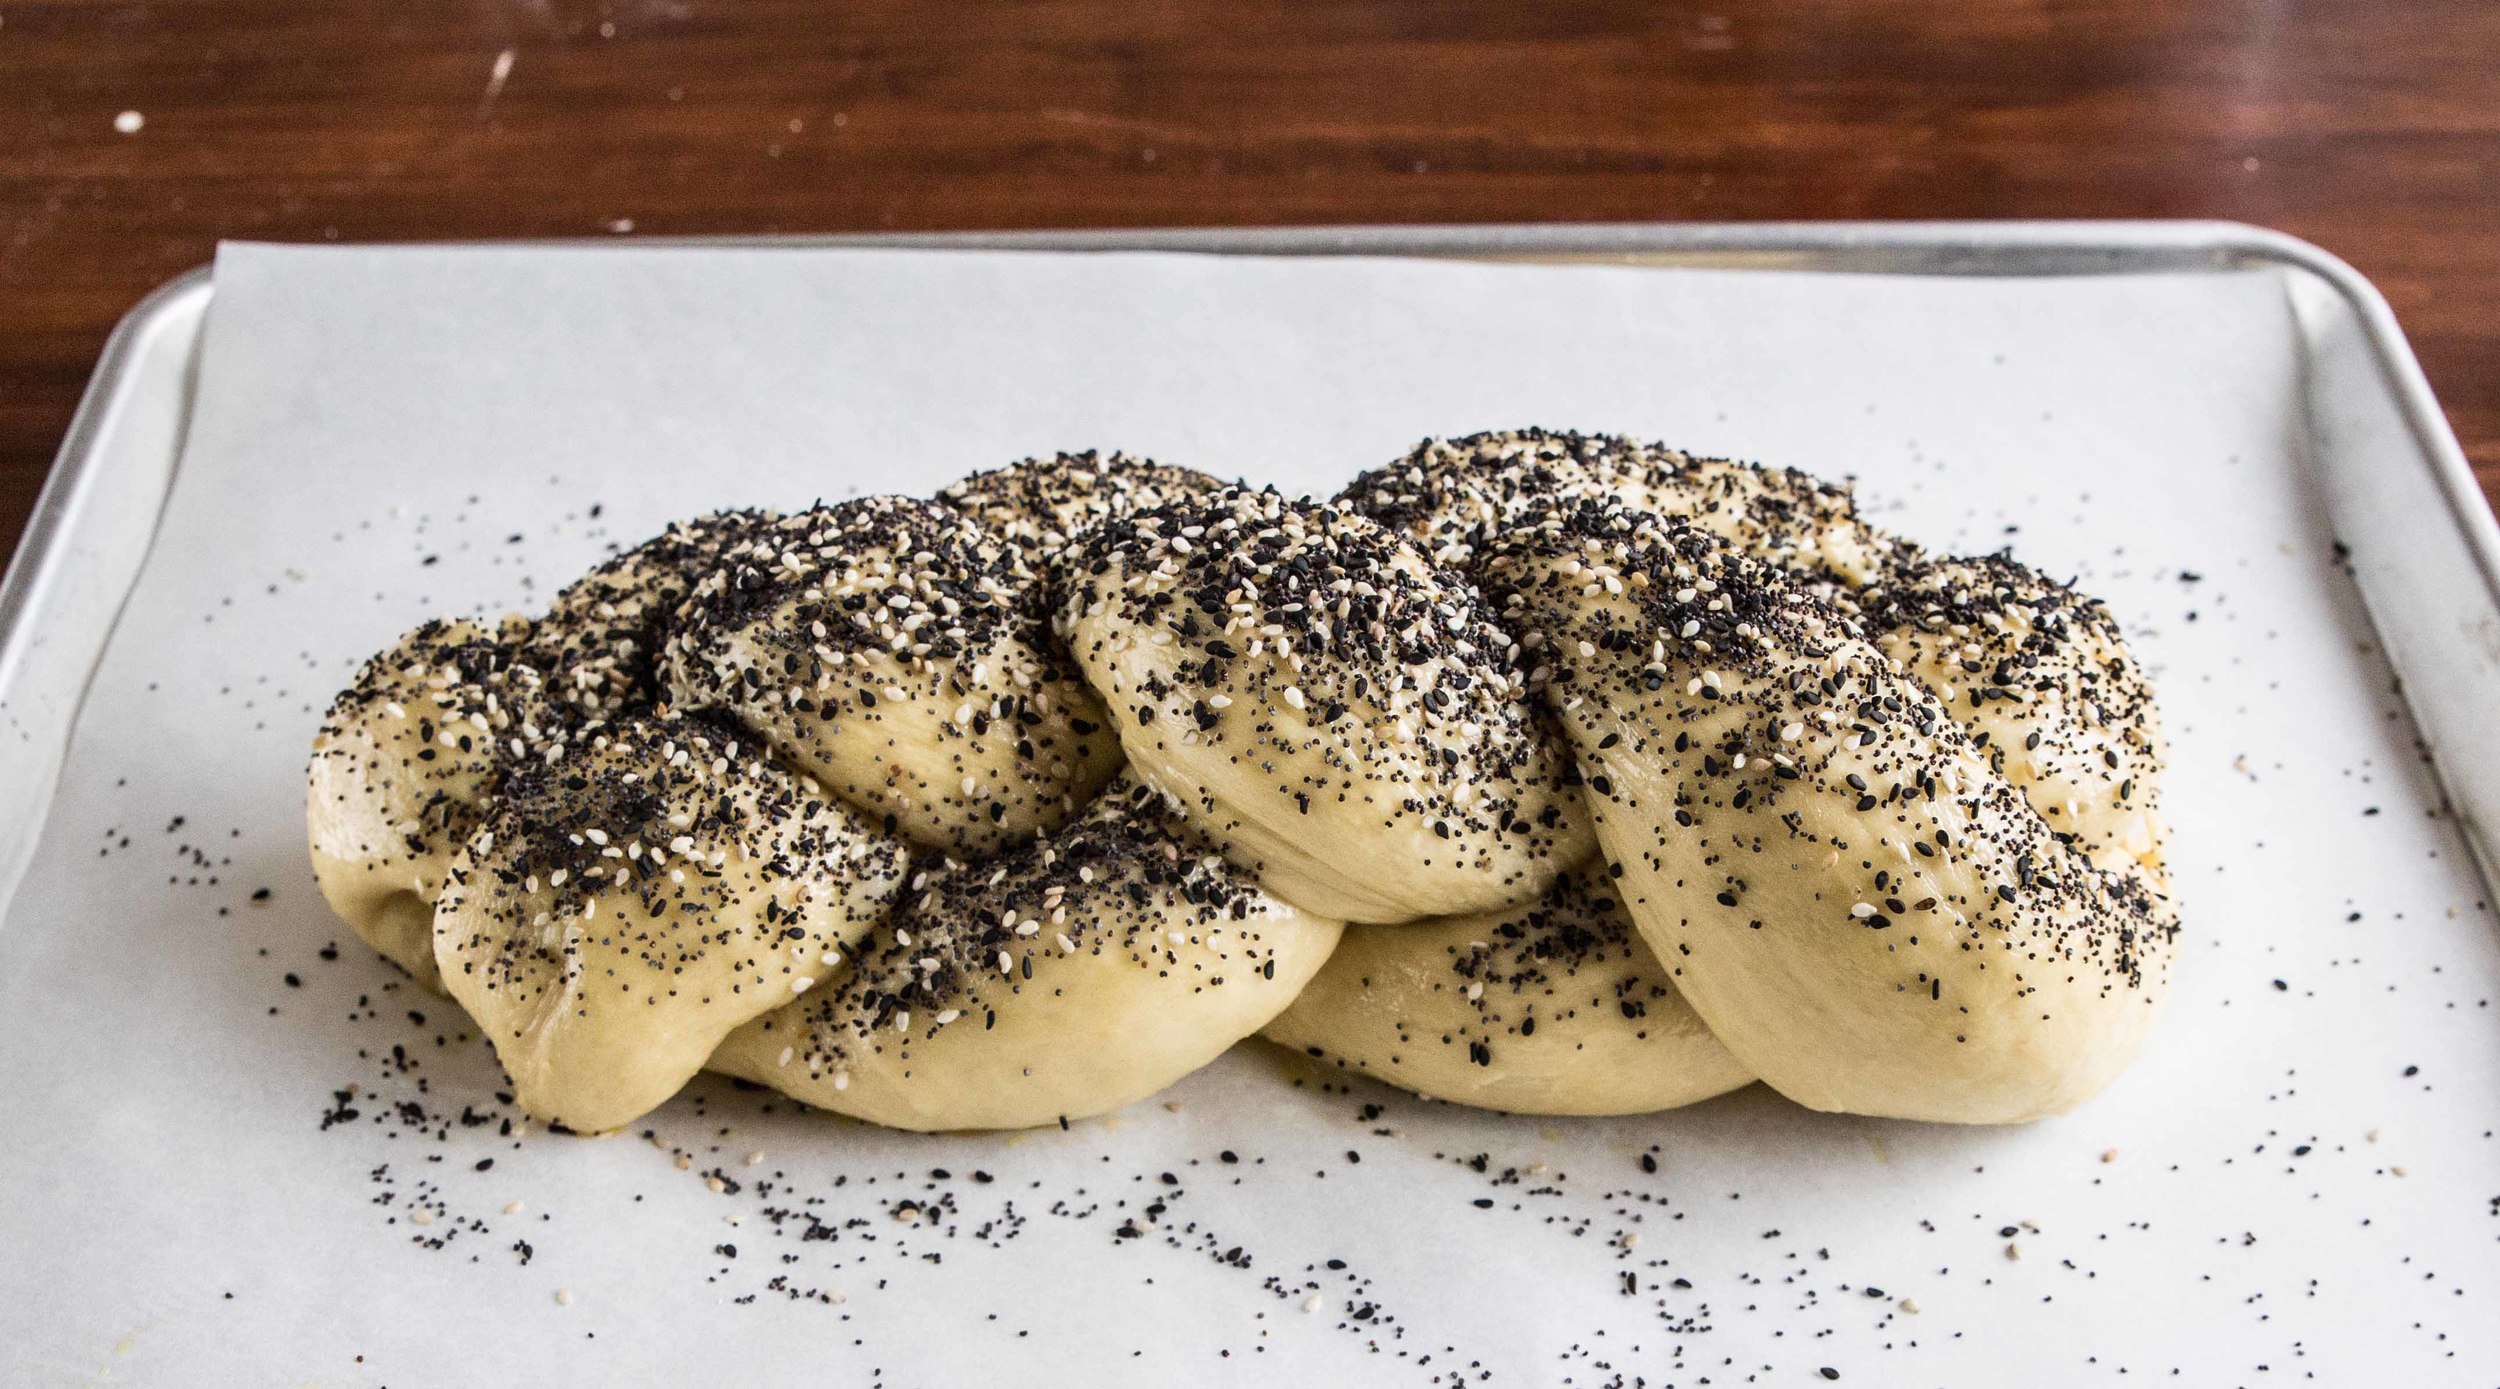
The loaf is brushed with an egg wash, which will give it a deep golden color when baking. Sesame and poppy seeds are sprinkled heavily over the top for flavor and visual interest. The seeds stick well to the egg wash, keeping them firmly attached to the bread (especially while cutting and toasting and eating).

The bread bakes for approximately 35 minutes. When the bread has browned to your liking (around the 20-minute mark), tent aluminum foil over the bread to prevent further browning. This is one of the tricks for getting a perfectly golden loaf each time.

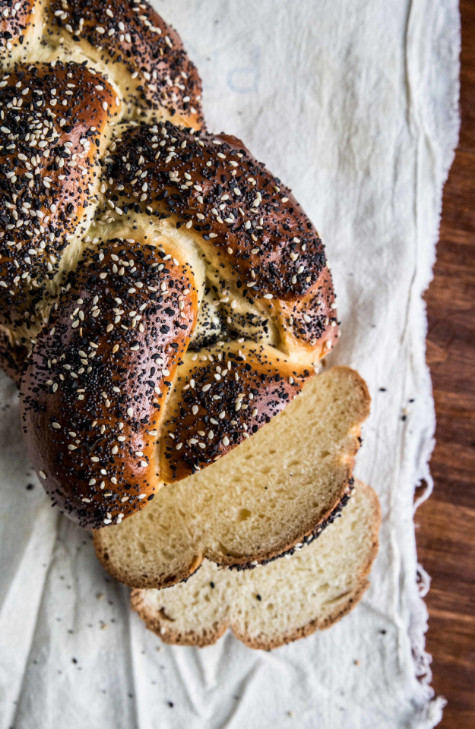
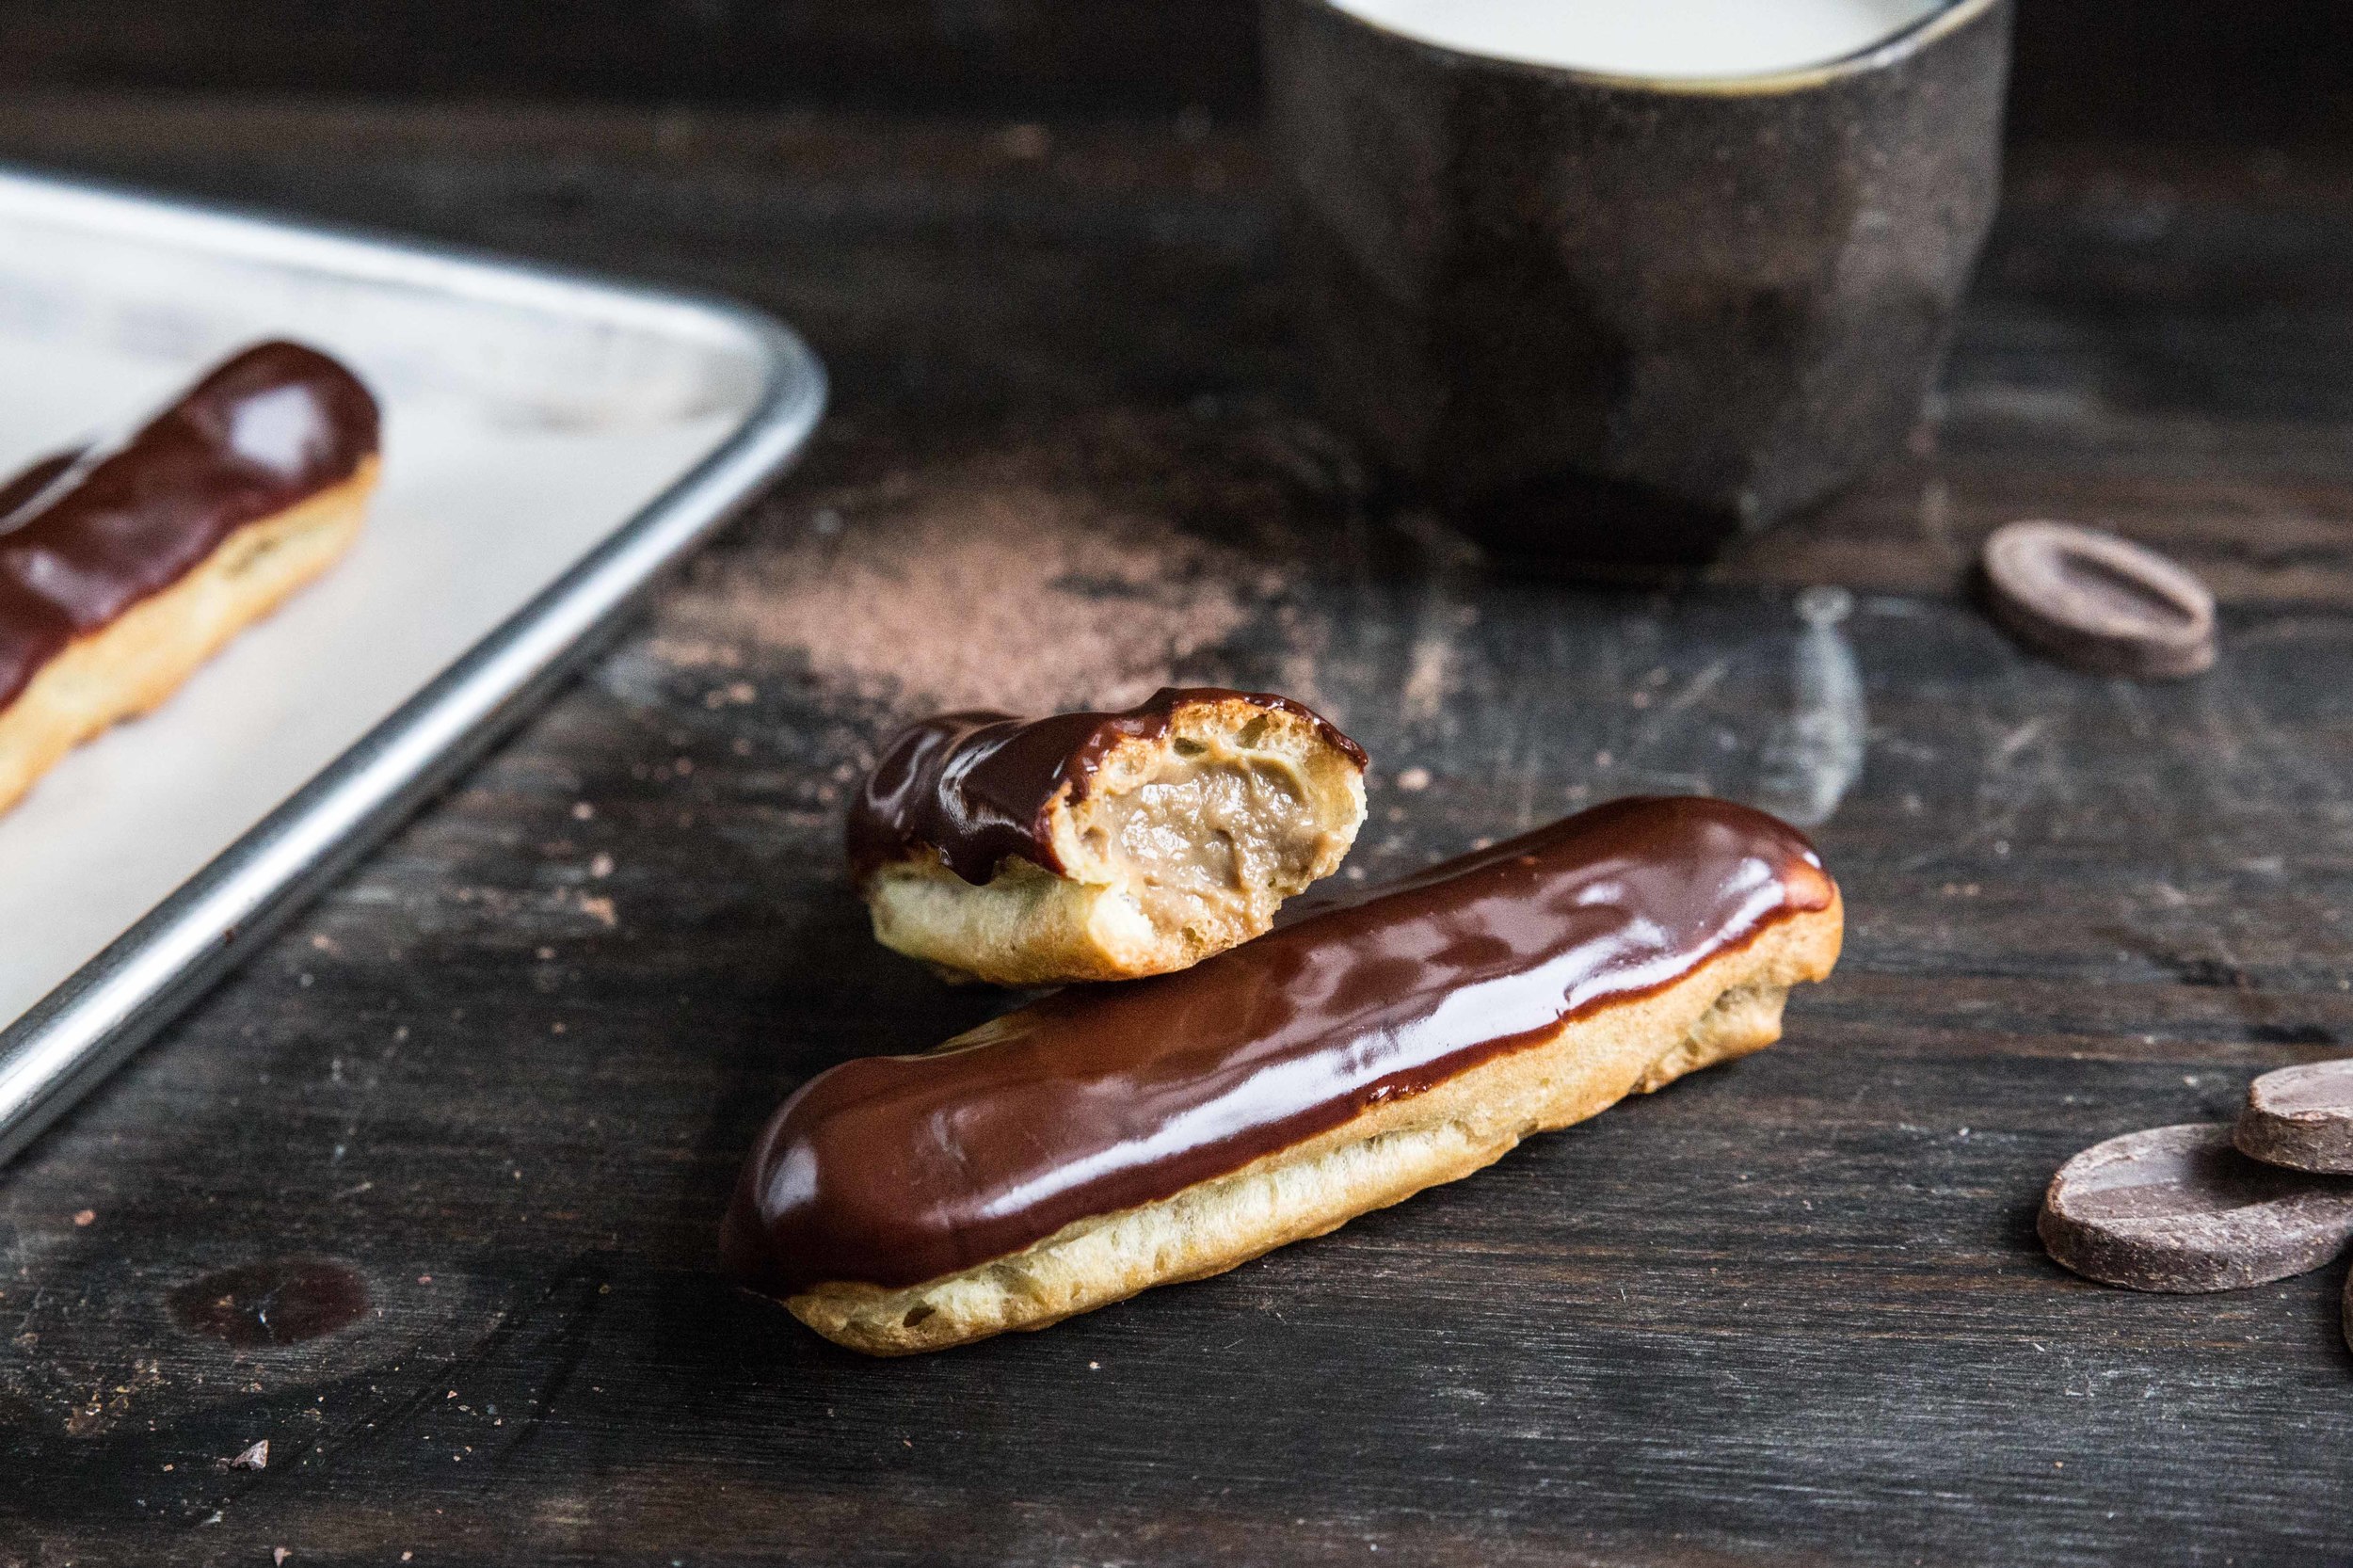
Challah is a classic Jewish bread enriched with eggs, olive oil, and honey. The loaf has a soft, tender interior with a browned crust. Often braided and sprinkled with seeds, it is a bread made to grace the dinner table. Challah is great as a side for soup and gravies, or simply spread with butter and jam. If your challah lasts several days, turn the remaining slices into French toasttrust me, it's divine. 

One Year Ago: Chocolate Orange Cake and Blackberry Coconut Scones
Two Years Ago: Almond Cake and Peanut Butter Chocolate Frosted Cake
Three Years Ago: Lavender Lemon Shortbread, Lemon Pudding Cake, Grapefruit Margarita, Chocolate Oat Muffins, & Chocolate Chip Oatmeal Raisin Cookies
Four Years Ago: Cinnamon Sugar Muffins, Caramel Sauce, Rum Raisin Ice Cream, Butternut Squash & Spinach Tart, Chocolate Toffee Scones, Rosemary Crackers, Grapefruit Cake, and Chocolate Caramel Crispy Bars
Five Years Ago: Chocolate Coffee Cake, Meyer Lemon Curd, Lemon Chocolate Tart, PB Swirled Brownies, Coconut Cream Cupcakes, Yeasted WafflesItalian Popcorn, and PB Chocolate Chip Cookies

Traditional Challah

Yields 1 large loaf

Dough
3/4 cup (177 mL) lukewarm water
2 1/4 teaspoons (7 grams) active dry yeast
1/3 cup (80 mL) olive oil
1/4 cup (85 grams) honey
2 large eggs
1 1/2 teaspoons (9 grams) salt
4 cups (480 grams) King Arthur Unbleached All-Purpose Flour

Topping
1 large egg
1 tablespoon water
Black and White Sesame Seeds, optional
Poppy Seeds, optional

In a large bowl, whisk together the water, yeast, olive oil, honey, eggs, and salt. Gradually add the flour and stir with a bowl scraper until combined.

Turn out onto a lightly floured surface and knead the dough for 5-10 minutes, or until elastic in appearance. Place into a lightly greased bowl, cover with plastic wrap, and allow to rise in a warm place for 1 1/2 to 2 hours, or until doubled in size.

Turn out dough onto a clean surface and divide into 4 even pieces and shape into logs. Using your hands, roll each log into a 16 inch- long rope. To create a 4-strand braid, pinch all four strands together at the top. From left to right, number the location of the strands 1-4. Cross strand 1 over strand 3. Cross strand 2 over strand 3. Cross strand 4 over strand 2. Repeat until you have reached the ends and pinch the loose ends together. Cover loaf with a clean towel and allow to rise an additional 30-45 minutes, or until doubled in size.

Preheat oven to 375 degrees F (190 degrees C).

To create the egg wash, whisk together the large egg and water. Brush over risen loaf. Sprinkle with sesame and poppy seeds until covered.

Bake for 20 minutes. Tent aluminum foil over the loaf to prevent over-browning and continue baking for another 15-20 minutes. The loaf will appear golden brown and should reach an internal temperature of 195 degrees F (90 degrees C) when done.

This post is sponsored through a partnership with King Arthur Flour. All thoughts and opinions are my own.

Quick Puff Pastry

As I was learning to bake, there were a number of pastries that intimidated me. The ingredients were familiar, but the techniques in which they were combined left me with a nervous feeling in the pit of my stomach. I avoided these sweet treats, placing them at the bottom of the baking list for a day when I felt adventurous. Even now, there are a few pastries I still shy away from (I'm looking at you, macarons). 

My first fear was scones. After a few batches, some failed and some successful, the routine grew comfortable, and they have remained trouble-free since. The second fear was pie crust. This one took quite a bit little longer to conquer. It wasn't until I realized my hands were a better mixing tool than any machine that the dough came together beautifully

Puff pastry is another of the pastry basics that intimidated me for many years. It is less of the technique that discourages me, and more of the sheer amount of time it takes to make laminated dough  (which can be days between the folding, rolling, and resting). I am impatient when it comes to pastry. Today, however, my impatience is a virtue because it resulted in this recipe for quick puff pastry. This flaky pastry can be mixed together in less than 30 minutes and has a puff that rivals that of the actual laminated dough.

To begin, all-purpose flour is mixed with salt and baking powder. Pastry purists may tell you that baking powder has no business in puff pastry, where the flaky layers should come from the butter alone. However, since this is a quick puff pastry, I figured anything that can give a little extra height on our pastry is welcome.

Cold, cubed butter is cut into the flour with a French technique known as fraisage. The butter is coated in flour and flattened with the heel of your hand, smearing it against the surface away from you. This process is repeated enough to flatten the butter cubes just once—perhaps a dozen times total. You don't want to overdo this step. The butter should still be quite large in size when finished (about the size of your thumbnail); large butter pieces helps provide those coveted flaky layers. If you overdo this step, the butter may melt and you will lose the flaky layers in the final product.

When you are finished cutting the butter into the flour, it should look similar to the image on the top left. Bring the dough together, form a well in the center, and pour in half of the ice cold water. Using a dough scraper, combine the water and flour. It may be a bit messy at first, but it will come together. Be careful not to over-mix the dough. Repeat with the remaining water. Then, form the dough into a square with floured hands.

The dough is rolled out into a 10 by 12-inch rectangle. If there is extra flour on the top, brush it off. Extra flour can make the flaky layers stick together, preventing them from reaching full height. Next, fold the dough into thirds, like you would do with a letter, continuing to brush off extra flour as you go. Then, flip the dough over and rotate it 90 degrees. The entire rolling and folding process is repeated another 4-5 times. Make sure to fold and rotate the dough in the same direction each time, to ensure a full rotation.

This folding and rolling process is what creates the flakiness of puff pastry. The butter is flattened into very thin layers so when the pastry hits the heat of the oven, the butter will melt, leaving space between the layers and creating the flaky appearance and texture. The dough should be wrapped and chilled for 30 minutes before using so the moisture in the dough can be distributed evenly and the butter can harden firmly.

The dough can be left in the refrigerator up to 3 days or frozen for several months before using. If frozen, thaw the dough in the refrigerator the night before for use the next day.

This recipe for Quick Puff Pastry creates a flaky pastry can be mixed together in less than 30 minutes and has a puff that rivals the standard recipe. Puff pastry is the base for many sweet and savory dishes, including rolls, turnovers, cookies, and elaborate desserts. Keep an eye out for puff pastry recipes over the next few months!

One Year Ago: Rosemary Soda Bread
Two Years Ago: Grapefruit Rum Cocktails
Three Years Ago: Hot Cocoa Popsicles, Chocolate Pudding, Black Tea Honey Cake, & Blueberry Lemon Pancakes
Four Years Ago: Cappuccino Pancakes, Hot Cocoa Cookies, Rosemary Focaccia, and Swedish Visiting Cake
Five Years Ago: Cinnamon Rolls, Mexican Hot Cocoa Mix, and Brown Butter Crispy Rice Bars

Quick Puff Pastry

2 cups (240 grams) all-purpose flour
1/2 teaspoon baking powder
1/4 teaspoon salt
1 1/4 cups (10 oz or 280 grams) cold butter, cubed
2/3 cup (156 mL) cold water

In a large mixing bowl, whisk together the flour, baking powder, and salt. Cut the cold, cubed butter into the flour with your hands. The dough should be crumbled in appearance, with large pieces of butter. Make a well in the dough and add half of the cold water, stirring and folding the dough with a dough scraper until the water is just combined. Repeat with the remaining water.

On a floured surface, pat the dough into a square and roll out into a 10 by 12-inch rectangle. Brush off excess flour and fold into thirds (like a letter). Flip over the dough and rotate it 90 degrees. Repeat the rolling and folding process 4-5 more times.

Wrap the dough in plastic wrap and chill for a minimum of 30 minutes before using.

Coffee Eclairs

Pastries are my first love. When I lived in Montreal, the scents of butter and yeast swirled out onto the sidewalks, luring me into the small pâtisseries. I could rarely resist. Naturally, baking became my second love, which developed from a desire to create that which I first loved.

In partnership with King Arthur Flour, each month I want to challenge you with a new recipe to help you grow and develop as a baker. This month we're taking on coffee éclairsa classic French pastry merged with the American love of caffeine.  Eclairs feature a pastry shell filled with custard and glazed with chocolate. The name éclair comes from the French for "flash of lightning," an apt name because the pastries are often eaten "in a flash."

The pastry shell of an éclair is pâte à choux or choux pastry. Choux pastry forms the base of many popular desserts, including cream puffs, profiteroles, crullers, and gougères. The pastry consists of butter, water, flour, salt, sugar, and eggs, but the technique in which they are combined makes all the difference.

Unlike most pastries, choux is cooked on the stove before it is baked. Choux starts by bringing the butter and water to a boil. The flour is added and stirred until uniform, as shown in the top left photo. It has a resemblance to dry mashed potatoes. The choux is placed back on the stove and stirred constantly for 2-3 minutes. As the pastry loses moisture, it will begin to pull away from the sides of the pan and form a ball. The dough will also form a film on the bottom of the pan, a starchy layer from the flourthis is a good sign. When the dough looks like the image in the top right, it is done.

IMG_1059.jpg

The batter should cool for several minutes before the eggs are mixed in to prevent scrambling them. When the eggs are added one at a time, the dough and egg will look like they will never combine, but after enough mixing, the batter will become smooth. While you can use a mixer to do this step, I prefer to do it by hand. Using the same pot creates fewer dirty dishes and a little elbow grease never hurt anyone.

The batter is the correct consistency when it forms a V-shape on the end of a spatula. It should drip off very slowly. If the batter is not dripping, add water, a tablespoon at a time, until it reaches the right consistency.

Place the choux in a piping bag with a large tip. The éclairs can be piped with a star or round tip (I used a 1 M). I prefer the star tip because the ridges make the éclairs easier to hold when filling and glazing. Eclairs are typically piped so they are 4 inches long and 1 inch wide. In order to make the eclairs uniform, I create a guide by using a ruler to draw 4-inch lines on parchment paper. Keep the lines at least 2 inches apart and make sure to flip the parchment upside down so the ink does not bleed onto the pastry.

When piping, keep the bag at a 45 degree angle to the surface, but do not touch the surface. When you reach the end, stop the pressure and bring the tip back over the pastry, folding the remainder over onto itself (as shown above). Don't worry about having a perfect shape here. The choux loses much of its shape when it puffs in the oven.

You will know the choux has finished baking when it has a uniform dark brown color. This is often a shade darker than you think it should be. If it’s too light in color, the pastry will have a gummy interior, which you definitely do not want. When finished, the oven is turned off, the door is cracked, and the choux is left for another 15 minutes to dry.

Pastry cream is made in a similar method to pudding (in fact, pastry cream is actually just a rich pudding). Sugar plays an interesting role in the creation. Whole milk and half of the sugar are brought to a boil over medium-high heat. The sugar increases the boiling point of the milk which makes it less likely to burn when heating. In a separate bowl, the remaining ingredients are whisked together. The remaining sugar helps prevent the flour from clumping  when mixed with the milk.

Once the milk has boiled, pour a small amount into the egg mixture and whisk to bring up the temperature of the egg mixture. This process tempers the eggs and prevents them from scrambling when added back to the hot milk. The pastry cream should be cooked at a full boil for at least one minute in order to thicken. When it is the consistency of pudding, it should be removed from the heat and run through a fine mesh strainer to remove any lumps. The pastry cream should be refrigerated before using. While this pastry cream is coffee flavored, you can leave out the espresso powder for a vanilla flavor.

The pastry cream can be made several days in advance as long as it is kept airtight in the refrigerator.

The éclairs are coated in a glaze of chocolate ganache. The ganache is made by pouring near boiling cream over chopped chocolate. The mixture is allowed to set for at least 5 minutes before stirring to encourage even melting. Espresso powder is added to enhance the flavor of the chocolate. This recipe makes more than you'll need for the eclairs, but I prefer to have extra when dipping to make the process easier. The leftover ganache can be rolled into truffles, drizzled over baked goods, or eaten by the spoonful.

The chocolate ganache can also be made several days in advance. Warm the chocolate before using.

To assemble the éclairs, use a sharp knife to poke a hole into both ends of the pastry shell. With a pastry bag filled with the chilled pastry cream, pipe the filling into both ends. You'll be tempted to overfill the pastries, but you don't want to do it. When overfilled, the pastry cream will leak out every time the pastry is handled, causing a mess everywhere (I speak from experience). If you hold the pastry up to the light while filling, you can see the cream fill the pastry and it makes it easier to get the right amount.

The tops of the éclairs are then dipped into the melted chocolate. Make sure you use a bowl that's at least 5-6 inches in diameter to make dipping easier. Let the chocolate set before serving; it happens faster in the refrigerator.

These éclairs are a classic French pastry with a coffee twist. The pastry shell is made from choux pastry, which puffs and hollows in the oven. The interior is filled with a rich coffee pastry cream and glazed with dark chocolate. Most of the work for the éclairs can be done several days in advance, making the assembly a quick maneuver. Serve to friends and family and celebrate your own love of pastry.

One Year Ago: Chocolate Raspberry Tarts
Two Years Ago: Chocolate Almond Biscotti
Three Years Ago: Pomegranate White Wine Panna Cotta, Toasted Almond Cookies, and Coconut Raisin Granola
Four Years Ago: Beer Bread, Baked Tortilla Chips, Roasted Pepper Feta Scones, and Chocolate Rum Cake (GF)
Five Years Ago: Banana Bread Oatmeal and Chocolate Blueberry Ice Cream

Coffee Eclairs

Yields 2 dozen

Dough
1/2 cup (113 grams) unsalted butter
1 cup (250 mL) water
1 teaspoon granulated sugar
1/2 teaspoon salt

1 cup (120 grams) King Arthur Unbleached All-Purpose Flour
4 large eggs

Filling
1/2 cup (100 grams) granulated sugar, divided
1/4 cup (40 grams)
King Arthur Unbleached All-Purpose Flour
1 tablespoon espresso powder
2 large eggs
2 large egg yolks
1 teaspoon vanilla extract
1/2 teaspoon salt
1 3/4 cups (415 mL) whole milk

Glaze
8 ounces (225 grams) Valrhona dark chocolate or semi-sweet chocolate, coarsely chopped
1 cup (250 mL) heavy cream
1 teaspoon
espresso powder

Preheat oven to 425 degrees F (220 degrees C).

For the dough, combine the butter, water, sugar, and salt in a large saucepan. Bring to a boil over medium-high heat. Remove pan from heat, add the flour, and stir until uniform. Return to heat and continue stirring. In 2-3 minutes, when the dough visibly pulls away from the sides of the pan, forms into a ball, and forms a film on the bottom of the pan, remove from heat. Let dough cool in pan for 4-5 minutes.

Add the eggs one at a time, using a spatula to beat them in, making sure the first egg is completely incorporated before continuing. Once all the eggs have been incorporated and the mixture is smooth, put the dough into a piping bag fitted with a large star or round tip. Pipe the dough into 4-inch long, 1-inch wide tubular shapes on parchment-lined sheet pans. Bake for 25 minutes, or until uniformly brown in color. Turn oven off and crack open the door, drying out the shells for an additional 15 minutes.

For the filling, whisk together 1/4 cup sugar, flour, espresso powder, eggs, egg yolks, vanilla extract, and salt. Set aside.

Place the milk and remaining 1/4 cup sugar in a medium saucepan and bring to a boil. Immediately remove from heat. Temper the egg mixture with the milk and return back to the saucepan. Bring back to a boil, whisking constantly, until mixture thickens into a pudding consistency. Remove from heat and refrigerate until needed.

For the glaze, bring the heavy cream to a boil in a small saucepan. Immediately remove from heat and pour over chopped chocolate, allowing the chocolate to melt for 5 minutes before stirring until smooth and uniform. Stir in espresso powder. Set aside.

To assemble, place pastry cream in a pastry bag with a small round tip. Using a sharp knife, puncture a small hole at both ends of the eclairs. Pipe pastry cream into both ends; take care not to overfill. Dip tops of éclairs in chocolate glaze and allow to set until chocolate firms. Keep refrigerated.

This post is sponsored through a partnership with King Arthur Flour. All thoughts and opinions are my own.